|
|
Post by roger on Mar 6, 2019 2:03:03 GMT -5
PAGE 15 A place to look in "Breakers Yards" are 2000's Subaru's with the LL Bean or the XT Turbo cars. My 2006 Outback XT turbo has a Momo wheel from the factory. It has a nice feel.   The Steering wheel I need has to have the universal 6 point mount. Fords steering shaft is not splined, but a tapered 6 sided rod. I am probably going to check with some of the speed supply houses. Regardless of all the junk on eBay, they do have a good selection of stuff. If it is counterfeit then that tells me the real deal is out there somewhere. It isn’t a priority right now, the current wheel works and actually looks good. All the “carbon fiber” is plastic, no surprise there, but when I replace the wheel it will be out of necessity not necessarily out of esthetics. I do have a nice JDM I bought for the Eco-Exo. It turned out to be to big and I kept it just in case. I have not tried it with the TR1ke yet. I didn’t have the seat mounted, nor did a I figure the height of it. I bought the Faux Momo to enable me to move the trike around while under construction and decided to keep it in place. The JDM is the real deal, but about an inch larger in diameter. I may need the extra inch for those supersonic speed trials...:- ) Roger Worcester, Massachusetts I received a phone call from Edward Van Belkom (Eco-Exo-R builder/owner). He was curious about the progress on my TR1ke. The truth is, I have not been doing anything. Posting seems a bit redundant if there is nothing new. I have crawled all over it looking for things I may have over looked. A front end alignment, securing the ECM, and bolting down the passenger seat is about all I need to do. I keep the bonnet off the chassis until I can be assured I will not need to take it off again to work on something, or charge the battery. So, until the weather gets above sub-freezing my efforts on the TR1ke are back-burnered. In the mean time, I did some long overdue home improvements. The previous owner of my house was not .... let’s just say..”handy” with home improvement skills. Not that I am a ball of fire, but I know the basic creed all carpenters worldwide subscribe to.. that is, “ Sheetrock covers up a multitude of sins”. Well, I know I have committed my share, but when the Sheetrock job is botched then almost all chance of what’s beneath is not going to be pretty, let’s just cut through the fluff, It was borderline illegal, fully sinful and barely salvageable. The bedroom in question has now an improved and updated refresh up job. I re-taped the wallboard seams.. it didn’t surprise me that the previous owner did not think the tape was all that important, so he didn’t use any. It was the single biggest POS job I needed to get through. It is now painted, the particle board underpayment was removed and replaced with construction grade plywood, new hardwood floors and then wiring replaced to the lights and also all outlets were either replaced or rewired. Finishing the TR1ke will be easy compared to what I had to do on this home improvement project. I know this is not strictly about my build, but more of an explanation of why it it was put off by an overwhelming project from Hell. Roger Worcester, Massachusetts In our house the heater ducts had gaps you could fit 4 fingers in, in almost all joints. My crawl space under the house was warm. Then some of the exterior walls had R13 in some places where R19 was required by code but a few spaces had nothing. Many 110 volt outlets had loose screws holding the wires. There were 5 GFI outlets with 3 of them on the same feed from the breaker box, replaced them all with 2 GFI breakers. The old 6 circuit Generator switch box was on only 1/2 of the breaker box and had one main disconnect so that one of the 110 volts feed could back feed to the outside, I replaced that with another 10 circuit and everything is now 100% disconnected from the main feed. Being an electrician I could not understand all the short cuts the last time someone did work. It only takes a few seconds to do it right. Spring is coming, you'll get a break soon.  The house projects are all done. I am hooking up a vintage (70’s) stereo system and that will be the sum and total of my renovation efforts. I will be shoveling out the winter clutter from the garage and putting the trike out where I can get to both sides then setting up the alignment. According the dealer, the trike doesn’t require a toe in, straight ahead with a slight bit of camber. My first attempt will be with about 1/8” toe in at 36” with a slight bubble offset with the camber. It will be a starting reference point only, not sure if it will stay there. It has been unbearably cold here, not weather to work out in an unheated garage. As I have said before, the project is nearly completed and I have a few more items to take care of as far as securing cables, wires and hoses. I have held off in completing the finishing touches pending some test rides and performance tweaking. I don’t want that to interfere with the overall completion of this build. We are expecting some warm weather In the next few days, so it will be a good time to get some things done. Roger Worcester, Massachusetts I do not believe that they recommend 0 degrees toe and slight bit of camber. I would think it would wander all over at 0 degrees and little camber. I like a bit of Neg camber to plant the tire in the corner. But what do they recommend for Caster? To little and it will want to drift and too much and the steering gets heavy. But hey, what do I know, these guys RACE these so..... WOW, a 2.0 Stereo from the 70's. I have 2 ea 7.2 Surround systems for the TV's but in my Den I have a Kenwood Model 11 and 2 Sansui XP2500 speakers that I bought in Heidelberg, Germany in 1976. AKEI GX-747 Reel-To_Reel and Cassette player too. The sound is still better than most of the newer 5.1 systems, just not as much sub's base. Snow over here has been light so far this winter. Temps in the 30's but no snow till Christmas day and we got 10 inches over night, was gone in two days. And yesterday we got another 3 inches. Just cold and wet most days. Castor is preset from the factory, the camber will be a slight negative setting and I plan to start with 1/8” toe in each side. I agree with you about the “0” toe in setting. The setting that works for my Eco-Exo is the same as my starting point on the TR1ke, but naturally the scooter tires on the Eco-Exo are a lot different. They are much more forgiving when it comes to the alignment since the road contact is much narrower. They ride on the centerline of the tire like they did when they were mounted on the scooter. You are right about racing the trike. It has all the goods to do just that. That motor is a real animal and can handle a lot revs. In My case, the 180 horses make it very formative in a race. I have heard of cases where the lubrication system really wasn’t designed to handle tight high rev cornering. Most motorcycle engines (probably all) require the bike to lean into a corner to keep the oil within reach of the oil pump pick up tube. Since I am not going to track my trike, I will keep the warp drive engine down to sub-light speed Scotty. Well, got to get some stuff done around here. Roger Worcester, Massachusetts Over the past few days I have gone through my paperwork to see if I was missing any documents. As a result of this, I removed my 4 point restraint system, the seller WOULD NOT provide the invoice as promised. No invoice means I cannot go through the Massachusetts DOT inspection with that price of equipment. As it is, I had the inertia system and invoice, so installed that as a replacement. It actually looks good and not as cluttered looking as the 4 point harness. The other item I had to fabricate, that was a new license plate holder with lamp. Amazon would not provide the sellers address for my license plate bracket so off it came. I have invoices for sheet aluminum and for the lamp, so I am covered there. I have the seats all installed, the inertia locks on the new restraint system were tested, so am good there. I will be trimming the steering column plastics tomorrow so the bonnet will slide on without interference. My next to the last thing is to mock up a bracket support for the ECM, then do the alignment. The small stuff like securing the odd cable or tying down this and that all are on my punch list. It is a short list and may get longer as I continue my efforts heading for the inspection date. I took the opportunity today to clean up the floor pans, vacuum the area beneath the seats and in general get it clean. I need to apply a little adhesive remover. There are areas the have tape residue from either me masking areas off to avoid scratches, or from the shippers masking the trike for transport. Tomorrow I will be installing the bonnet. I won’t bolt it in place just yet but I simply want to insure it’s safety. Right now It’s looking good. Let’s see if the inspectors are of the same opinion. Not schduled for the inspection yet, but looking to do it in March. Roger Worcester, Massachusetts Back in my early telephone days there were no nylon wire ties. I had a reel of waxed string and a set of curved needles and a hook. I can lace up a wiring loom right pretty. I have a nasty scar on my right wrist from when I stuck my arm into a bundle of wires and someone had not clipped a wire tie off flush and the 1/4 inch sharp end dug in to my wrist. I was stuck for a while but had to just yank my arm thru and it ripped a two inch gash. I was paid extra to do a "Water Fall" and lace job for Starbucks coffie's corporate offices Data racks. It looked something like this video but no wire ties, all waxed lacing twine. The crew was paid $9 per hour to pull all the 1000's of Cat 5 cables into a small room and then for 4-5 days of 14 hour shifts I would comb and lace the cables down and terminate them on the data racks and got paid $13 and hour. If during an inspection one cable was out of place I had to undo it all and re-lace it on my dime. When I did the lace up, I did a dual color. Black for the primary bundle and white for sub-circuits that are attached to the primary. After I KNOW for sure the wiring is all going to last, I will lace it closed using vinyl and the white waxed lacing string. When I did the Exo, I tore into the bundle a couple of times chasing circuits and I had to open and close the bundle more than I felt comfortable doing. In the end, I rewired the entire trike after I installed the 2008 speedometer. Not a big problem, but when it was done, it has never failed. I have all of the installation(s) done, just doing the tidying up and making pretty. I need to get out the vacuum cleaner and crevasse tool and get the small pieces of aluminum and metal from drilling. I thought I had it all but when I looked harder, there was more. After I do that, I will blow it down with an air nozzle and see what comes out of the corners. I found some more tape residue to remove. Have paint thinner and windex glass cleaner for that. I am getting a U-Haul trailer when I take it in for inspection. The TR1ke wheelbase is just under 70”. The width of the trailer is 72”. I figure to back the trike in and leave the nose sticking out if the measurements are not exact in U-Hauls information brochure. Since the quarters will be somewhat cramped on the trailer, the canards and rear spoiler will be removed. They are not necessary for the inspection, plus the trike will be in backward, the spoiler may catch the wind and do some damage to it. So why risk it. Anyway, pictures will be coming in a few days. Catch you all later. Roger Worcester, Massachusetts When I read you had used waxed wiring string yesterday I had to look it up because it meant nothing. Today I was looking at a machine we had just pulled out of storage and there was the same used on it! Never seen it or even heard of it before yesterday and today it was in front of me - spooky  Okay, fast update: Have you ever noticed when you say “you’re done” and the Mrs comes out to see that nice shiny wax job you put on your “finalized” project. Then you pat yourself on the back, smile smugly and wallow in your true loves admiration... we’ve all had those moments. We’ve all felt the pride of completion. BUT!!! Every time you “SAY” your done, something ALWAYS happens to upset the apple cart. Well, I had one of those days. I was all finished... done, wax job and all. Everything present and accounted for. All bolts and nuts secured... all wiring and electrical devices functioning as designed. I slipped the key into the ignition, used the electric reverse to back out of my driveway. I got to the end of the driveway, cranked the engine, it didn’t start. I tried and tried and tried. Still no run. After checking the Error status on the clocks I found... there was none. I said something considerably worse than my minister is comfortable hearing. I pushed the trike back into the garage. I used some starting ether and it cranked right up but idled for about 5 seconds then died. The fuel pump was running, it was starving for fuel. I removed the pump from the fuel tank, and found the connection between the pump and the discharge nozzle lost it’s “0” ring retainer. The “0” ring and retainer were pushed aside and was actually sideways in the port. I corrected this problem and reinstalled the pump and fuel tank. I started the engine, it ran quite smooth and revvvvvved up nicely. It is ready for the maiden drive. As a precaution and to ward off evil JuJu... I am abstaining from gloating, feeling pompous, or seeking accolades from the Mrs. I am going to get in, strap myself into seat, start it up and go for a ride down the street and hopefully return. I will post the results of my ride. I suspect some small adjustments may be necessary. Clutch may be to tight, brakes might need to be adjusted, or it might be okay, but to be honest, I expect something to need a tweak. We’ll see how it goes.. Roger Worcester, Massachusetts I am going to get in, strap myself into seat, start it up and go for a ride down the street and hopefully return. I will post the results of my ride. And ten hours later still no results posted.........should we be worried  Okay.. the results are in. I took it down the street several times. Reverse wiring needs a tweak but not necessary at this time. In a word (or two). Holy ————! You fill in the 4 letter word of your choice. The engine has no problem whatsoever getting this thing down the road very fast in a short distance. It handles very nice, brakes need to be used a bit more to seat in, no clutch slippage, but rear tire spinage... The battery is the AGM type and has been used quite a bit for the initial test functions, and charged and recharged and again. It was a cheap off brand and needs replacing. Bottom line: It goes like hell....:-) |
|
|
|
Post by roger on Mar 6, 2019 2:18:43 GMT -5
PAGE 16 I did a little tweaking on the reverse. I decided the battery was probably undersized. I removed the AAA battery and installed a D cell comparatively speaking. It is a GL1500 Goldwing battery. We shall see how that does the job. I also rebled the front brakes and have solid pedal. Oh, yes.. fabricated a nice stainless steel battery box to hold the monster battery. This should remedy the issue of the undersized battery. Roger I did a little bit more tweaking today. You know the old saying, “Everything affects everything else”. It’s true. You do something over there, and it affects something right here, so it went for me today. It started off by installing some “Adel” clamps on my wiring legs, then that grew to securing wires beneath the dash, then I noticed my clutch pivot pin was a nut and bolt. I took the bolt out and found the appropriate size round stock and made a pivot pin with carter pin retainers. The accelerator pedal was also a bolt, I removed that one as well and made a pivot pin. As I was working on the gas pedal, I noticed I didn’t install a pedal rest to restrict deceleration pedal movement, so I needed to make the stop and install it. Oh, as I was looking at the clutch pedal I didn’t install a return spring, so did that. Well, you can see it was a fun day here in the garage.i kept the Hoover nearby and vacuumed the drill tailings as I went. I would say yesterday’s test run up and down the street was a success. Not only did I get to have some real fun, I cleared up a few gigs in the process. What I found, I corrected. Nothing terribly disturbing, but as long as I had the bonnet off the chassis, why not just do what needed to be done. Tomorrow I will reinstall the passenger side seat and install the bonnet and adjust the mirrors. It was a great day. At 69 years old, I am as grateful as I can be that I am able to do this sort of work. There are way to many Porch sitters, and easy chair riders my age, it’s not for me just yet, and when that time comes, someone read that “Meet your Maker with a smokin engine and bald tires epitaph”. In my case it will apply. Cheers everyone Roger Worcester, Massachusetts It was a great day. At 69 years old, I am as grateful as I can be that I am able to do this sort of work. There are way to many Porch sitters, and easy chair riders my age, it’s not for me just yet, and when that time comes, someone read that “Meet your Maker with a smokin engine and bald tires epitaph”. In my case it will apply. Well said Roger! Reminiscent of @kiwicanfly 's footer if I'm not mistaken. Kindred spirits somewhere along the way  . Martin After I’ve had my breakfast and drink another cup of coffee I will give the trike a once over, take a few pictures of the wiring. The inspection process requires photos of the build process. The inspector asked me for pictures of the area beneath the bonnet when I built the Eco-Exo. Lucky for me I had them. If the weather holds out I will do another test run or two. My street isn’t long enough to go through all of the gears so might go out of the neighborhood and on a back road to at least give it a reasonable test drive. I am having an issue with the electric reverse. I have a 340 CCA battery installed. However when I use reverse it hits the battery (or control circuit) so hard that it kills the engine. The battery cable lead to the reverse motor is larger than needed and the lugs are soldered on. When I press the button to activate the circuit with the rear wheel off the ground, it is just fine, when I place the wheel on the ground and do the same, the engine instantly dies. I suspect it isn’t the main power cable, but the control circuit that is responsible. Today I will do a test to see if I am correct. I am going to wire a battery straight to the starter solenoid with a heavy duty switch in the drivers seat area. This will bypass the safeties I have in place and apply battery power not only to the starter but to the control circuit as well. If it works then I will wire it in permanently. If not, I’ll need to examine the power lead to the starter and do an amp load test on it. I also will probably need to buy an Odyssey battery with about 600 CCA. Reverse isn’t required for the inspection, but if installed, it must be operational. Well, here starts another day in the garage, I will post what I find. Roger Worcester, Massachusetts It sounds like your reverse motor is drawing more than that 300 CCA battery has and even more than the engines Stator can provide in combination WITH the battery. That is a huge Amp draw and does not seem normal to me. A bigger battery may help but I think there is an overload problem there and will still be there to raise its ugly head later when you lease expect it.... How much gear reduction is on that reverse drive? May need more. I am not sure what the gearing is. The starter motor used for reverse has a built in reducttion gear, then what ever the gear ratio is for the chain drive on the trike. I am thinking it is drawing dangerously high amps. Not because of a high gear ratio but from a fault inside the motor. I can do without the reverse until I get it through the inspection process. After that I will simply drive it and address the problem later. I verified the problem was not in the control circuit, so that side will stay as is. The electrical cable is heavier than needed, and it is connected directly from the battery to the reverse motor, no breaks or splices. Before I go out and buy a $250.00 battery, I will use the one from my car . I will see what happens if I increase the CCA to 650 amps. I just don’t want to burn out the stator, although it is easy to replace, it is just a PITA on top of the initial problem. I cleaned my workspace, put my tools away and swept the garage floor. I also used some Honda spray cleaner and polish and got the fingerprints and smudge marks off the GRP. I installed the reflectors, red rear amber front. The bonnet is secured, the passenger seat (drivers seat as well) are all bolted in place and secure, the Hooter hoots, the Lights shine and the winkers wink, and so goes all other systems. The engine doesn’t leak anything. I think I am in good shape, but one never knows what evil lurks in the hearts of the inspectors, and I ain’t “The Shadow”. LOL. Roger Worcester, Massachusetts Yeah the cable connection would not draw enough Amps to kill the bike if it was too small or bad crimp connectors, it just would not crank well. So yes I think the motor may be the problem. I just had two Chrysler 5.2 V8 starters rebuilt and it cost me $38 plus tax, for BOTH. All shiny too. There must be a local rebuildier that can look at it for you. I figured that when I do start my trike build I will remove the bike stator and make a pulley to run a 1 wire GM style alternator and a 850 to 1000 CCA group 24 car battery. This is a common Goldwing mod due to the crappy stator system. My reverse system will be simple. Harborfreight has a 1200 pound 12volt wench for like $49 and you modify it by taking the cable drum apart and mounting a rubber wheel in its place. Then a pull lever forces it down on the back tire and you push a button to start it. I will be heading to the MassDot Registry of Motor Vehicles tomorrow. If it isn’t overwhelmingly mobbed I will pay the $50.00 fee for the inspection. After that I will go down to the inspection center to make the appointment for the inspection. I will try to get it in the afternoon. This will give me enough of a time margin to reserve a trailer for that morning. This way I don’t have to get a trailer the day before and leave the trike sitting on the trailer overnight. As far as the reverse motor goes, I have some more tests to do before taking it to an electrical shop. One of the tests will be to determine the amp load with the rear wheel off the ground. I need to get the tester first. I believe a good friend of mine has one I can borrow. The other test is more of an “inspect and correct” measure. It is to double check my negative bonding strap from the reverse motor to the battery connection. If that has come loose at the engine connection it would account for the extremely high amp load. The trouble is, the main engine ground is beneath a lot of other stuff that needs to be removed to check. Will probably get out my jump start cables and connect one end to the battery and the other to the reverse motor housing. It would provide a sufficient ground to run the motor without killing the electric system. I did a walk around video and will publish it on YouTube then provide a link on this forum. I will try to do that today. Roger Worcester, Massachusetts |
|
|
|
Post by roger on Mar 6, 2019 2:26:58 GMT -5
Here is the YouTube link to the walk around and start up of my TR1ke. Roger Worcester, Massachusetts Nice   Martin Okay, here is what I found during my test of the reverse motor. I doubled up on the ground strap and tried a fully charged booster battery all to no avail. I have a 340 CCA Honda GL1500 battery installed. I either need a new starter or newer more powerful battery. I am thinking a deep cycle 650 CCA or better, battery. I watched a YouTube video from 2013. A TR1ke is backing into a campsite, on the grass for a good distance. Mine won’t go to the end of a 30 driveway. It’s time to ask, what battery do other TR1ke owners have that have the reverse option. If anybody can provide this information I would be grateful. I did ask Peter Dove the Dealer in the US. He was quite sure my Goldwing battery as undersized and recommended the Odyssey Battery, but wasn’t sure of the size. Thanks Roger Worcester, Massachusetts you may find the motor draws only 30 a when not under load and 300 when loaded. 300 squeezed from a 12 ah motor cycle battery will kill it quickly. A electronic soft start like they use on industrial motors would be nice if one can be made or sourced. This basically ramps up the amps in a short space of time but stops the snatching. Look at small caravan movers, much nicer approach if modified. Like Dave posted above, a small 12v winch has an epicyclic reduction so if the pulley for the rope/wire was replaced with a rubber or knurled wheel that rubs on your tyre when the lever is pulled it could be a brilliant solution. I know the device you are talking about. The item is a variable frequency drive, used to modify the cycles so the motor speeds up or slows down depending on the setting. The variable frequency drive unit also has a ramp up, feature. Those are spendy little items. I am more inclined to plop a huge battery in there and call it a day.. I did have the reverse motor tested, and it was good. Where to find a 350 amp DC rheostat is the question, and after I find it, how big is it going to be. Reverse isn’t necessary, it is desirable, but not needed to pass the state inspection. Cheers Roger Roger, are you running two batteries or just 1 shared? I would recommend maybe a group 24 1000 CCA over a deep cycle. The deep cycle battery needs a slow charger and I am not sure how it will last using the stators output. I could be wrong. I believe I am going to do almost just what you said Dave. I have some pretty good Advice from an owner of a TR1ke and another very good electronics tech. Using a base of 300 initial surge amps and 100 continuous amps then doing some math, a conclusion was made of what size battery to buy. To be very truthful, I didn’t do the math, Eddie VanBelkom did. Anyway, we concluded I needed a 45 Amp Hour battery. I am going to bite the bullet and buy an Odyssey PC1100. The Odyssey will be a stand alone battery. It will not be connected to the main frame of the trike. I have a 340 CCA for that end of the electric system. I will however install a “Blue Sea” battery combiner for those instances where I might need to jump start the engine. Again, I will not be doing anything until after I get this through the inspection system. The inspection needs to be scheduled yet. It all starts Tuesday. I was informed that Monday is Patriots Day. You know, the Boston Marathon.... and all that security. (Massachusetts Holiday) Roger |
|
|
|
Post by roger on Mar 7, 2019 0:29:43 GMT -5
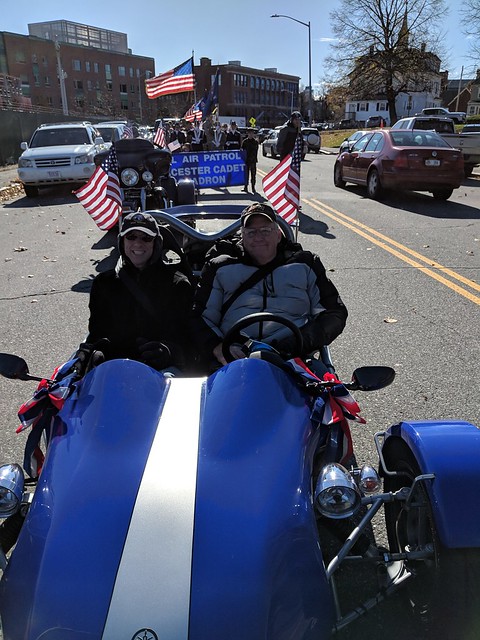
PAGE 17 If you are going to install two batteries you need some sort of controller to manage charging. Then again is it control of discharging?....... either way I believe RV's have those sort of things installed to deal with the issue. all you need is a decent wheel chair motor, they come with soft start speed controller, a reduction box and a wheel rather than the norm which is a loud clunk as the motor bites then lots of mechanical noise. Then you can simplify things and use a nice little lightweight battery. Without getting too deep into a lot of modifications and changes, my plan is to make the system I already have work as it is designed to. It is a Reverse rotating gear reduction WOSP motor assembly. From what I read about it, It is designed as a reverse system for motorcycle engine powered/based kit vehicles. The motor meshes fine with the powered gear, the motor has no faults. If I use an adequate battery and properly sized cables it will work just fine. At first I thought I wired it incorrectly, then second guessed my cable size, but as it was, It was an undersized battery. I did rewire the control circuit from a switched source to straight from the battery. The motorcycle battery just wasn’t enough for the 300 amp initial surge and the 100 amp continuous power demand. The battery I will install for the reverse will power only the reverse motor and will be connected to the system battery by means of a Blue Sea BSS9003E marine 300 amp rated switch. The only reason, currently (no pun intended) to close the switch is to provide emergency starting power, like built in jumper cable. ILater down the road I will look into a priority charging system that monitors the primary battery and charges it first, then charges the auxiliary battery second. As a safety measure to reduce the possibility of an electrical fire, I am investigating a 300-350 amp terminal mounted fuse on the battery. The Odyssey battery for the time being will be charged in the garage similar to an electrically powered car. I will need a “smart charger” that will shut off when the battery is fully charged. I filled out the paperwork today for the inspection, I will be heading to the MassDOT RMV to pay the fee. I appreciate all the information. It is this sort of thinking out of the box that really good ideas and solutions are made and ultimately applied. Thanks to everyone. Roger Worcester, Massachusetts I made it down to the RMV and processed the application for a VIN and Inspection. I also went to the inspection site to speak with the inspector to verify the Registry processed the paperwork correctly. The inspector will be calling me next week to finalize the appointment. The project is finished in spite of the fact the reverse battery portion is still in abeyance. It “WILL” work, just not for long. It will pass the inspection without it. I am not sure if any other state has the same issues with the RMV as us here in Massachusetts. It is an absolute horror show. The RMV is under-staffed and I can tell they are all stressed out. The customer management system in place is in adequate to handle the amounts of people requesting service . There is a line out the door, just to get a number to wait. All I had to do was drop off a check and get a receipt and I was there over an hour. People that go there are annoyed that the state cannot and will not provide the service necessary, in a timely, efficient manner. It is only going to get worse with the new drivers license requirements. I will post the results of the inspection regardless of good or bad. Roger There isn’t a lot I can say at this point. I have all my paperwork together, “in duplicate” and have made a solid appointment for my vehicle inspection. All slots were filled for this week, so I was offered Tuesday, May 1st at 10:00. I reserved a U-Haul trailer and borrowed a pair of ramps but doubt I’d I will need them. The 6’ X 12’ open trailer is only about 10 inches from the deck to the tarmac. A couple of strong guys could probably lift the nose that high and then apply a little creative lift and push to the back end and have it loaded. As I am typing this, the State Police officer that does the inspections just called to confirm the appointment. Always a good sign. Anyway, that’s where I stand. I will need to remove the canards and rear wing to avert any damage while in transport to the inspection yard and back. If all goes well it is possible for me to have a number plate on it by the end of the day Tuesday next. That’s about it for now. Oh, I will run the reverse motor on the installed battery and if it passes the inspection next Tuesday, I will order the items necessary for a two battery system. Good or Bad, I will post the results. Roger Worcester, Massachusetts My plans were to have the trike all inspected by now. The State of Massachusetts unfortunately scheduled me on a rainy day tomorrow. I will attend the inspection. My TR1ke is all loaded on a 12 X 6 foot trailer and is currently in a garage keeping dry. By noon tomorrow I will either be driving it, or not. It depends on the outcome of the inspection by the State a police officer assigned that duty. There was exactly 1/2” clearance for my front wheels to fit through the 6’ beam of the trailer. Once inside, there was ample room, probably over an inch. I will post the results. Roger Today I got up early to prepare for the inspection scheduled for 10:00 AM. We latched the trailer to my friends heavy duty pick up. We arrived at the inspection center early, unloaded the trailer and waited for nearly 2 hours for our turn in the inspection bay. Finally at 11:00AM I rolled into place, handed the inspector my paperwork and answered a few brief questions. We were directed to a seating area and there we remained, being called into the bay on 3 occasions to answer questions. After trying to make idle chatter with my friend, I was called into the bay for one final question, probably THE MOST IMPORTANT QUESTION of the day. That was: Mr Baker, Where would you like your sticker placed? “I passed,” tomorrow I go to the RMV for my number plate.....and registration. No more inspections.... Roger There is a number plate on my TR1ke. I took it out and ran it through the gears. It handled very nicely... predictably in fact. I was not fading and drifting into the curves but rather going through the checkout procedure of the fun index. I have the cable shifter oriented so when I push forward on the gear selector it goes from 1st upwards to top gear. I might change that to when I pull back on the lever it shifts to the higher gears.. it seems more natural that way. The clutch pedal takes a bit of getting used to, but have to admit I didn’t stall the engine as often as I thought I was. I would like to be able to alter the ratio on the accelerator pedal so it doesn’t go from idle to 9,000 RPM with a tap of the pedal. The brakes are really good and seating in nicely. I did some panic stops and gentle braking. All good. The fuel gauge on the clocks are not that visible. The entire setup is rather small for my eyes. I can read the odometer and Tach. The rest is a blurrrrrrr. I need to find a smaller cut helmet. Mine kept bouncing off the seat back. Not all that comfortable..... However... the seats were comfortable and I was able to adjust them to my leg length. I will be converting my headlamps over to LED. I have the package for my Adjure buckets already. Well, that’s it. I will post a photo or two tomorrow. Cheers all Roger Worcester, Massachusetts |
|
|
|
Post by roger on Mar 7, 2019 0:38:19 GMT -5
 We waited outside the state inspection facility until our turn was called. 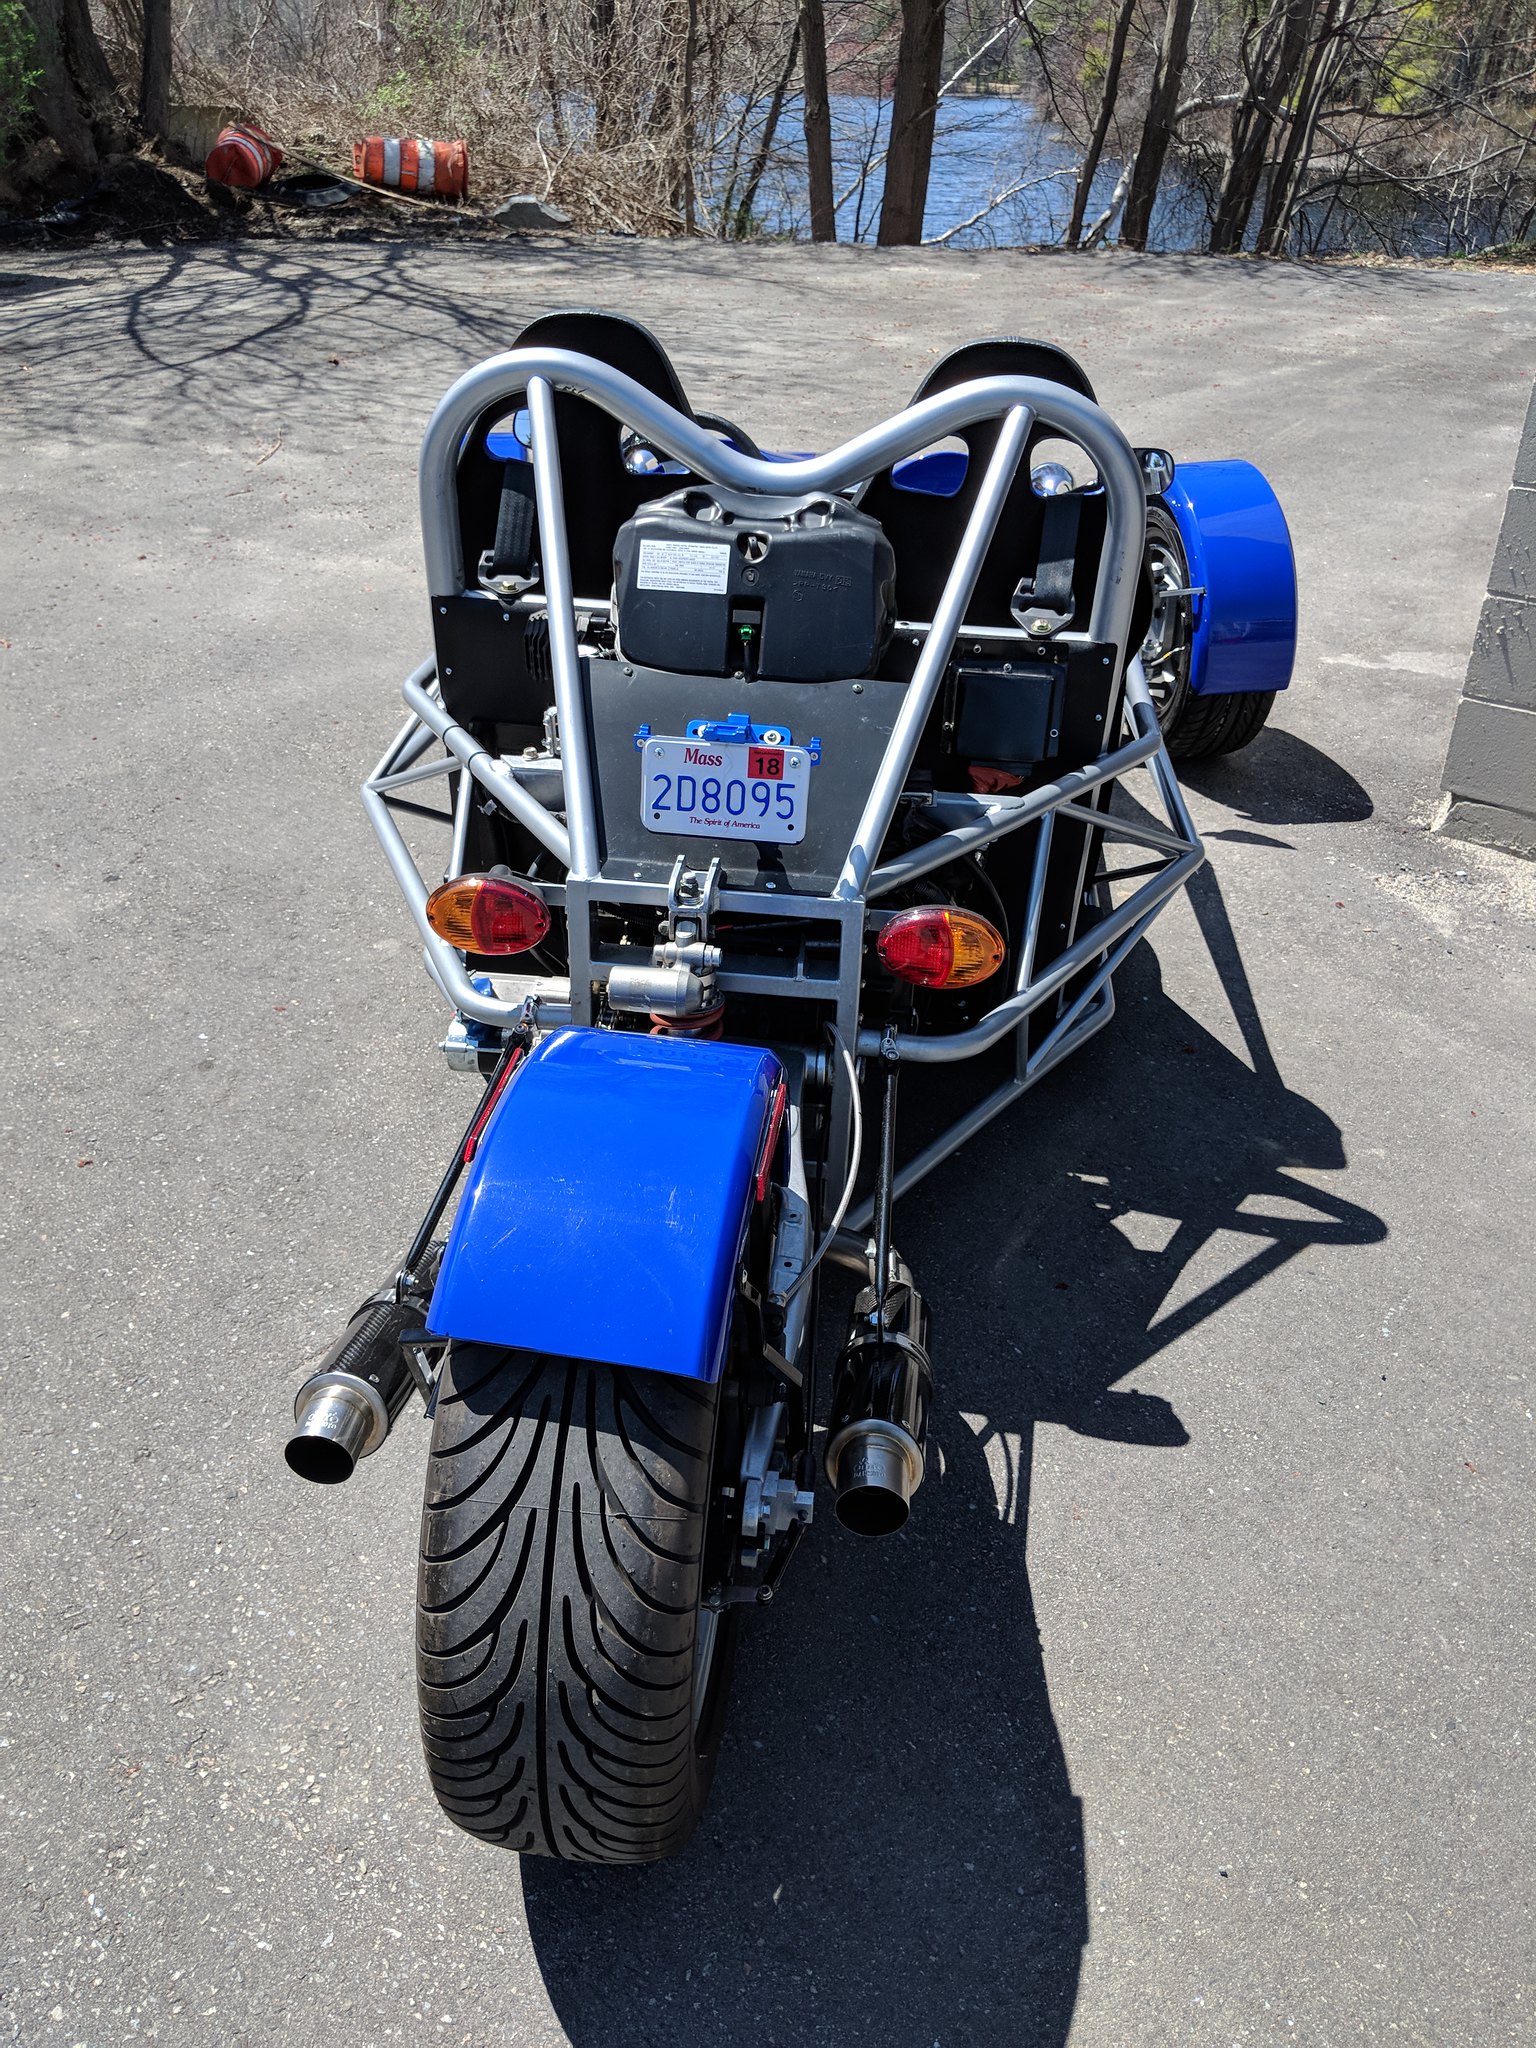 As you can see we received our number plate complete with annual inspection sticker....(the sticker had not yet been applied during the photo shoot). I removed the canards and wing to facilitate ease of inspection. The more you have, the more the inspectors can look at and potentially fail you for having installed it in the first place. The exhaust system runs cooler than I expected. The carbon fiber exhaust never gets above a temp that it will burn to the touch. I also have the headers wrapped in some very high tech composite wrap. It is supposed to rain tomorrow so no riding is scheduled. I want to get away to the Mohawk Trail and test it on some curvy roads. Not tearing up the tarmac, but testing the handling characteristics as well as learning how to work with the very ample supply of power locked up inside that 180 HP R1 engine. Today’s short ride was kept down to 55 mph, I need to see how it goes at 70.... Roger Worcester, Massachusetts Rain today so not optimal riding weather. I may brave it if the temps improve. Ive put on a couple of 50 mile out and back loops to a neighboring township. Ive had the speeds up to and over 75 MPH. I have not noticed any shimmy or shake in the steering. It tracks remarkably well and holds the road like it were on rails. I have noticed a few odd issues that need adjustment or correction. The most noticeable is the brake pedal not returning to the top fully. This caused the rear brake pads to drag. I pulled the pedal back by the tip of my toe and all was right with them. Now I need to install the obvious return spring, and/or add a little never seize to the dual master cylinder pivot point. It was a bit stiff during assembly. The other thing I noticed was the canards are flapping about like the were pulled from a hummingbird. I will need to install a support of some sort to add a little rigidity to the mount. 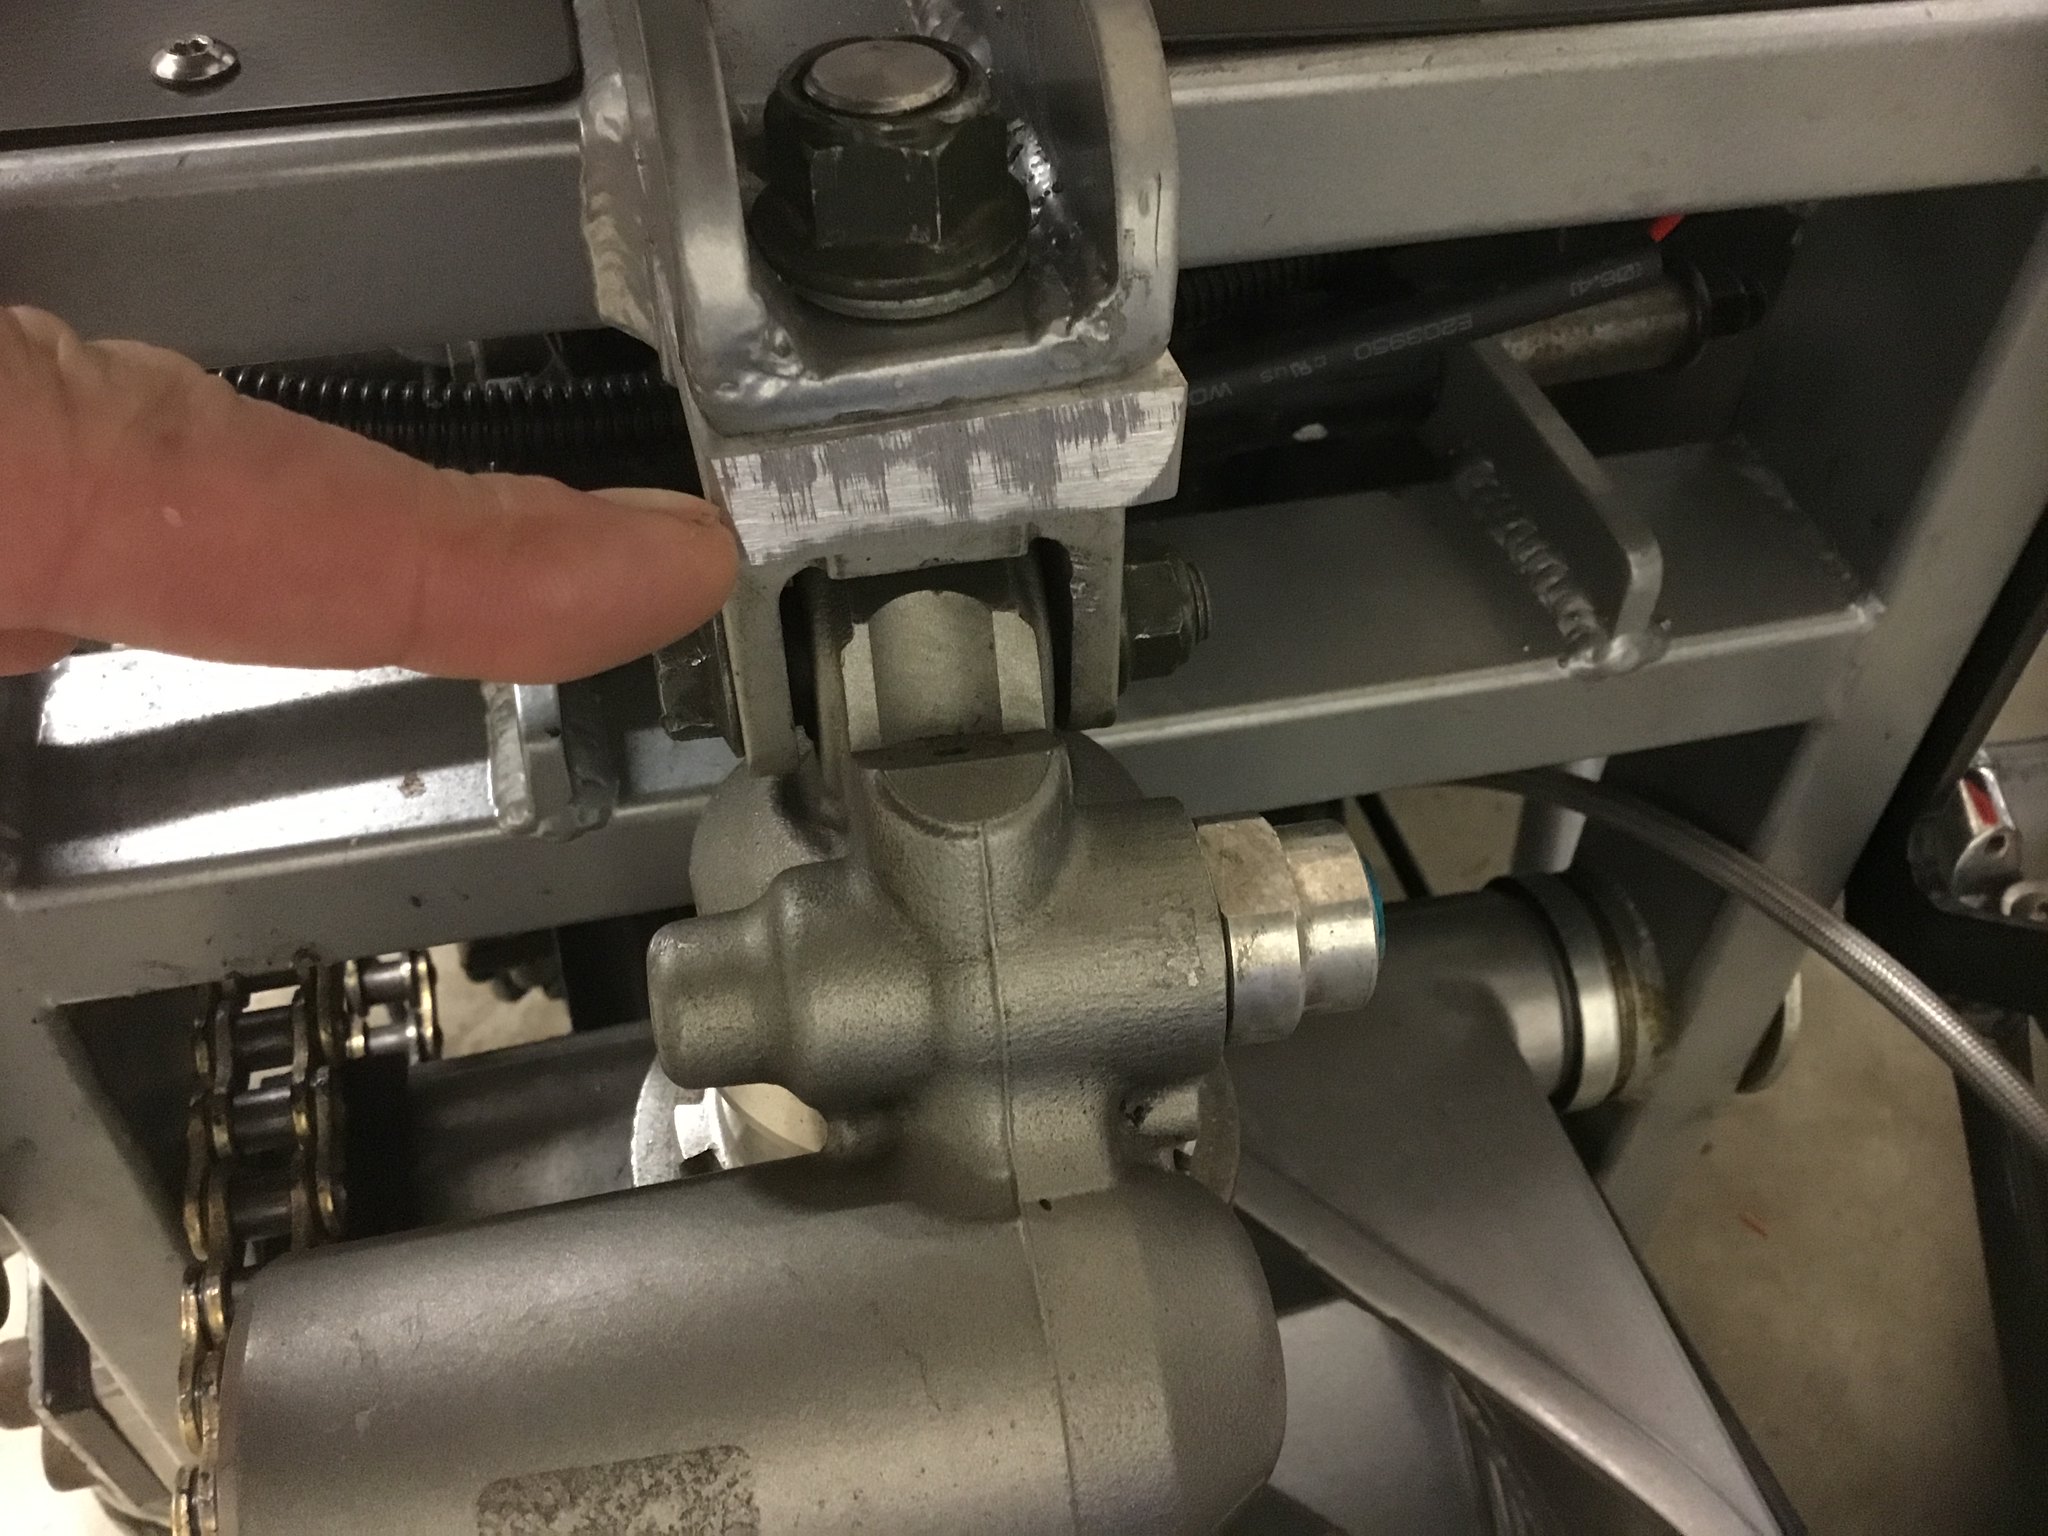 I addd a 13mm spacer to the rear shock yoke. It gave me a bit of lift on the rear. Now the trike sits just slightly rear high. I also am going to apply a little preload to the coil over. Right now it’s at its lowest setting. I also need to add more preload to the fronts as well.  The overall ride height is where it needs to be, just need the suspension a bit stiffer... just a small tweak mind you.... nothing drastic. Over all, I am very pleased at its outcome. I need to concentrate on the details and hopefully nothing serious will present itself. Roger Worcester, Massachusetts  I found these on Amazon.com. They are for a bicycle but serve my purpose quite well. I bought two of them. One for each side. Handy for gloves and trike documents. They were less than $10.00 USD. Hey, it’s the only luggage I have at the moment... Roger Worcester, Massachusetts There are spring kits for some Calipers that you may modify to fit the bikes calipers. They go on over the Brake Pads and push them out so they do not drag. These are an example from my Subaru Outback XT. By adding these my disc pads do not rattle anymore and I gained almost 2 MPG due to less drag. The gap is closed up so quick when you step on the brakes and the ABS does not set any codes.  When you put a return spring on the brake peddles arm, it too will pull the pads away from the rotors just like what those springs above do. With both, as the pads wear down you will get more gap between the pads and the rotors. There is no adjustment on ether system. What’s happening with the pedal is the dual master cylinder balancing rod is sticking.. The pivot point is quite stiff and causes the rear brake caliper to remain partially engaged because the pedal did not return to neutral. It hangs down a bit. When I pull back on the pedal with the toe of my shoe, No more parasitic drag. A little anti-seize may resolve issue with the pivot on the balancing bar, but a spring would insure no more brake drag. I installed a return spring on the clutch pedal. It was an extra center stand coil from a GL1000 Goldwing. I may have another one knocking around somewhere. I appreciate the tip on the anti-rattle clips, but the caliper in question if from the R1 Yamaha. The pads are pretty snug and are new. Tomorrow I will look in my catchall drawer for another spring. Push come to shovel I will go down to the local ACE hardware and buy one from them. I have a couple of weeks before I leave on my vacation, so may as well getter done. I will be in your neck of the woods Dave. Going to Olympia and Puyallup and eventually to Aberdeen. Might stop in your neighborhood for coffee.... Roger |
|
|
|
Post by roger on Mar 7, 2019 0:47:42 GMT -5
PAGE 18 You are welcome any time to call for a meet. There is a good breakfast place in Sumner near Puyallup called "The Buttered Biscuit". Its a 20 minuet ride from my house. I will PM you my current cell number. Well now, doesn’t that just “Butter yer Biskit”. Ya know, with a name like that I’ll bet the food is great. Sounds good. Tomorrow is supposed to be bright and sunny. I am going to take both trikes out of the garage and do a photo shoot. I will try to post the pics later tomorrow afternoon. Roger Worcester, Massachusetts Dave, I am probably going to be in your area after June 17th,,, forgot to mention that. I took a nice ride in my TR1ke today. I was accompanied by my friend Alan. He was in the passenger seat. Our combined weights were enough to sit the trike quite low, but we negotiated every speed bump without scraping bottom. It was a very smooth ride, but need the preload on the shocks set a little bit stiffer. So far, so good. Roger Worcester, Massachusetts Tomorrow is supposed to be bright and sunny. I am going to take both trikes out of the garage and do a photo shoot. I will try to post the pics later tomorrow afternoon. Will be good to see your 2 trikes alongside each other. Different ends of the spectrum in terms of performance, but both a credit to your build standards. Martin The photoshoot might be a bit premature. I just now opened an email from Flickr. Flickr sold out to SMUGMUG. Smugmug charges a monthly fee for their service, I cannot dig deep enough to find out what they charge for 3rd party hosting. I imagine it will be along the lines of what photobucket charges. I tend to think this is a popular way for the free services of companies like Yahoo to “Cash in” on their clients by selling them out. I never figured to be a bargaining chip. I have until the 25th of May to download my pictures and close my Flickr account. If I do not do this before then, my pictures and information will be transferred to Smugmug. You know, it took me about a week to transfer my hosted photos from Photobucket over to Flickr, now I need to find another free 3rd party host and do the transfer all over again. This is the way things are going. It is going to be a real PITA for all forums out there. Pass it along Roger |
|
|
|
Post by roger on Mar 7, 2019 0:53:10 GMT -5
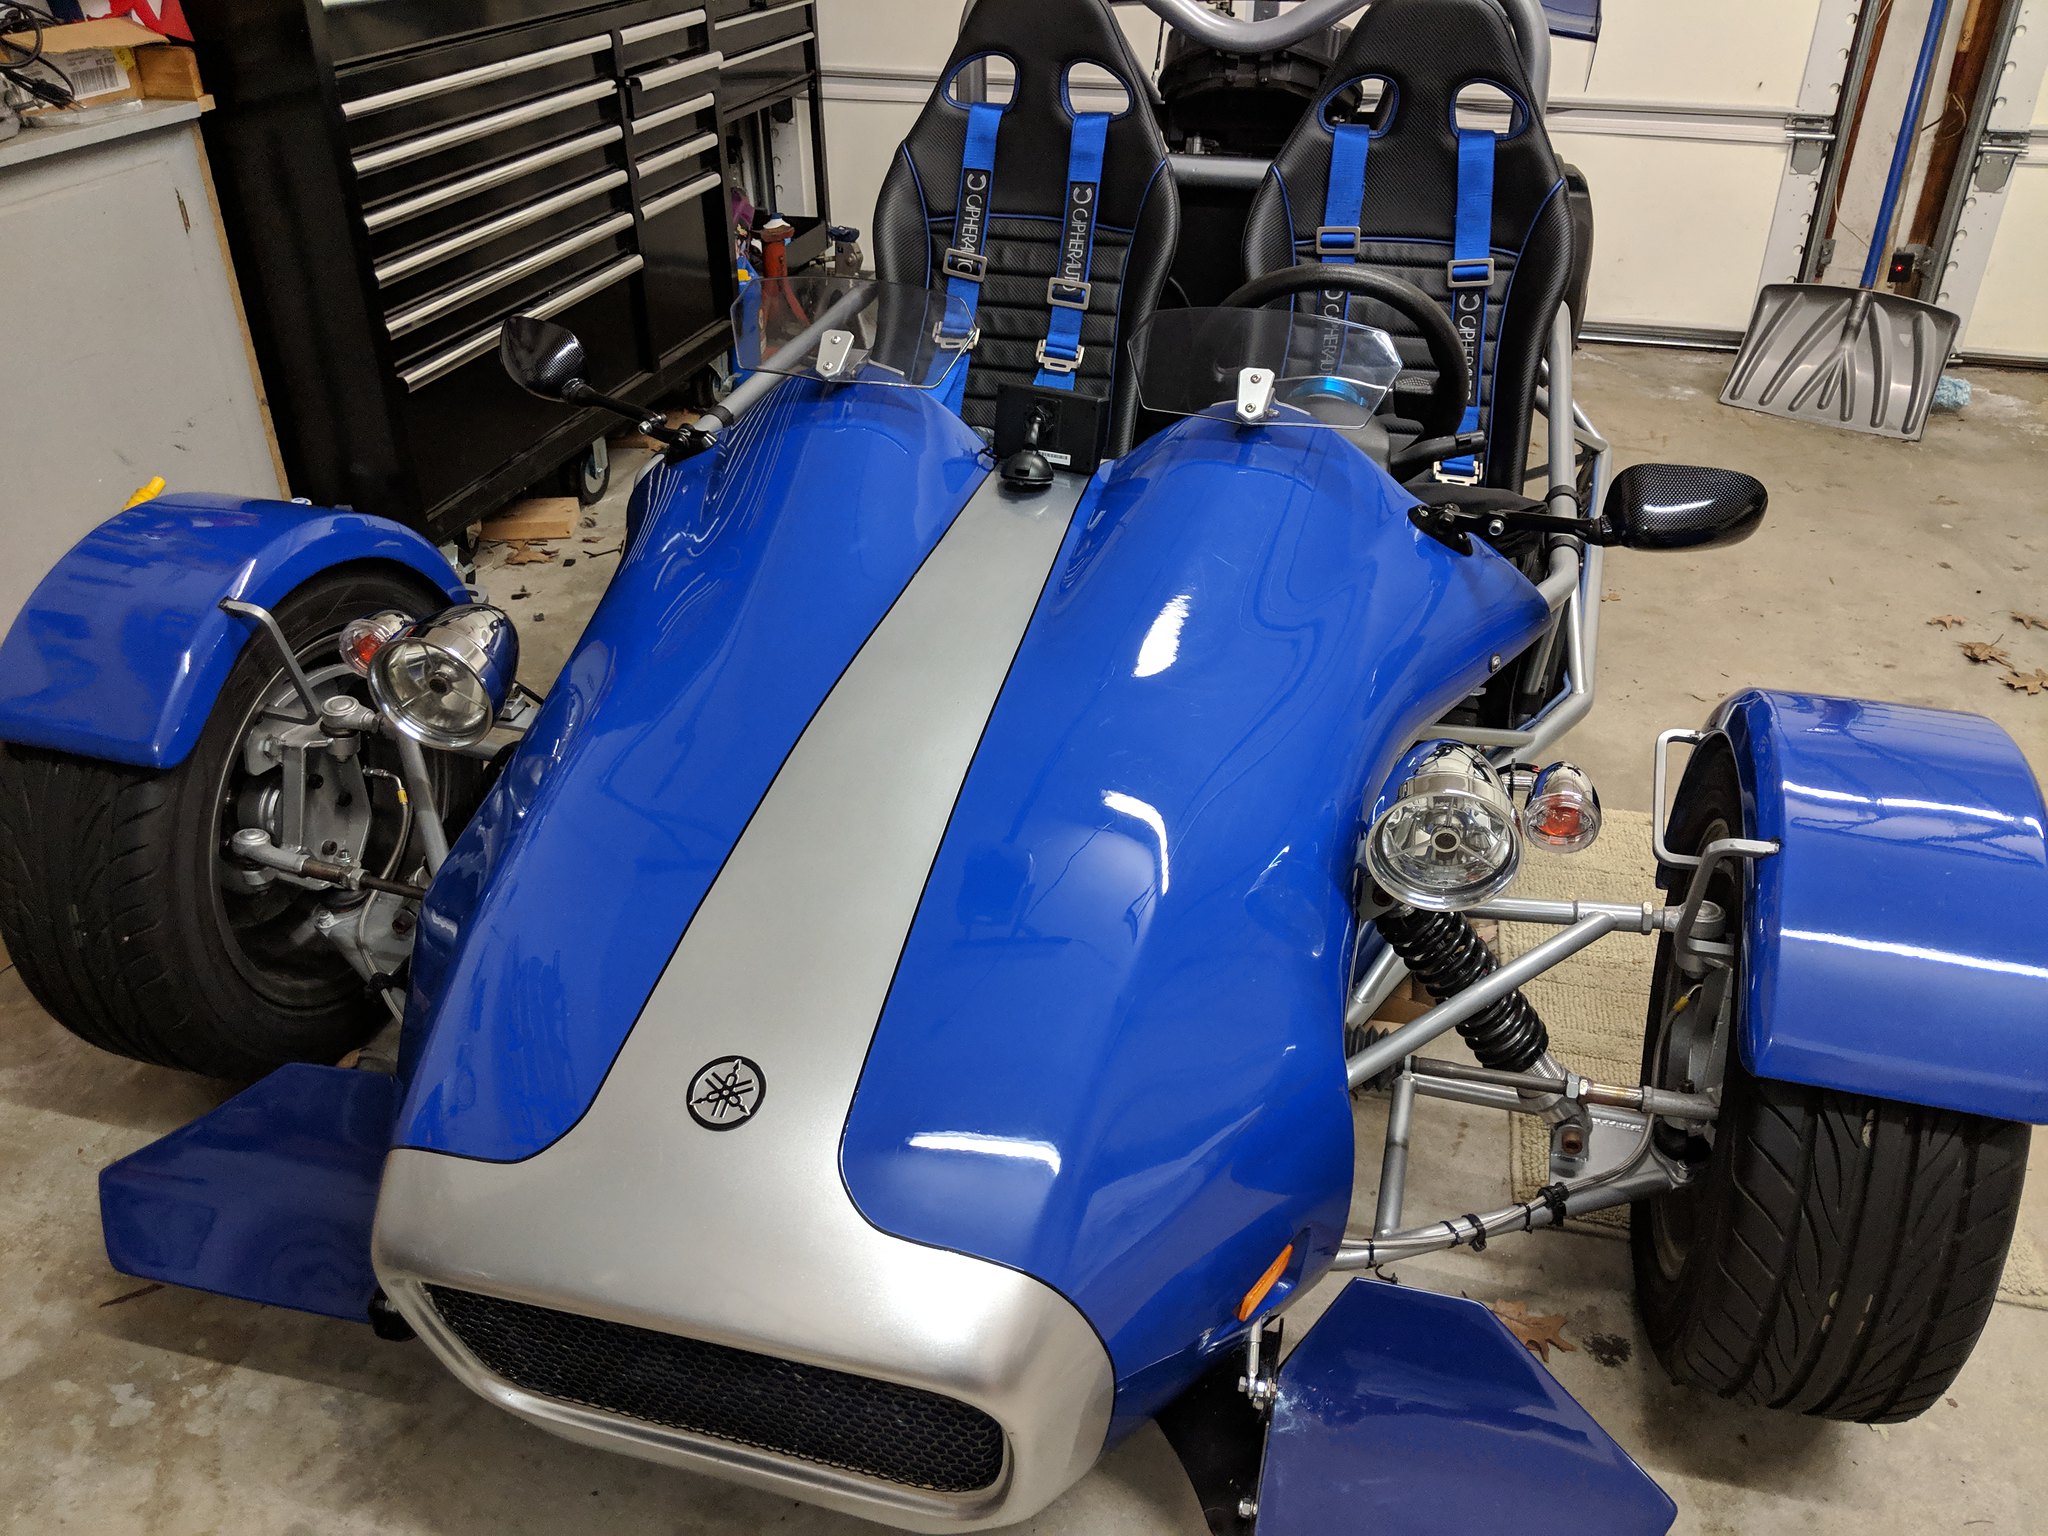
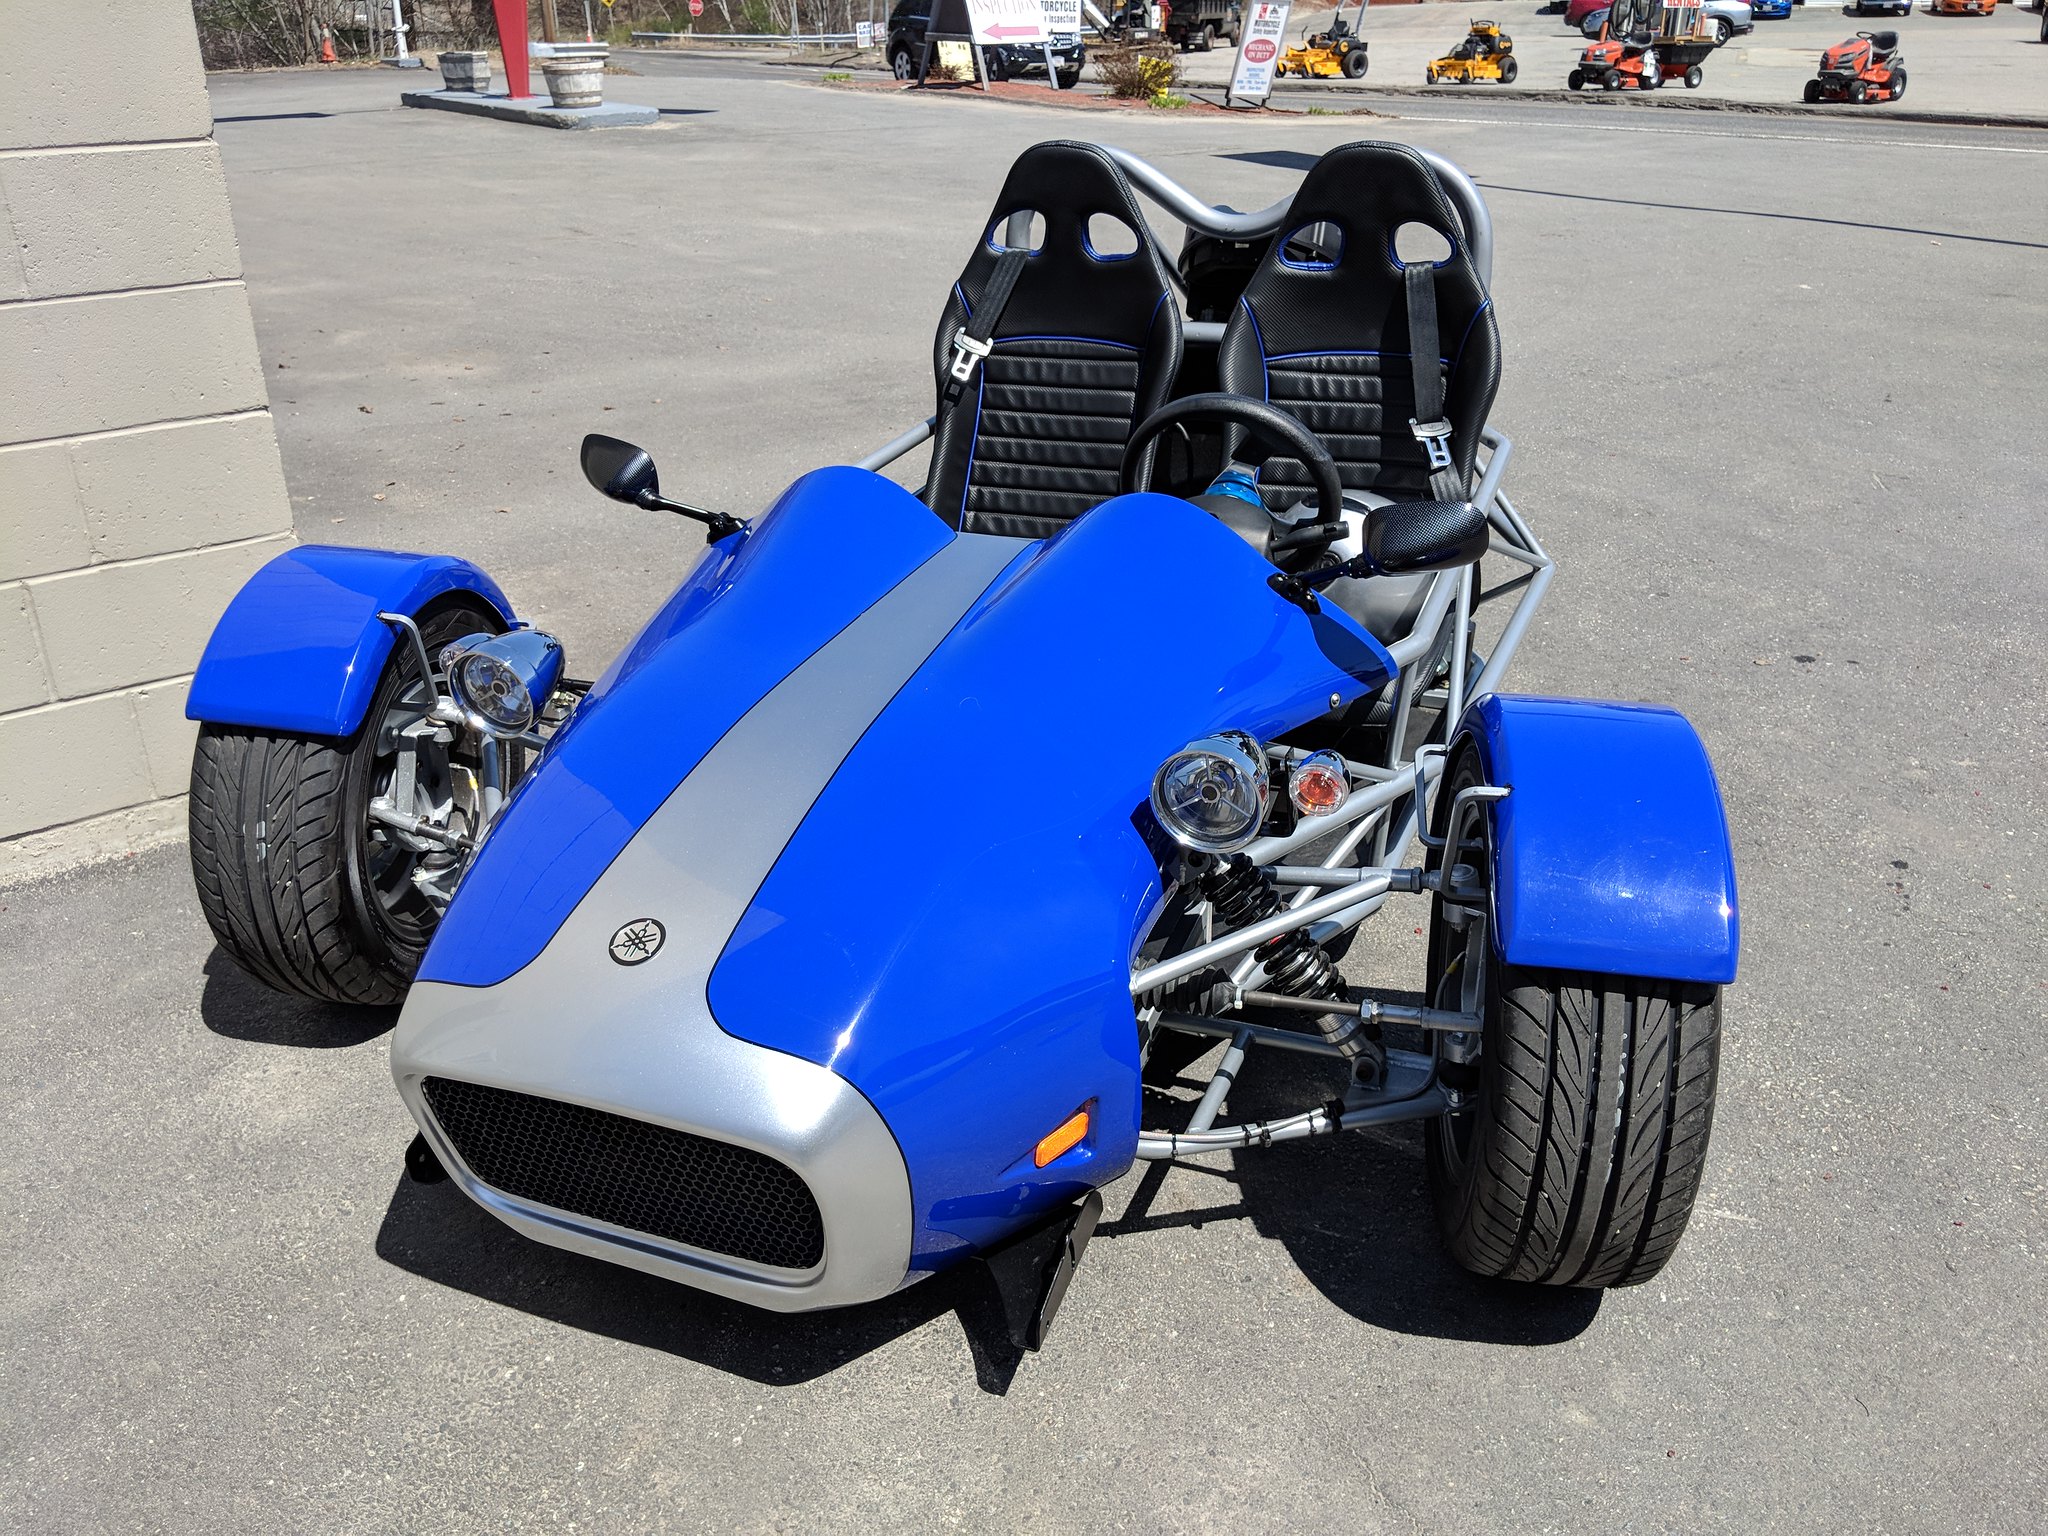
I had a few minutes this afternoon to take the pictures. Both of the trikes run quite well. I’ve been driving the TR1ke to shake it down. Tomorrow I will tighten the chain. It is a bit slack. Anyway, it was a pleasure building both. These are examples of a group effort from members of the forum. So, to all that read, build and offer knowledge, thank you for allowing me to enjoy my winters during the build and the summer wearing out the tires... THANK YOU ALL Roger Both look very nice! Wishing a lot of fun driving it. I am looking forward to many hours of fun.. thanks currently in Northern Idaho fishing... Roger |
|
|
|
Post by roger on Mar 7, 2019 1:08:32 GMT -5
PAGE 19 Not an update but just a note. Roger is on a driving vacation. He was coming thru my area and I met Roger today for a lunch for us to pick each other brains. I showed him the MEV E-Trike plans and another nameless trike plans that I have. We had a good chat and ended it with Roger telling me to start a build. I may have to give Dove Racing a call. Dave is correct, I did say "build something". Also, Dave picked up the check for lunch :-) In going over our conversation, Dave had the basic plans for the MEV E-Trike. Not a lot of detail, but a simple build, the plans were adequate. He also has a Non-MEV Plan set. It was over detailed and when the build is complete you would then own an ugly trike. It uses a complete GL1500 frame (minus the front fork assembly) I am sure Peter Dove could fill his order with a very nice TR1KE kit instead. As with all projects, you start at the beginning, so Dave, thanks for the chat and sharing your interests... now is the time to put one on order. Roger In Aberdeen Washington for the evening I am not sure if anyone is reading anything on the Eco-Exo forum or writing as far as that is concerned. I would like to mention that here in the "Colonies" the Winsonsin and the Massachusetts trikes are going full throttle. I am not so sure about the Pennsylvania trike belonging to Fred, the "Smmmmokin Guitar Player" but last I heard he had the wheels turning on it. My trike was finished and inspected January 2014 and Edward in Wisconsin followed me later in the year. I am not sure when Fred got his on the road. Front what I hear there are two trikes somewhere in the midwest, Colorado country or near there. As far as anyone is aware, a black hole swallowed those two and sucked them off the face of the Earth. That leaves Jimmy in Texas..... I believe the same black hole got him as well. He was going full throttle and in a cloud of dust (yea, and a Hardy hi ho Silver) he vanished as well... I just parked mine back in the garage and wiped it down. I went on 100 mile out and back to visit a friend building a Rat Rod. Chevrolet Monte Carlo frame with a 305 CU inch engine with a Willys Pickup coach. Anyway, I am glad to report my trike ran great, the engine sounds really good and I have many more miles of riding to look forward to. It is a shame the EXO-ECO project is dead.Roger Roger and I had this conversation when he came thru here last month. It is a shame that someone has not taken Stuart Mills up on his license to build the Exo-Eco.  Today I completed the auxiliary battery installation in my TR1ke. This battery is the primary source of power for the reverse motor. I wired in a Blue Sea ACR7601 Charging Relay to enable the stator keep the aux battery charged. The relay also isolates the two batteries when I engage the reverse motor, and only uses the auxiliary battery. It is a bit of a maze of cables but I will be cleaning it up a little later. When I tested it, I started the engine and let it idle. I engaged the reverse system and it works quite well. It no longer pulls the main battery down nor does it kill the engine in the process. Hopefully it will be a long lasting fix. Roger Worcester, Massachusetts I took a 155 mile ride in the TR1ke today. I went to Attleboro Massachusetts to visit my brother and to take him for a spin in my newly completed project. I encountered a speed bump in the neighborhood he lives in and scraped the clamp off the exhaust system. After some time of messing with the rear ride height, I made an adjustment to the linkage bolt connected to the rear suspension. I was able to lift the rear up about 2 inches. I also ran the preload adjuster to full strength. I have yet to do a test ride because of Torrential downpour rain. Maybe tomorrow. I also need to install a new T-bolt clamp on my exhaust header. I may have to modify the mount for the reverse motor. It is difficult to explain, but the motor is slipping in its mount causing the two gears to Grind because they are not fully meshed. The mount was designed to make minor adjustments, but it is causing the system to fail. I may make my own and see how that works. Anyway to top off the day, I got caught in part of that torrential rain. I was soaked from head to toe. I missed getting home in time “DRY” by about 20 minutes. Lovely huh! Roger Worcester, Massachusetts Just a quick update. I did an adjustment to the linkage to the rear shock. It raised the rear end up considerably. I also did almost maximum preload on the spring. It is a much firmer ride, doesn't bottom out and still handles great. I also installed a new T-bolt clamp on the exhaust to replace the one that got damaged by bottoming out. I took the right front tire to be balanced and sorted out the wobbly gobbly steering. I know I lost a weight in the ride yesterday, so no big deal. I went the Athol Massachusetts to a custom car show. The event was packed. I always bring my Trike but usually don't stay with it to answer questions. Today, I did. I got swamped with questions. Next week I will be bringing the Eco-Exo. I wanted to do a shake down drive on the work I did. It's all good. That's about it for now. Roger Worcester, Massachusetts Roger, you need to make a custom rear hitch that lifts the back tire of the Eco-Exo off the ground. Then tow it behind the tR1ke to the shows. Good idea in theory, bad idea for the 80 mile round trip and for enjoying the countryside. Besides, the back end of the little trike is HEAVY🚛. I would ask Eddie to drive over from Wisconsin to see if he would lend me his Jim Dandy kneeling Eco-Exo hauler enclosed trailer/garage/hangar thingy. It brings up a good question for me though. I was thinking how I could transport one to the west coast. While riding one would be an adventure for sure, but not something on my 1st Choice list. I was thinking of something smaller, like those trailers in a bag that would support the chassis and leave the front wheels off the ground, but I,d need a pickup to pull it. Probably not going to happen. My long range plans are much shorter due to my age and abilities. I am in the "enjoy what I have" stage of my life, but still enjoy building stuff. Maybe renting a toy hauling motor home would be the ticket. Who knows?? Anyway, there are plenty of places to drive around here.... and I am satisfied doing that. Roger Worcester, Massachusetts |
|
|
|
Post by roger on Mar 7, 2019 1:15:20 GMT -5
I am in the "enjoy what I have" stage of my life, If only everyone thought that, the world would be a happier place. I've been busy the last few days. Not only doing tweaks and repairs on the TR1KE but also ordering some extras from Amazon. I found the speedometer waaaay out of calibration. It was to the point that tattooed little old ladies in scooters were waving their canes and flipping obscene gestures at me for obstructing traffic. Well, maybe not that bad, but I was going slower than the flow. I downloaded the "SPEEDO HEALER" App and did the calculations for increased tire size and rear sprocket size and found a needed a -10.9 offset to the speedometer input. I am not sure, but I believe this is a percentage of under speed I was traveling vs the actual speed. If that is true, then at 65 MPH indicated, I was actually going 57.915 MPH. For those that do not know, the Speedo Healer corrects your indicated speed AS WELL AS corrects the factory error built into the system. My speed should be dead on correct when it's all finished. Okay, the other thing is: the TR1KE has absolutely no luggage consideration at all.... well, I did carry home two small pizza's by placing them beneath the seats, but other than that zero. I bought two small black triangular shaped zip bags designed to be placed beneath the seat of a bicycle. I bought two of them. I placed them on the left and right frame section's next to the seats on my TR1KE. They work great for my cell phone, glasses and registration paperwork, but fall short in the luggage catagory. I have been looking at the Givi line of side bags. They pared with Kappa and jointly manufacture a very nice side bag and top case for sport motorcycles. The Givi and Kappa bags both mount to the same frames and the Givi V35 is the same style as the Kappa K33N. I will need to manufacture the mounts, but I was able to order the hanging and latching points that the bags themselves attach to on the frames. Since Kappa was the least expensive by a considerable amount, I chose them. I placed the order yesterday and they should be arriving around the end of the month. They ship from a warehouse somewhere in the mid Eastern part of the US. I will be posting pictures... That's it for now. Roger Worcester, Massachusetts Roger, I do not know if you looked at my GIVI bags mounting system. It is all flat bar stock and I ordered the 4 "Buttons" and 2 of the "Monolock" "male" parts of the latch from GIVI for like $45 USD (As seen in pic 2 below, click on to see bigger).  
My rack is strong enough that I could weld on a hitch and tow a small trailer.
What I did was called Givi direct at their retail store in Sparks Nevada. They are sending me exactly what you showed me. Cost was $22.00 plus shipping. I should be getting all of the hardware and bags around the 27th or so. I will be making a similar frame. Thanks Dave.. Roger Worcester, Massachusetts Mine were a lot like those but used four knobs each. I got the bags first and fitted them temporary until I got the right angle of tilt and angle of the bags from the frame so they tilted slightly in on top. Then I fabricated the mount points out of some round stock and welded and then tapped the pieces to the frame.  20160127_142550 20160127_142550 by evanbelkom  20160127_142611 20160127_142611 by evanbelkomI like how you angled the bags nose slightly downward. The Kappa K33N side bag has about the same general shape as yours Eddie, but the Kappa bag is hard sided. Regardless of what I come up with for a mount, I will be keeping the bags attached as a permanently mounted fixture. Sort of like the top case on the Eco-Exo. I will have enough room for some foul weather clothing and other stuff. I might even go Glamping this summer provided I can fit in the essentials. Tent, sleeping bag and mattress. Maybe some Mountain House rations and coffee. Hey, let's go.... Roger |
|
|
|
Post by roger on Mar 7, 2019 1:28:26 GMT -5
PAGE 20 I received the Speedo-Healer today. I already downloaded the App and did the calculations to correct for the sprocket and tire size increase. I plugged it in and followed the instructions to program the unit. It was pretty simple. The speedometer sensor was just behind the air filter housing. On a 2005 R1, the sensor connector is a triangular shaped white 3 wire plug set. This is where the Speedo-Healer is connected. I coiled the excess cable and zip tied it to an available lug. I was ready to go for a quick test ride, but we are having some unpredictable weather. Rain, then clearing, then rain again and the cycle repeats. So decided to wait until tomorrow to do the test ride. Maybe it will be safe to take a spin then. I know I wrote a previous thread on this item so won't carry on about it. I am confident the newly installed speedometer correction will keep me within the speed limit. I will carry a GPS to see how close my indicated speed compares to it. Roger Worcester, Massachusetts I started on the lower side panel fabrication and fitment today. I am using 22 gauge aluminum (aluminium) for this. It might be a bit thin, but once it is installed it should be strong enough to do the job. It is only cosmetic and not structural. The panels will be installed the the lower and middle horizontal (forward and center) frame supports. Hopefully the panels will keep the debris and water from being kicked up into the seating area. Once I drill and thread the mount points it's off to the paint shop. The painter is able to color match the Royal Navy blue color. The silver frame rails in contrast, should make the blue panels quite visible. Before I take them to the painters I will spray some heavy coats of high build sandable primer. I will be delivering them already prepped. My wife is making some black vinyl piping for the upper panel edges to cover up the mating surface. They will be installed during the final installation. No pictures just yet, but will have some once the project is done. Roger Worcester, Massachusetts It's been a busy day. I am in the process of making the final side panel. I have three in primer and the fourth is nearly ready. I had to halt a bit on the fourth one to do a little side work. When I installed the automatic charging relay earlier this month, I failed to realize the rate the off cycle monitor discharges the battery if left switched on. In my case, I didn't install a switch at all. One is supposed to be installed on the 16 gauge ground wire. What I did was simply wired it directly to the chassis ground thinking the draw would be minimal. It was actually like leaving the interior light on in your car. After a few days, the battery goes flat. Anyway, the switch is installed. When I was in the build process I installed two extra switches on my panel just in case I needed them. Good thing.... Before I permanently install the side panels I will be lowering my seats and installing new 4 point safety harnesses. The inertia style belts cut into my neck. I've tried every which way I could to relocate the shoulder belt. It seems it's always going to in the way no matter where I reposition it. I will see what the 4 point harness does after I lower my seats. My saddlebags will be arriving today. I will be installing those as soon as I see what sort of mount I can fab up for the installation. That's it for now. Roger Worcester, Massachusetts 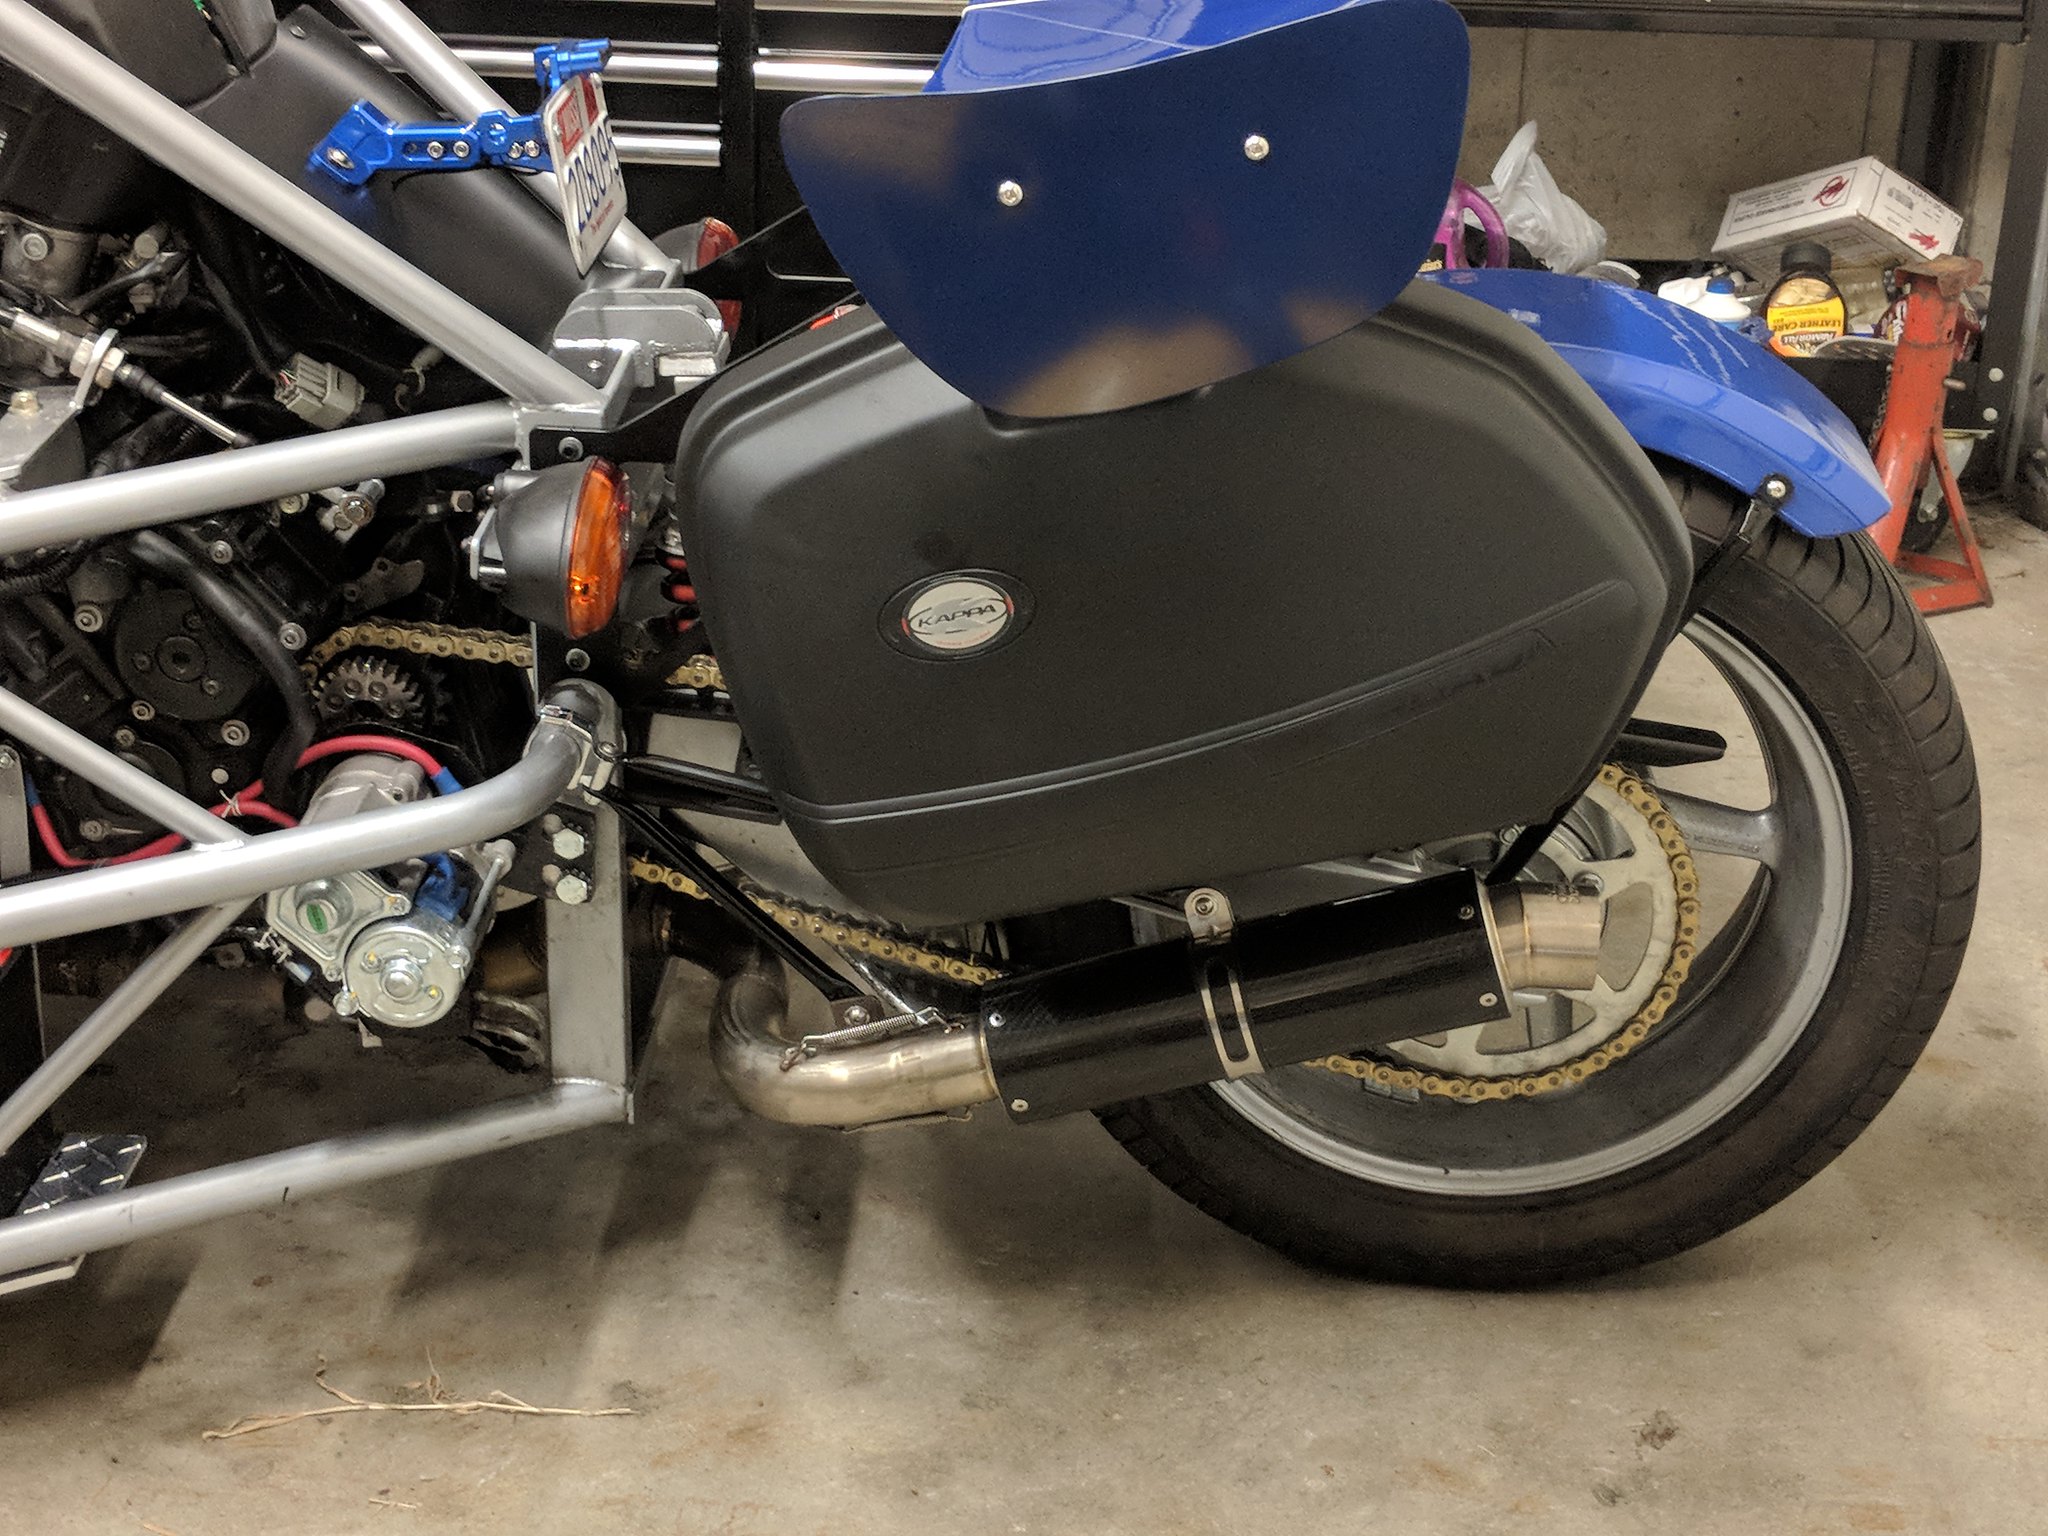 MVIMG_20180724_142915 MVIMG_20180724_142915 by Roger Baker, on Flickr I received my Kappa K33N bags today. Here is a test fit location. I will need to remove and relocate the rear tail lights and make a minor adjustment to the small canards at the rear wing tips... making the mount will pretty straight forward. Roger Worcester, Massachusetts I am biting off more than I can handle right now. I think I need to pace myself a little slower. I've decided to get some other areas on my TR1KE done and maybe next month start on the new saddlebags. Today I finished fabricating the side panels. I took them in to be painted. I had to take a piece in to have it color scanned so it will match the fenders and hood. I had a small section of the rear fender in my tool box so they were able to use it for the color scan. Before I install the side panels I will be removing and lowering the seats. As it was pointed out to me, my seat backs were about 2 inches above the roll bar. Not good, so will be doing that modification along with the lower side panel installation. The Wednesday classic car show was washed out because of the rain. There is always next week though. I want to drive my Eco-Exo and park it in with the rest of the cars. It is every Wednesday in Athol Massachusetts during the summer. Plenty of classic cars, hotrods, and vintage rat rods. They also feed you for free. Hey, ya can't go wrong, with cars and free food. I took my TR1KE a couple of times. I find people don't know what to ask, they mostly want to know what it is and is it REALLY street legal. Well, anyway. I will be getting my "to-do" list shortened as it pretains to the TR1ke. Roger Worcester, Massachusetts 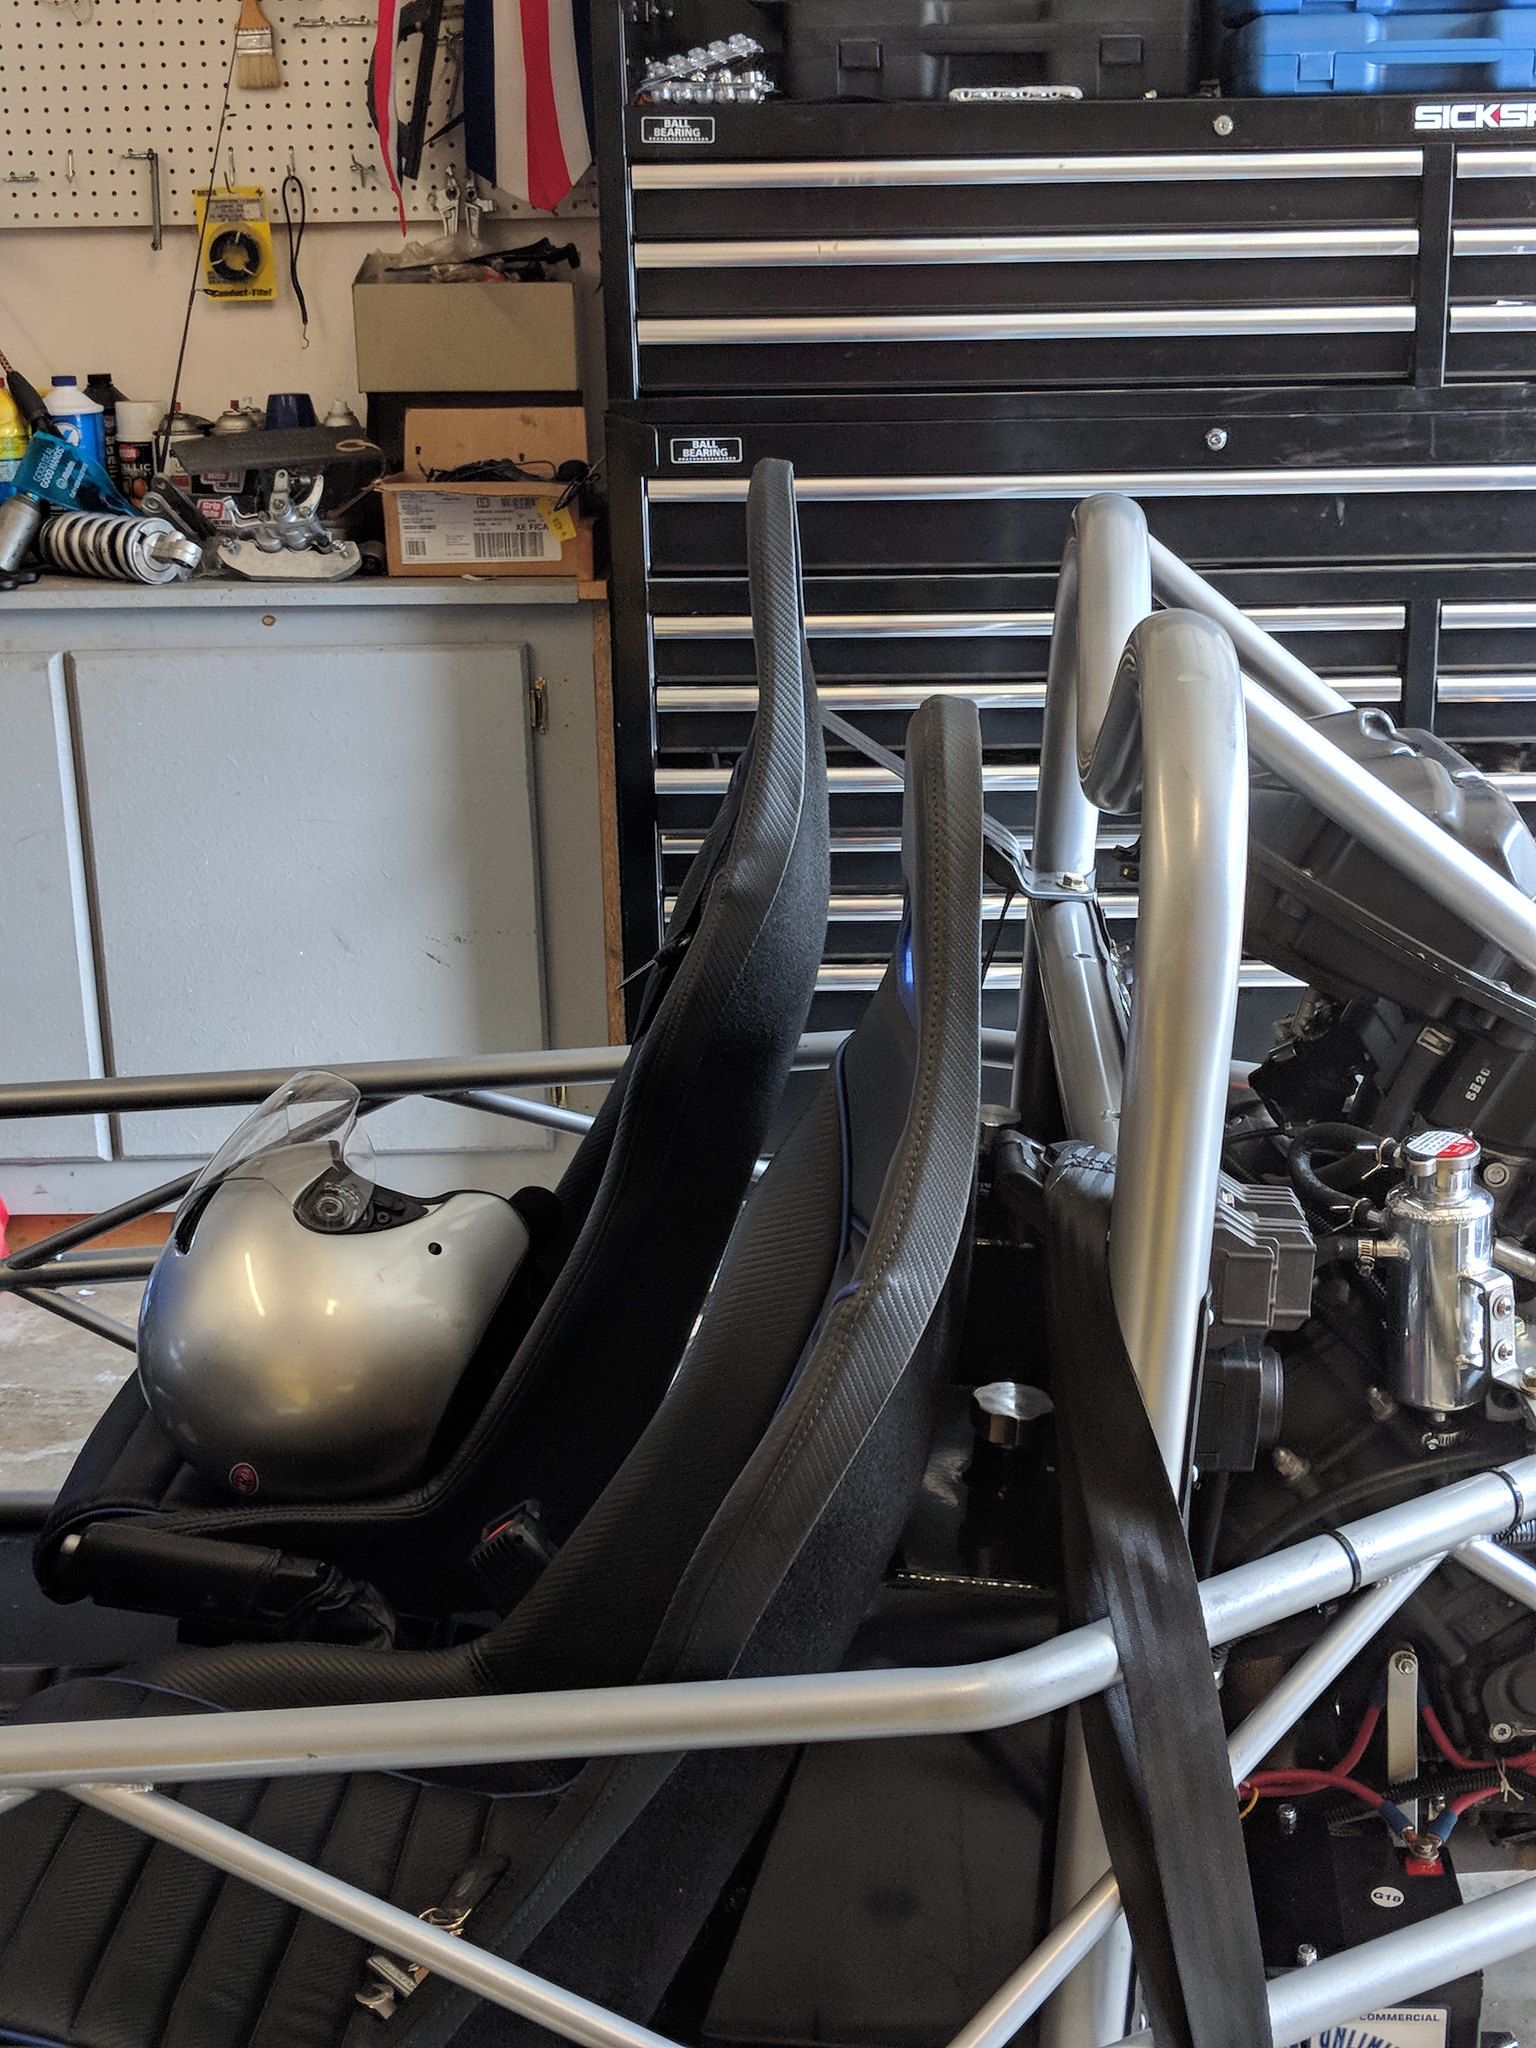 IMG_20180727_143128 IMG_20180727_143128 by Roger Baker, on Flickr Here is the difference in the seat angle and height. The modification was pretty straight forward. The left side seat is now a couple of inches lower the the right. Tomorrow I tackle the right side. Okay, I lied, I did it today, which could be tomorrow somewhere in the world... The seat angles are the same and I didn't loose any leg room in the process of tilting the seats back a bit. Anyway, it's done and I need to drive it a little tomorrow to see how I like the new seat position. 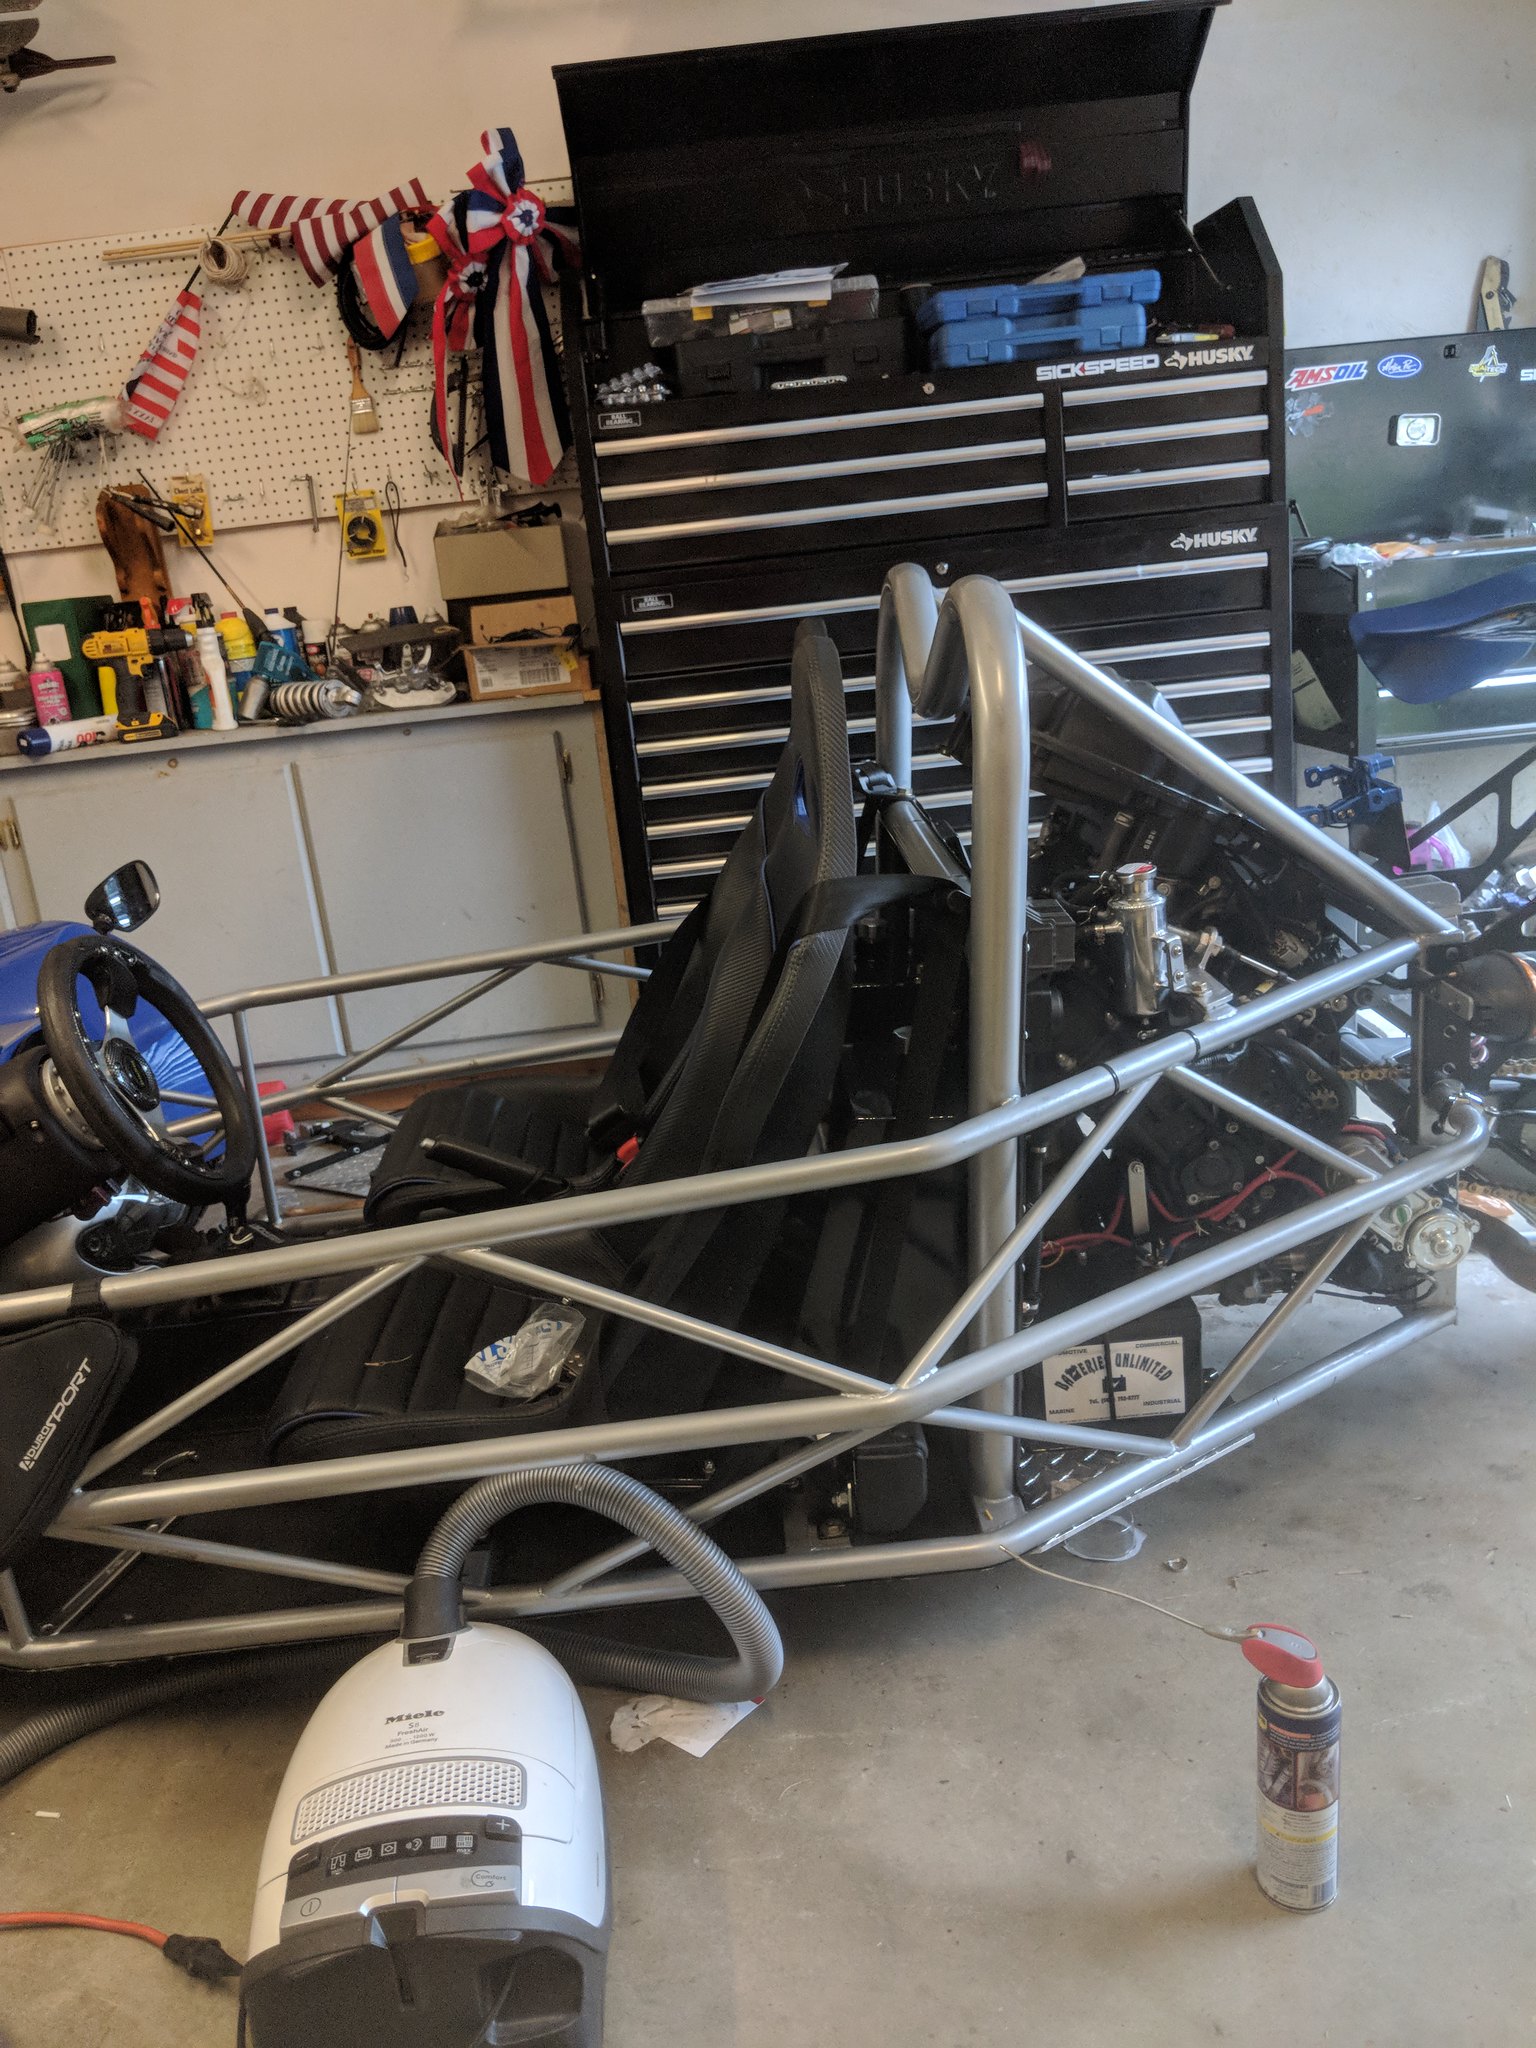 MVIMG_20180727_182347 MVIMG_20180727_182347 by Roger Baker, on Flickr Roger Worcester, Massachusetts I took the TR1ke out for a 75 mile run. The speedometer reads right on the money after installing the SPEEDO HEALER. The seats were also much better after lowering them to increase the angle of recumbance. I don't have that feeling of sliding out of my seat any more. I increased the preload pressure on the front coil overs a bit more. It stiffened the suspension and now I do not hit bottom any more. Don't get me wrong, the front is still low but as long as I clear the speed bumps and obstacles, I don't have to worry about dragging bottom. I also enjoy the stiffer suspension. I should get my side panels from the painters this week. As soon as I get them I will do the install and take a few pictures. That's all for now Roger Worcester, Massachusetts 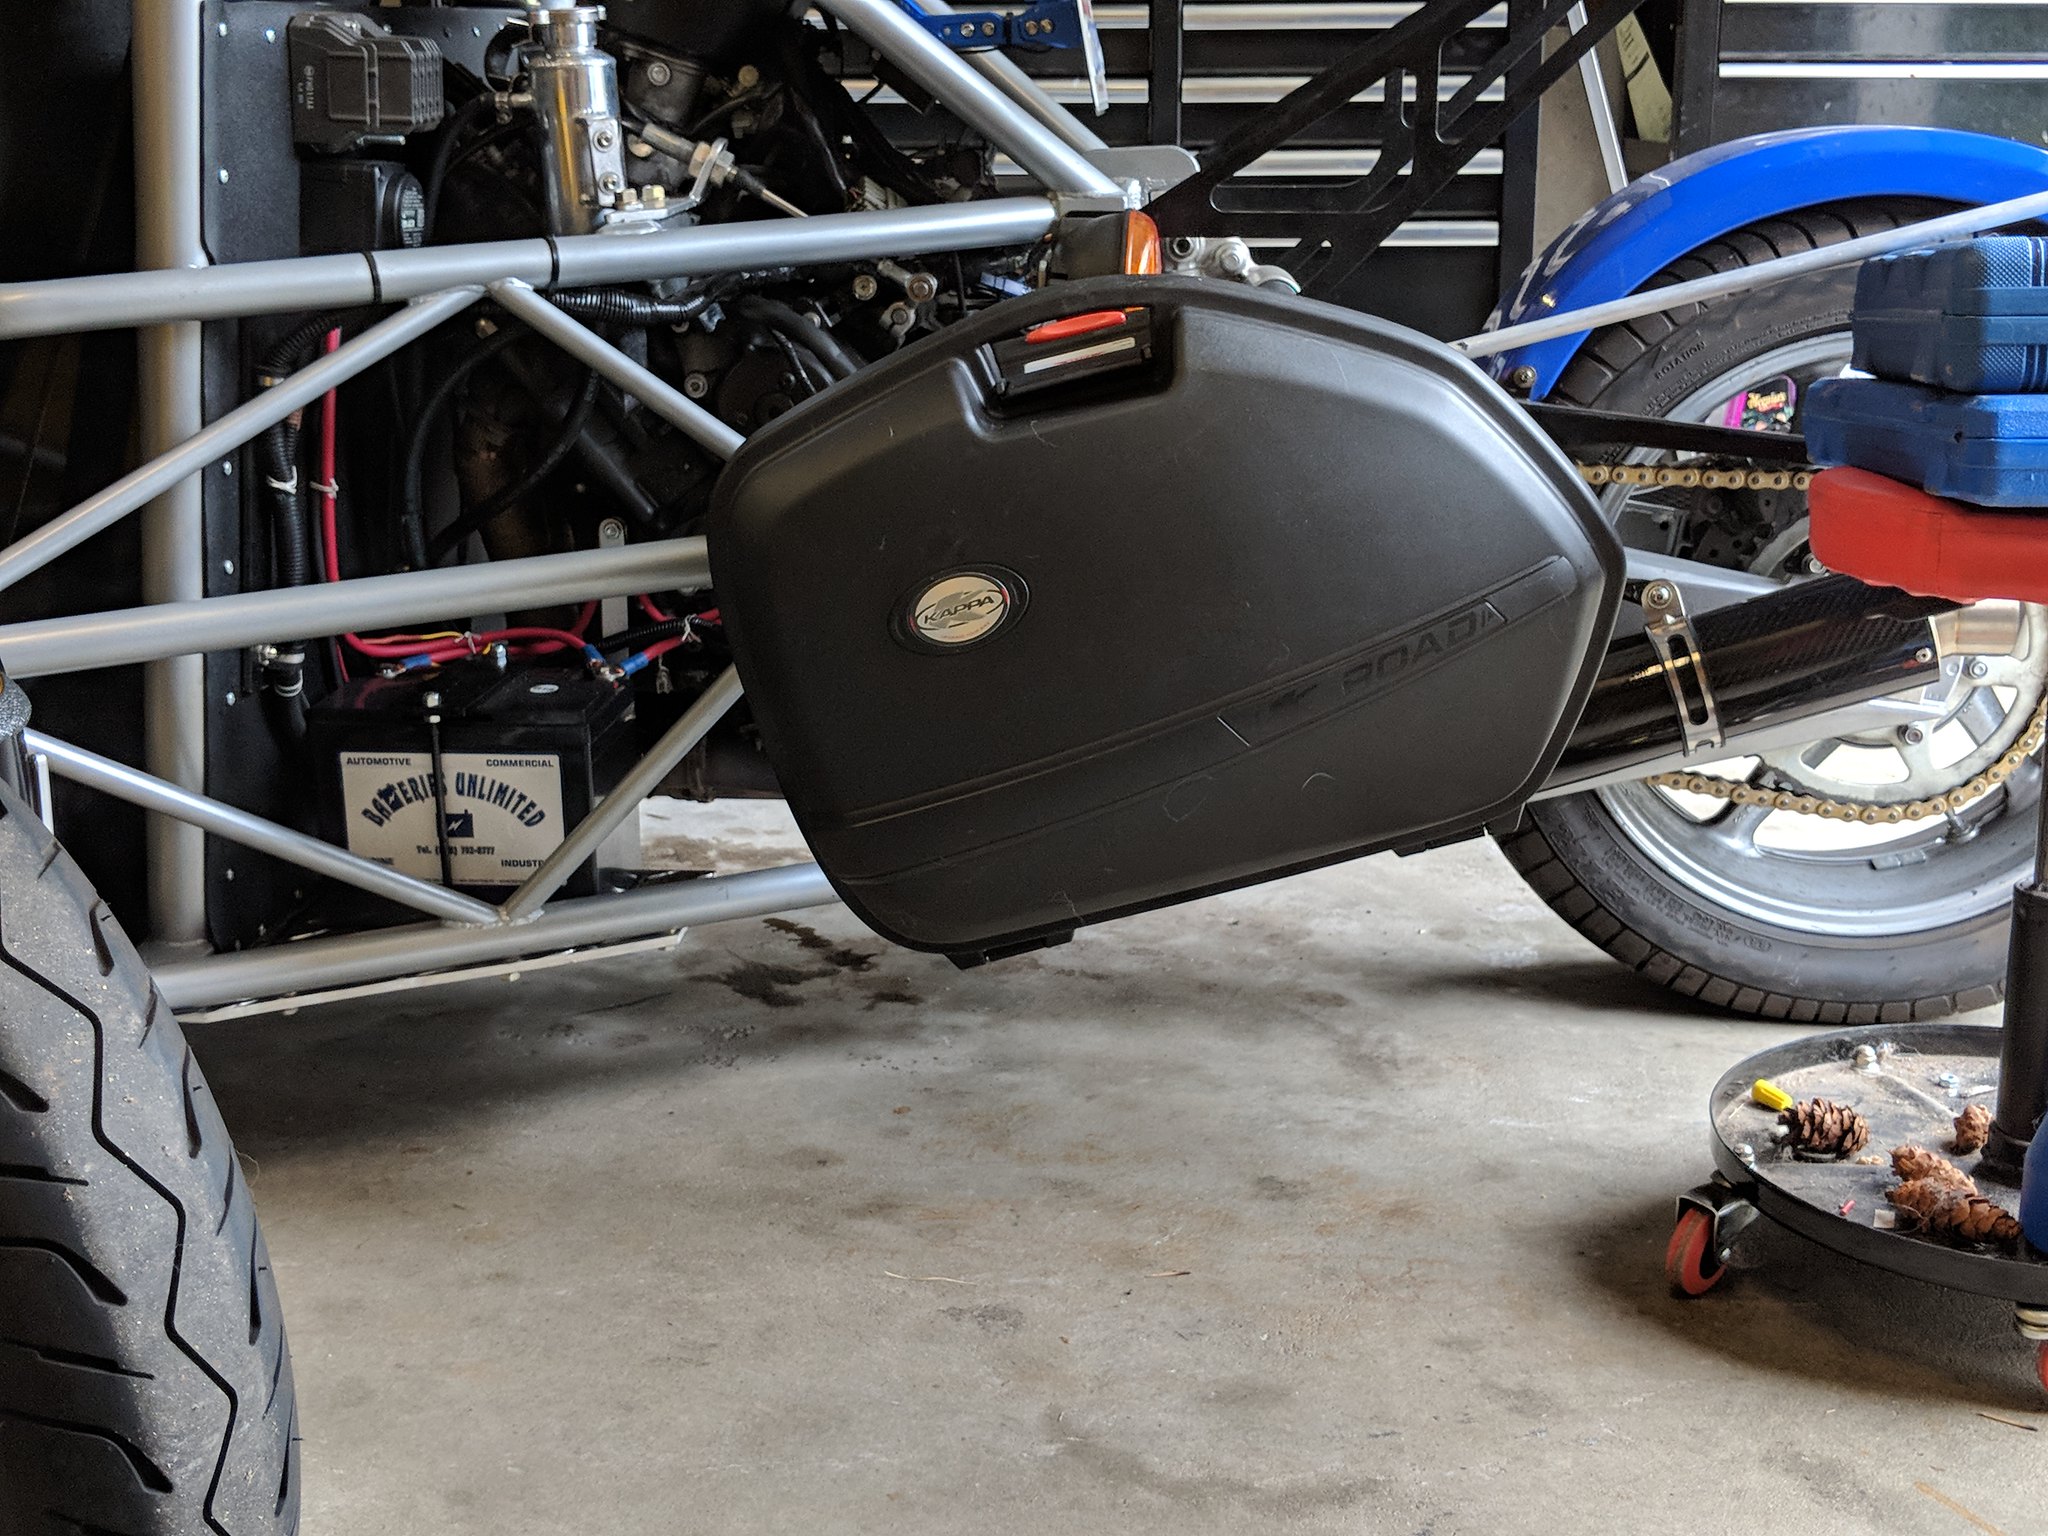 MVIMG_20180730_170713 MVIMG_20180730_170713 by Roger Baker, on Flickr 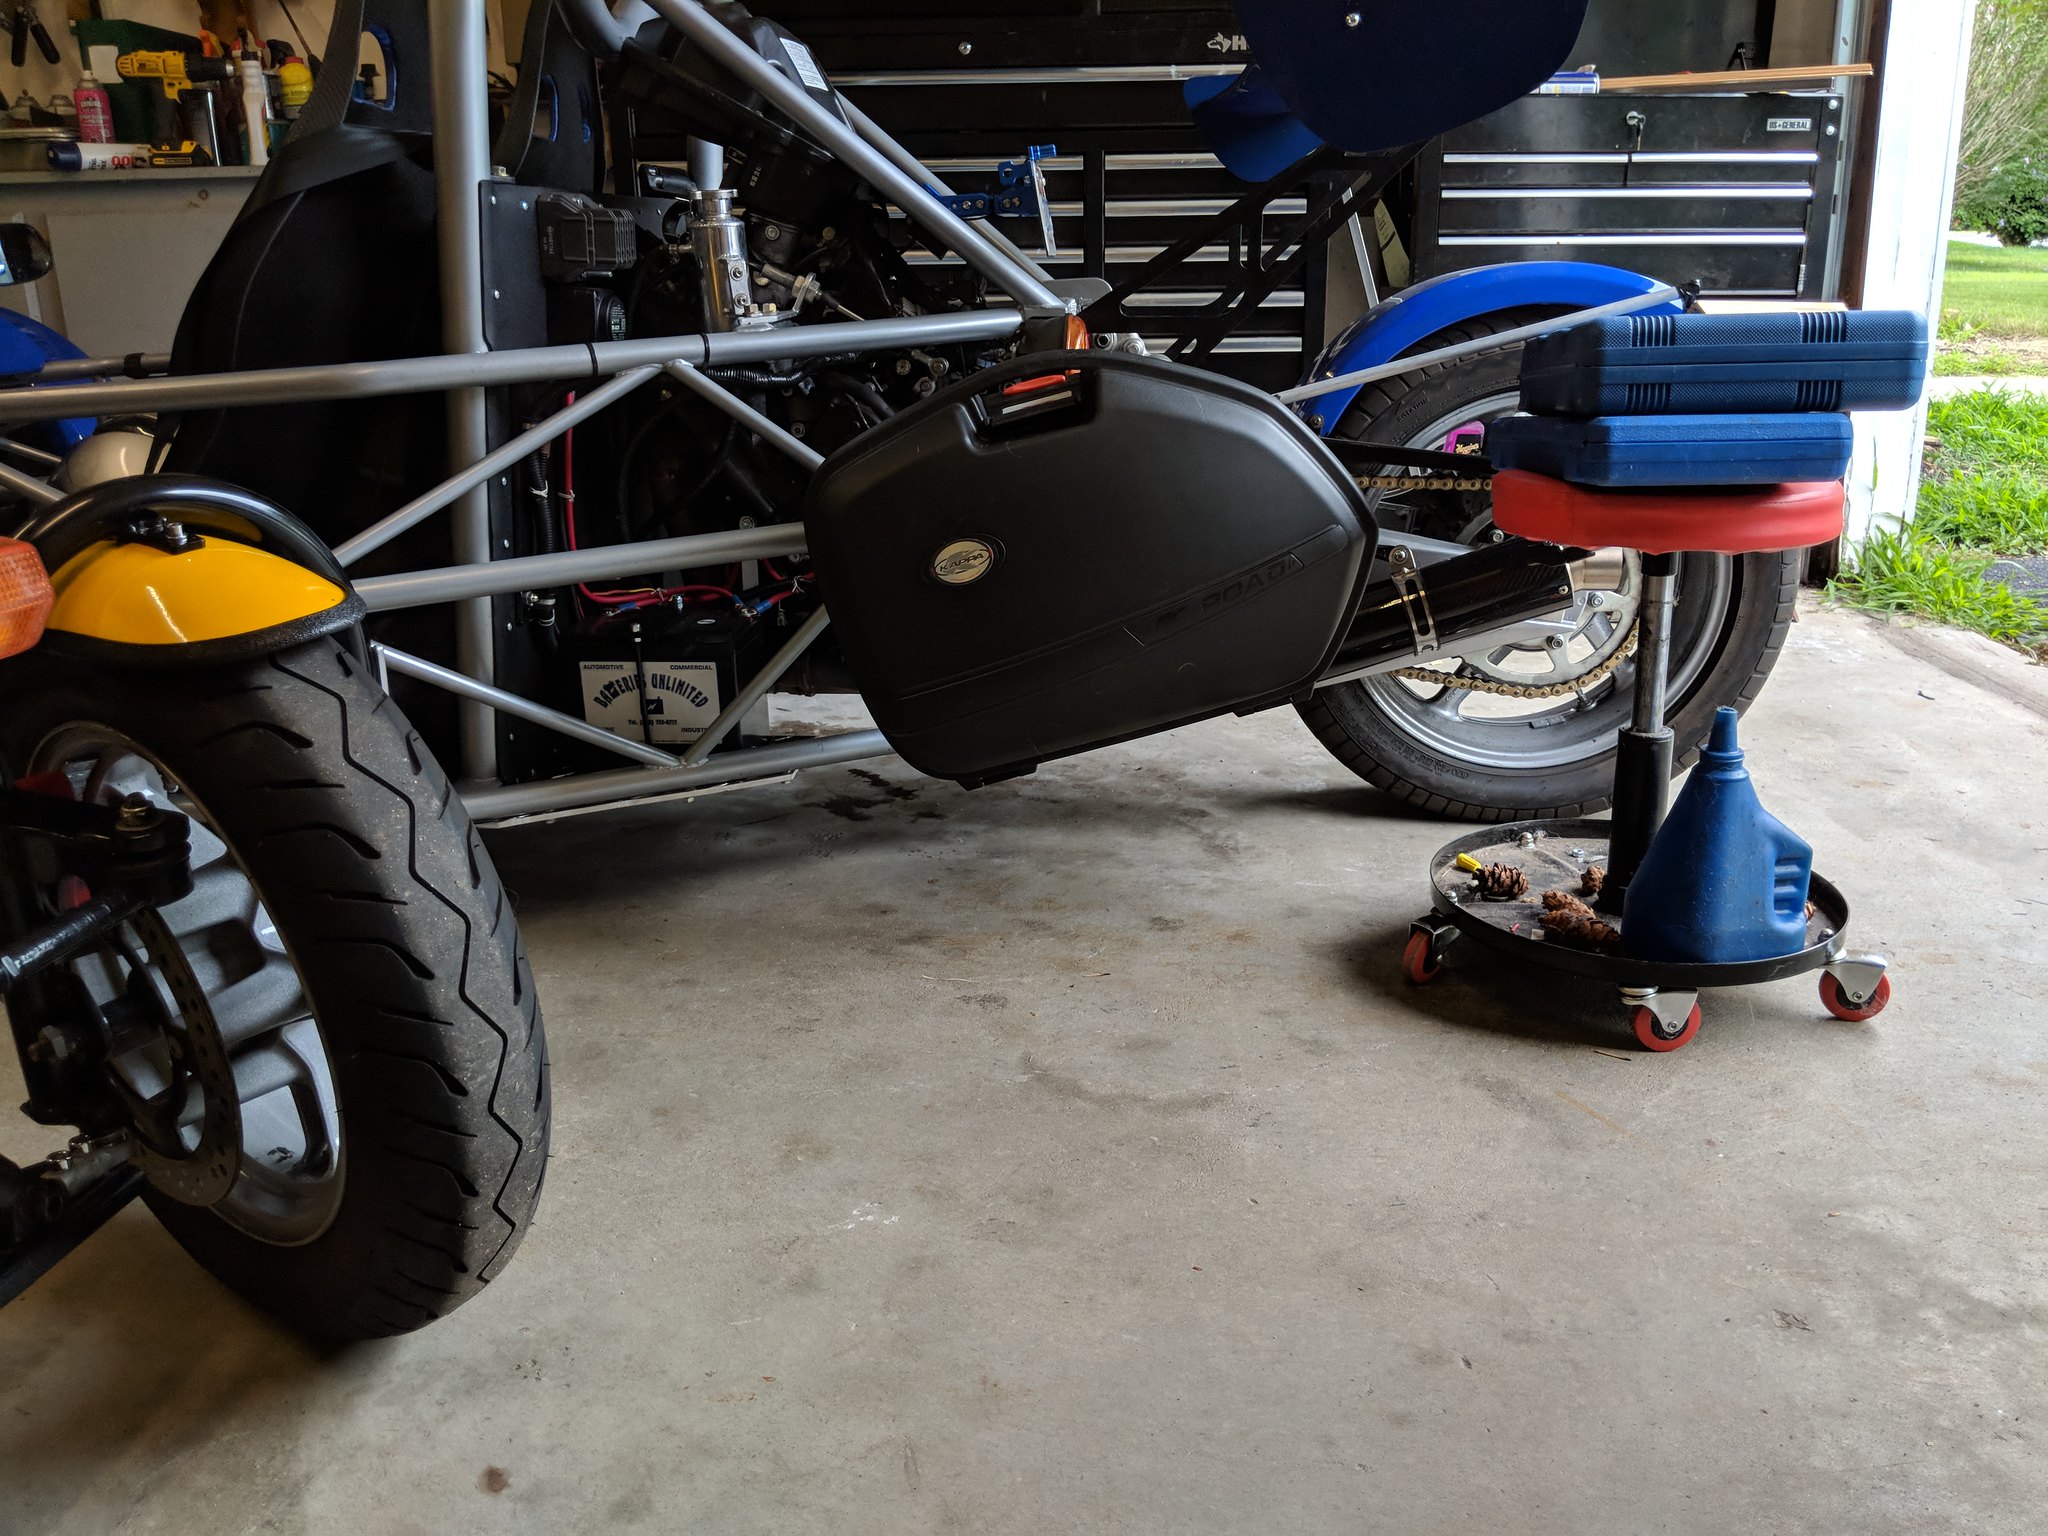 MVIMG_20180730_170707 MVIMG_20180730_170707 by Roger Baker, on Flickr I am looking at a different location for my saddle bags. I will not need to relocate the rear lights nor make modifications to the spoiler canards. Attaching them to the side rails with Kuryakyn chrome accessory clamps, or "P" clamps will make mounting them easier, but a little more expensive at $20.00 per clamp and I need 4 of them. |
|
|
|
Post by roger on Mar 7, 2019 1:36:05 GMT -5
Roger I found this video today and thought it might help a little. I checked out the side bags in the video. They are the soft sided ones. I am not to fond of those especially after buying the Kappa 33's. It looks as though he has them mounted to wrap around the center frame side rail. I am actually taking my design from a TR1KE with Givi E41 bag's mounted on the side like the one pictured below. 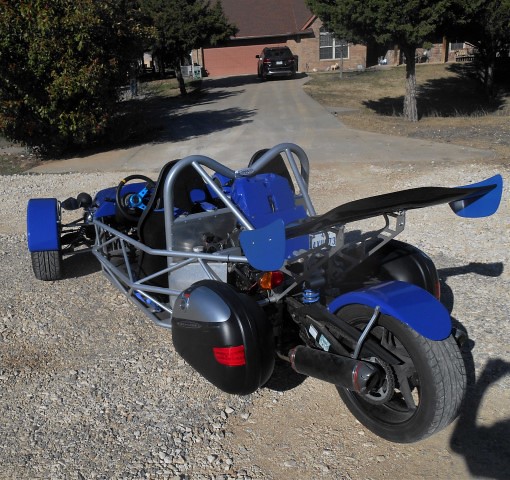 Trike rear view from left Trike rear view from left by Roger Baker, on Flickr I have the mount for the left side all mocked up and welded. I just need to decide exactly how (and where) to mount it. 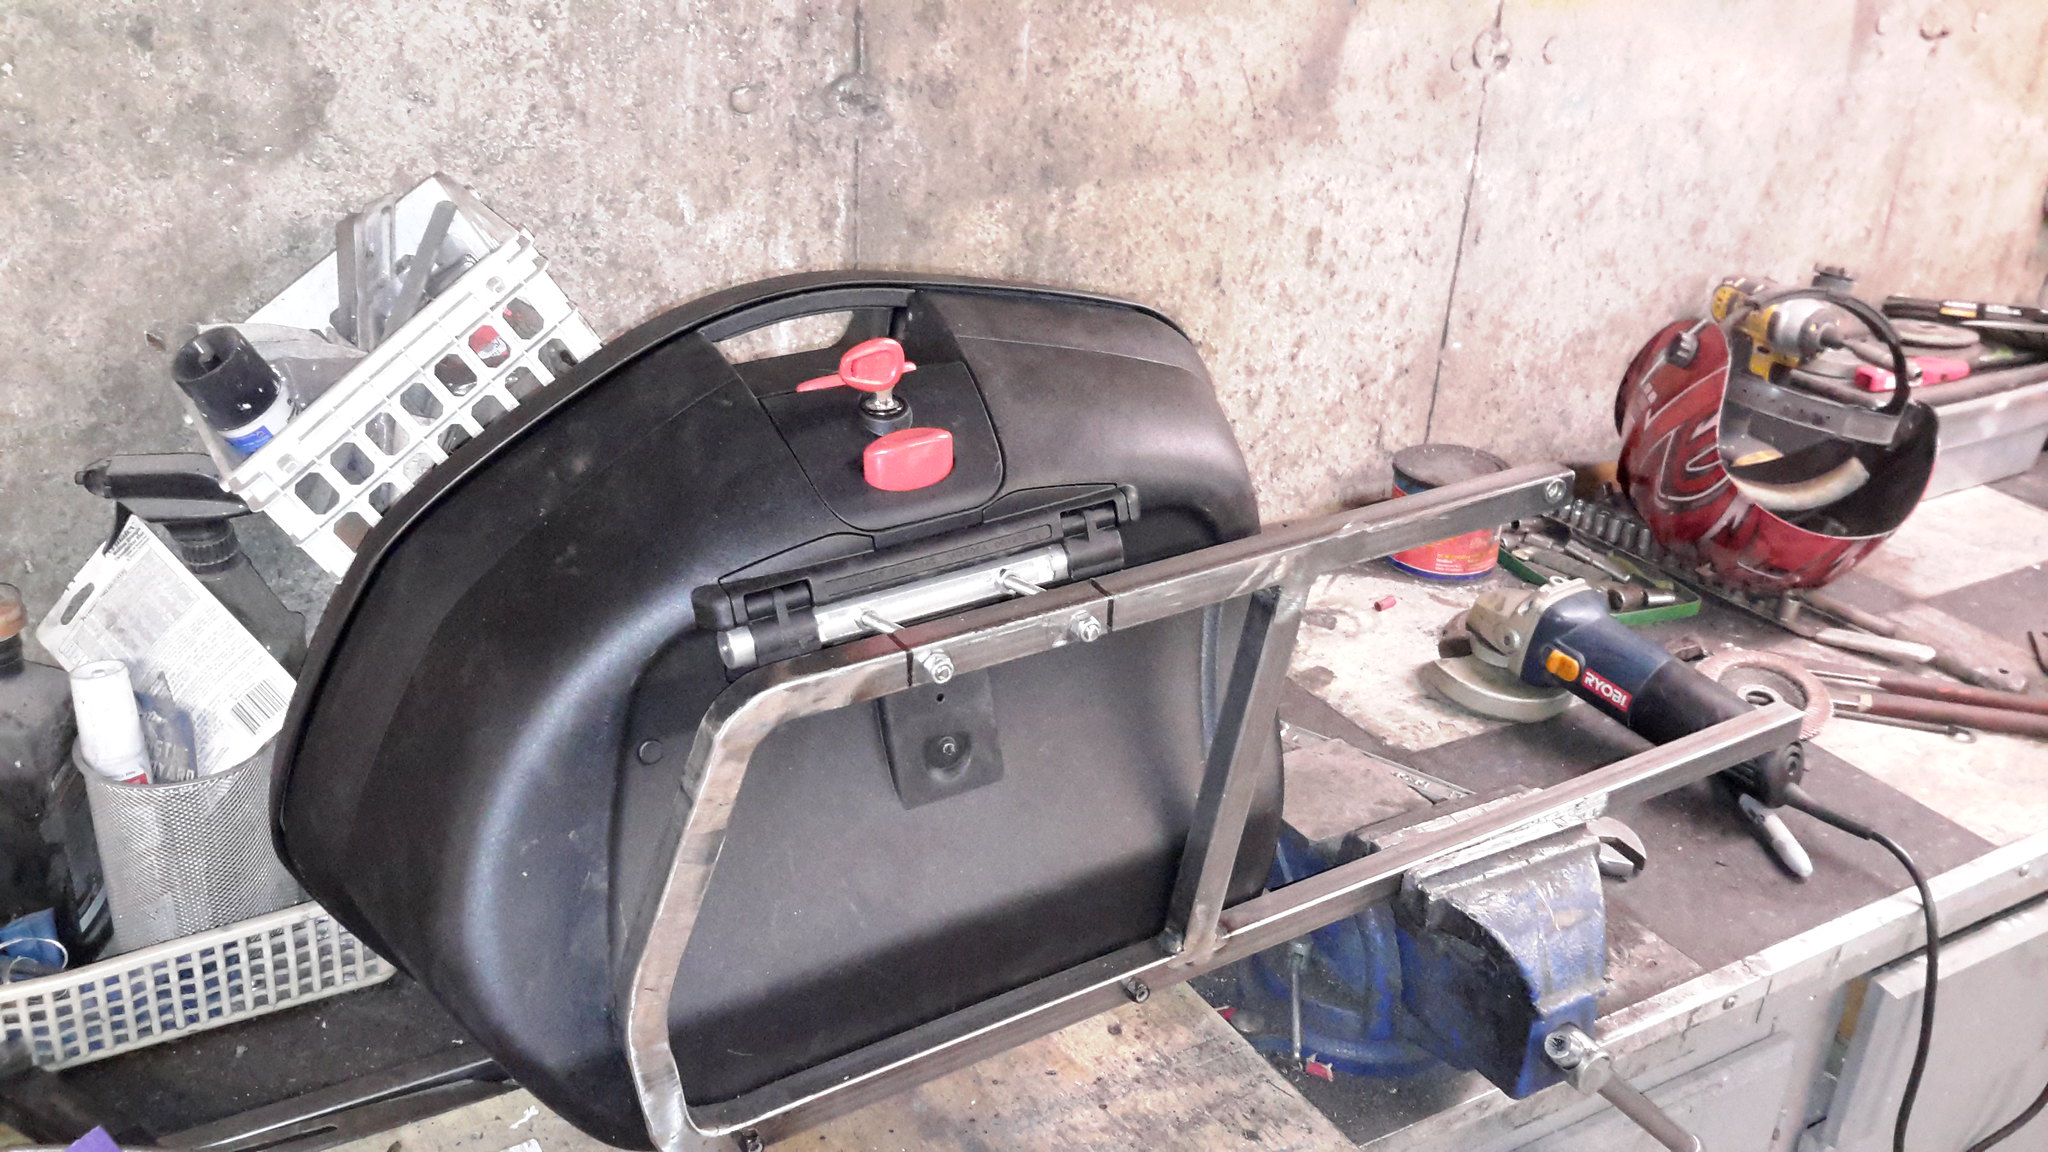 20180801_060625 20180801_060625 by Roger Baker, on Flickr Okay, I have the right side saddlebag mounts welded up. I need to order some "P" clamps for mounting to the 1-1/4" chassis rail. Once I get everything to fit and align with each other, then I will sand them down and send them in for powder coating. I will post fitment photos later. UPDATE: I ordered 4 each 1-1/4" "p" clamps for the mounts. They should be here before next week ends. Once I have the two hangers tightened then I can work on the cross braces. Thats all for now. Roger Worcester, Massachusetts Roger - looks great so far and can't wait to see what you do next. I have my TR1ke on order now. Thanks for all the info you sent me via text and I hope to contribute to the discussion when my kit arrives. -Dennis Welcome to the forum Dennis. It was a pleasure speaking to you earlier. Enjoy your build, make it yours... Roger I am still waiting for my wall plaster to set up so I can paint the “LOO”. I decided to let it cure for a couple of days and will paint then. Meanwhile back at the ranch..... I have been finishing up on my saddlebag mounts for the Kappa K33N hard bags. I ordered 4 of those 1-1/4 inch 3 section clamps. They are quite robust and really hold well. When I made the framework, I used the left side mounts as a template to make the right side. The bags fit nicely I am glad to say. I did have to make some spacers and hole reducers. The clamps came with 1/2 inch mount holes, I am using 5/16 inch hardware, so the reducers were necessary. After I got both bags mounted, I made a small angle adjustment to the right side. Both bags are at the same angle and height. All that remains is to make the sway support bars to keep the bags from flapping in the wind. I will be heading out to the Sandpaper store tomorrow for some 180 and 400 grit to prep the pieces for powder coating...(gloss black) Tomorrow is the Wednesday car show at the Market Basket super Market parking lot. Usually about 150 to 250 nicely done cars. Hopefully I will make it out weather permitting. Will take the Yellow Eco-Exo-R. That’s it for now, I will post some pictures later. Roger Worcester, Massachusetts |
|
|
|
Post by roger on Mar 8, 2019 0:37:48 GMT -5
PAGE 21 I am not sure how much of a following the TR1KE has on the forum, from the very fact that I seem to be the only live body doing any posts, I can assume I am pretty much "it". If there is anyone building anything it isn't likely to be on 3 wheels. From a journalistic viewpoint, it is safe to assume, not to many folks read what I enter,or are only casually skimming the pages and not curious enough to inquire about the process.... Sooooo, with that being thrown out there, I am continuing to enter as long as I am working on my TR1KE. At some point though, I will be finished with my modifications and there wouldn't be much of a reason to post about building or modding that's already been completed. As of right now, I have the frames for my saddlebags at Central Mass Powder Coating. They REALLY increased their prices. Holy cow, $150.00. That includes media blasting, etching, primer and gloss black top coat. What I like about powder coating is its durability. The frames will be ready tomorrow. When we get some decent weather I will be taking pictures. One of the things about the design of the frame's is the fact I didn't need to drill any holes in the chassis to mount them. I used chrome 1-1/4" clamps and spacers. As always, pictures to follow. Roger Worcester, Massachusetts Being one small page of the many MEV kits I do not see too many members even thinking about 3 wheels. 4 wheels are BORING. Some of the t R1ke owners need to show up to more Track Days to show those 4 wheel CAGED animals whats up. I take my trike(s) to the local car shows. I usually go and see what is there first, then circle back and answer questions about my TR1ke and Eco-Exo-R. I get a lot of interest in the idea of doing a build, but let’s face it, the Slingshot and Vanderhall trikes have really put MEV kit car trikes in the hurt locker. The onlookers don’t want to build one, they just want to own one. For less than $30K I can own either of them. My preference would be the Vanderhall with frontwheel drive and automatic. I tried out the Slingshot, they need to build one with a less aggressive looking style. The retro-style of the Vanderhall is reminiscent of earlier British craftsmanship found in the older sports cars. Meanwhile, back to reality..... I do enjoy my trikes very much and would not want to get rid of them.... at least not at the moment. Who knows what will come around the corner. I do have a PPL and might get into the flying trike gondola, or a closed body ultralight. Something I could fold the wings up and take it out fly it and then go home. Roger Worcester, Massachusetts 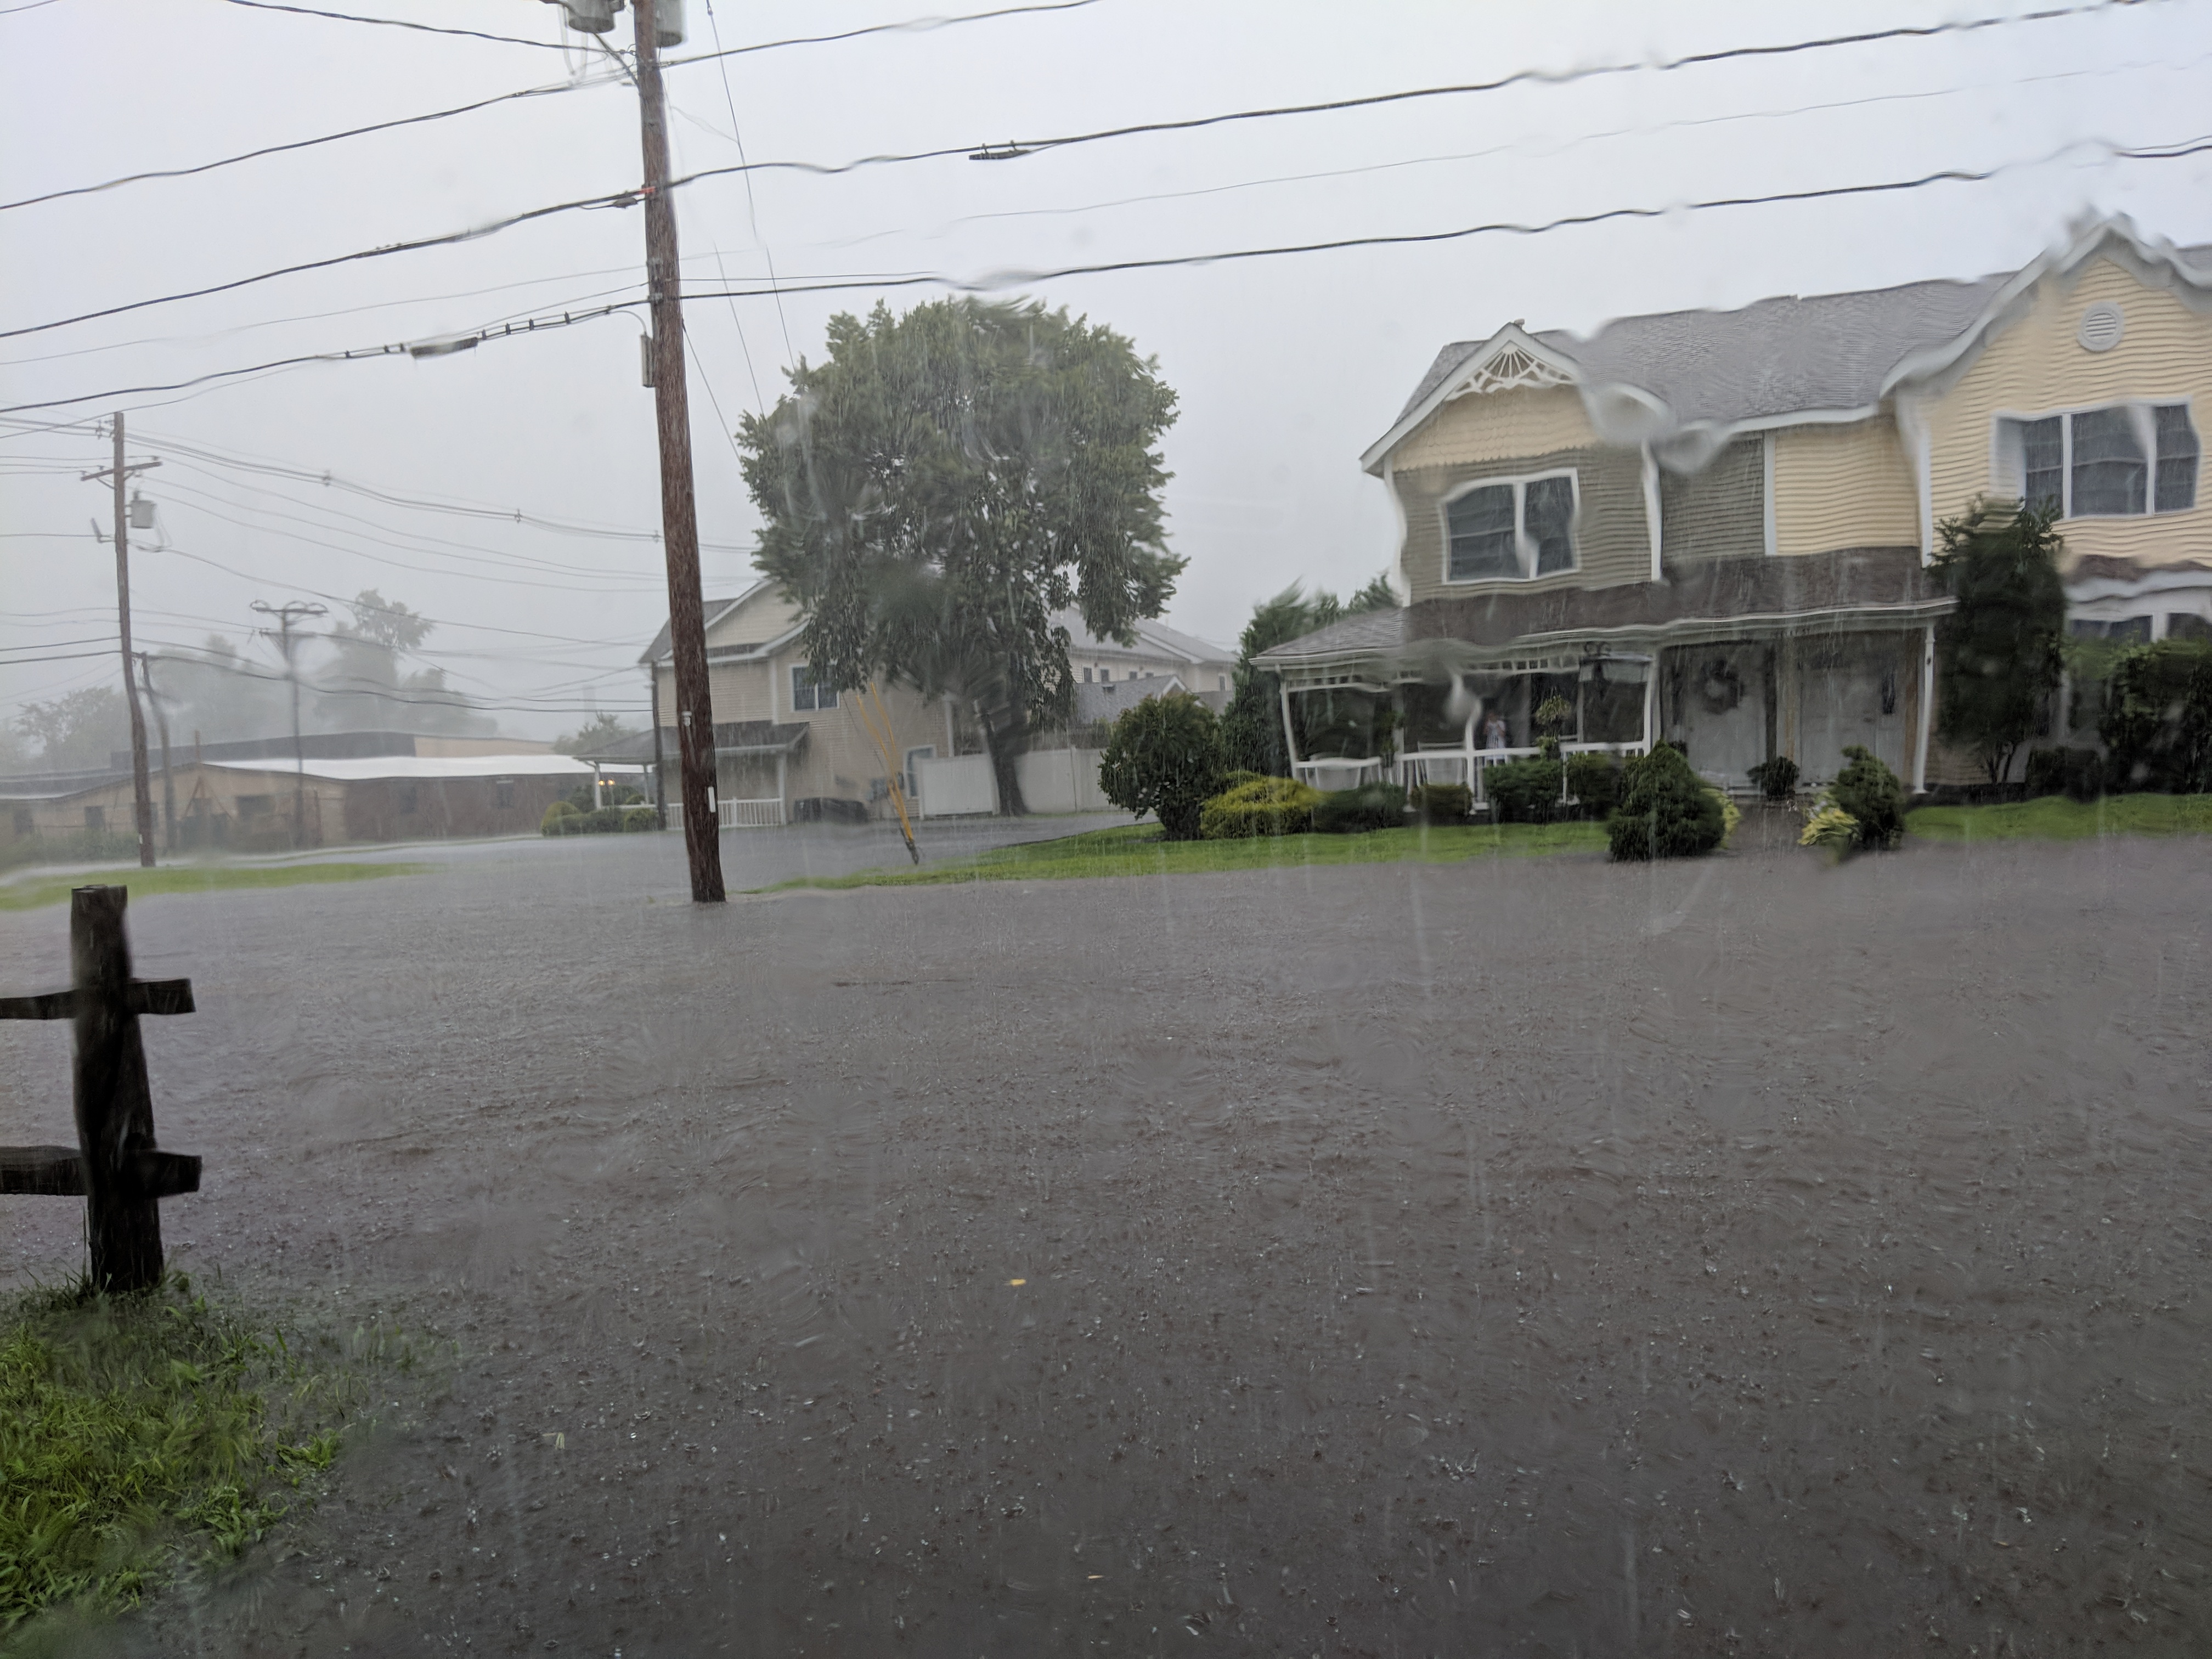 MVIMG_20180814_140742 MVIMG_20180814_140742 by Roger Baker, on Flickr When I went to pick up my parts from the powder coating company it just started to rain. Within 15 minutes it turned into a deluge of water. It was so fast and intense by the time I picked up my parts, the streets were running rivers. The picture here was taken from the parking lot just in front of Central Mass Powder Coating. The street had about a foot of water rushing down it. Roger Worcester, Massachusetts 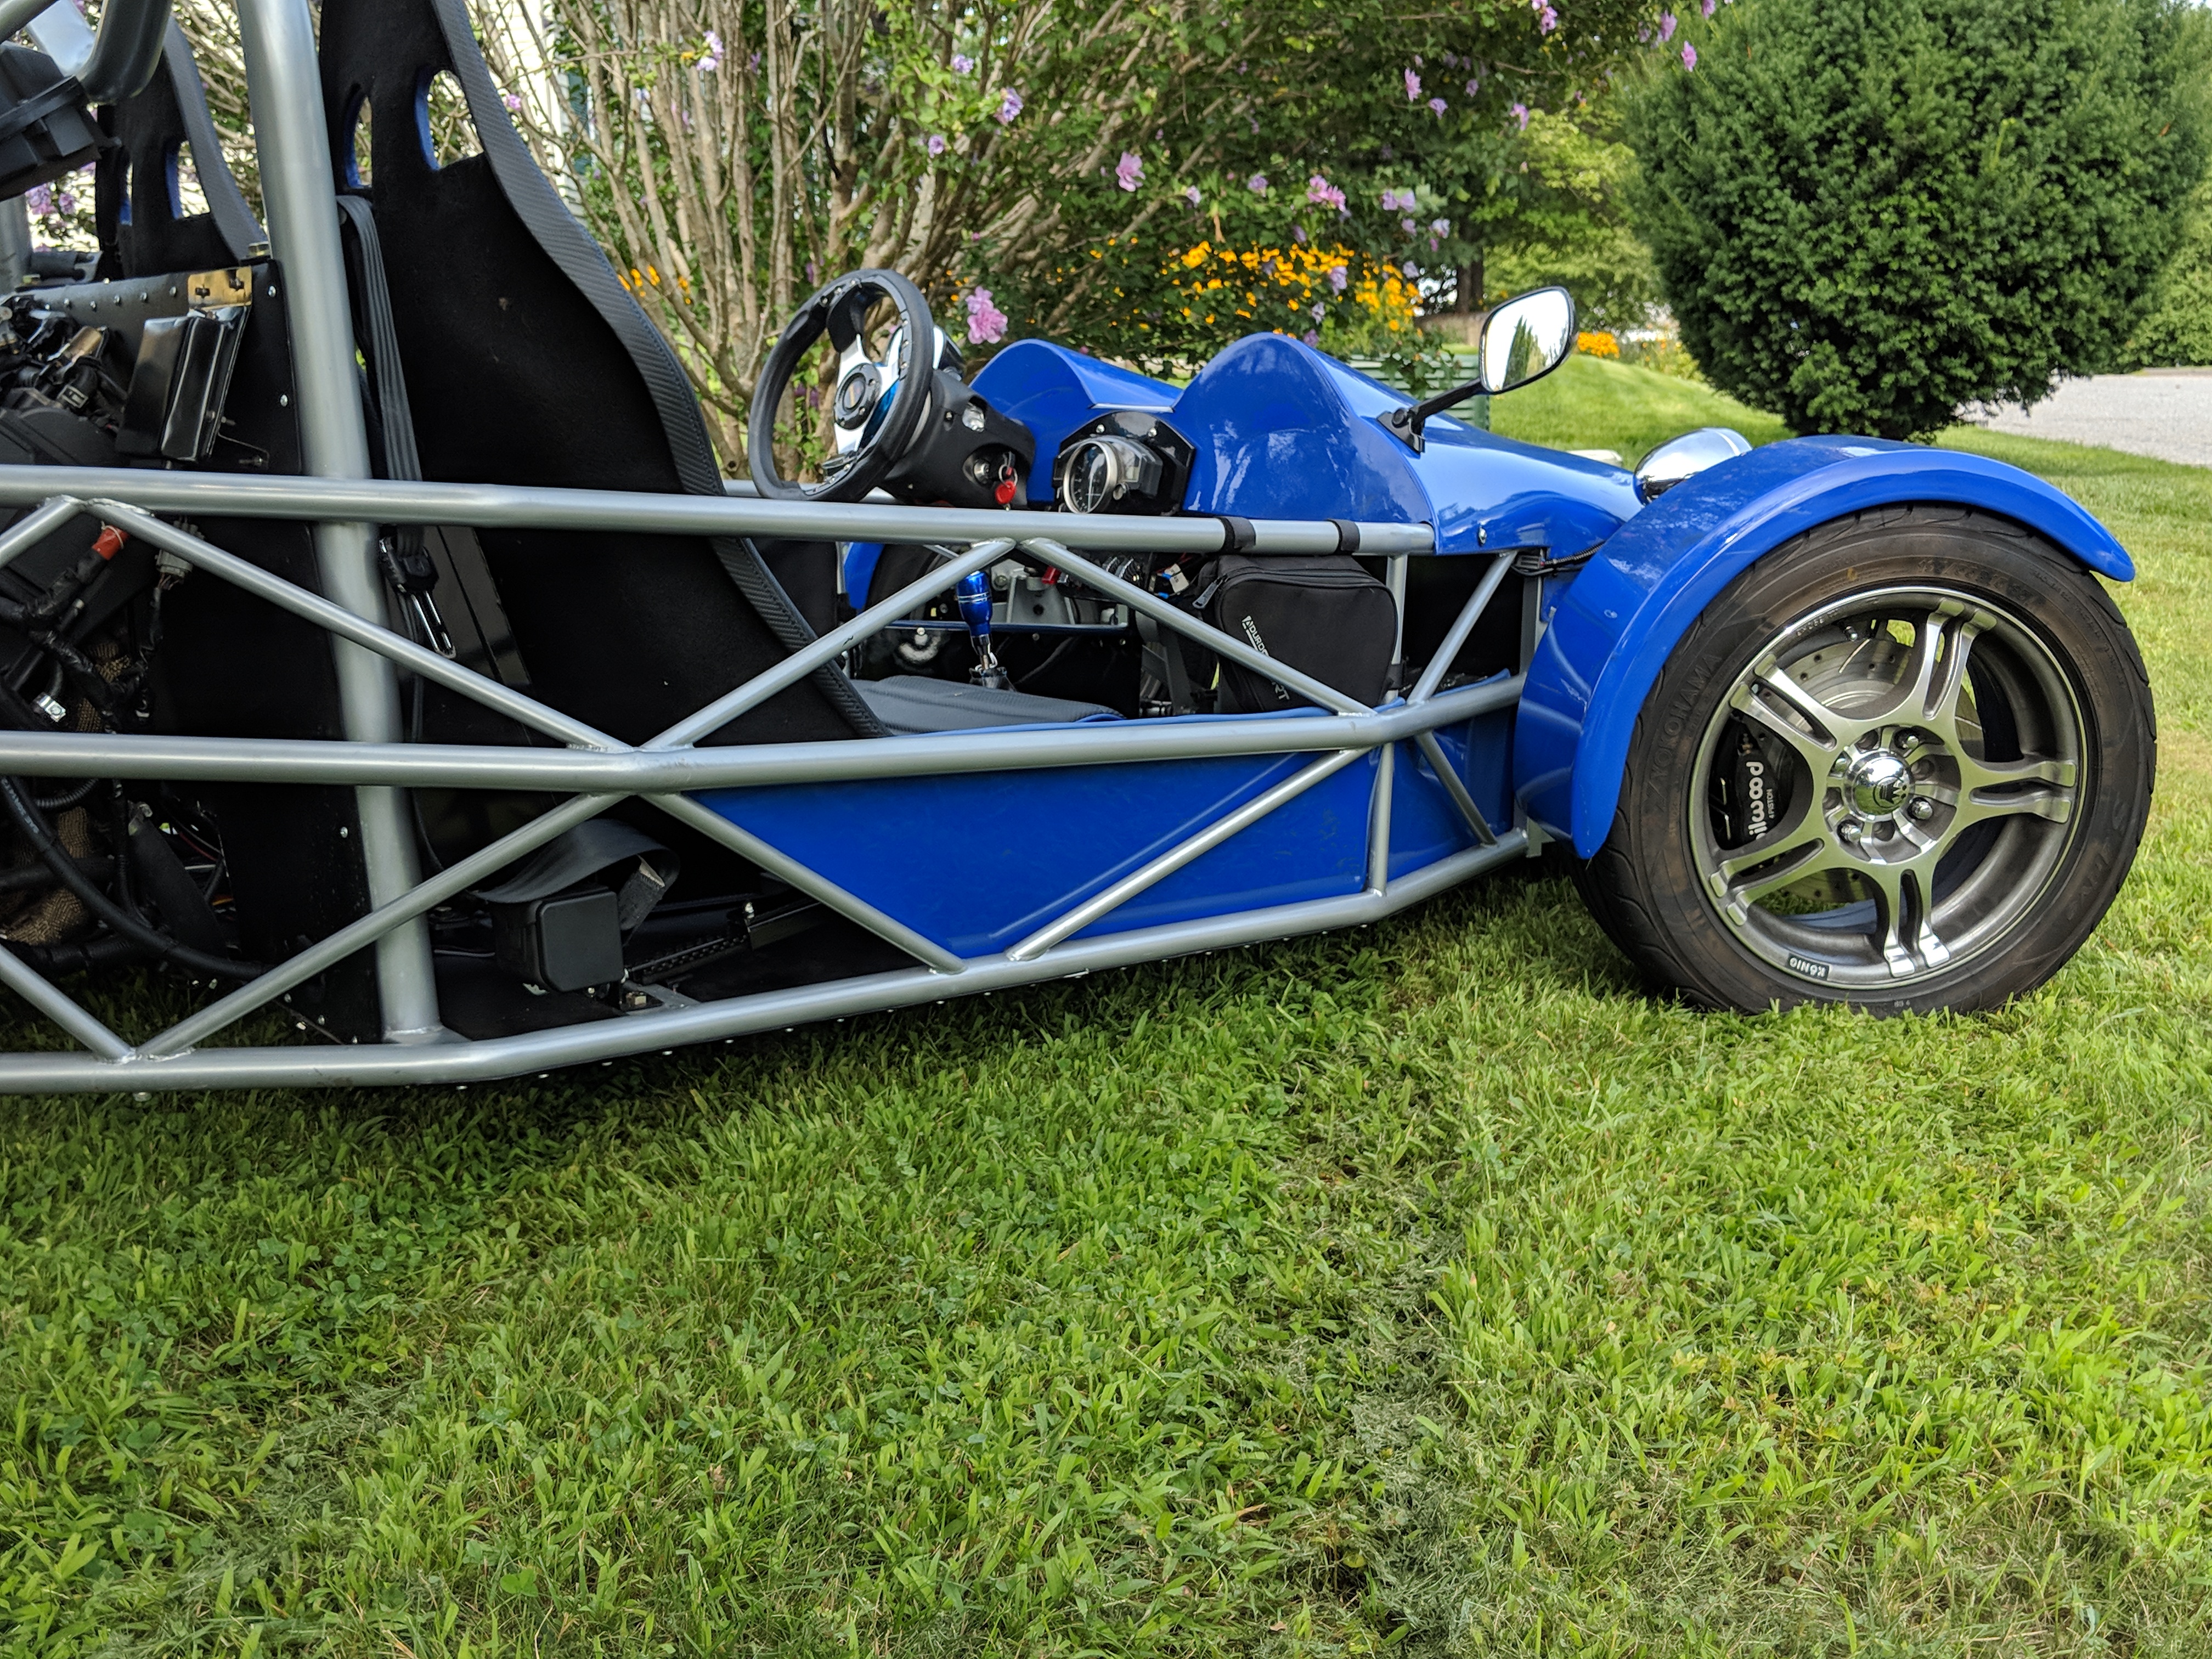 MVIMG_20180819_153702 MVIMG_20180819_153702 by Roger Baker, on Flickr I installed the lower panels. I had them color matched to the rest of the blue parts. Hopefully these will stop all the sand, small stones and tire wash from landing inside the passenger compartment 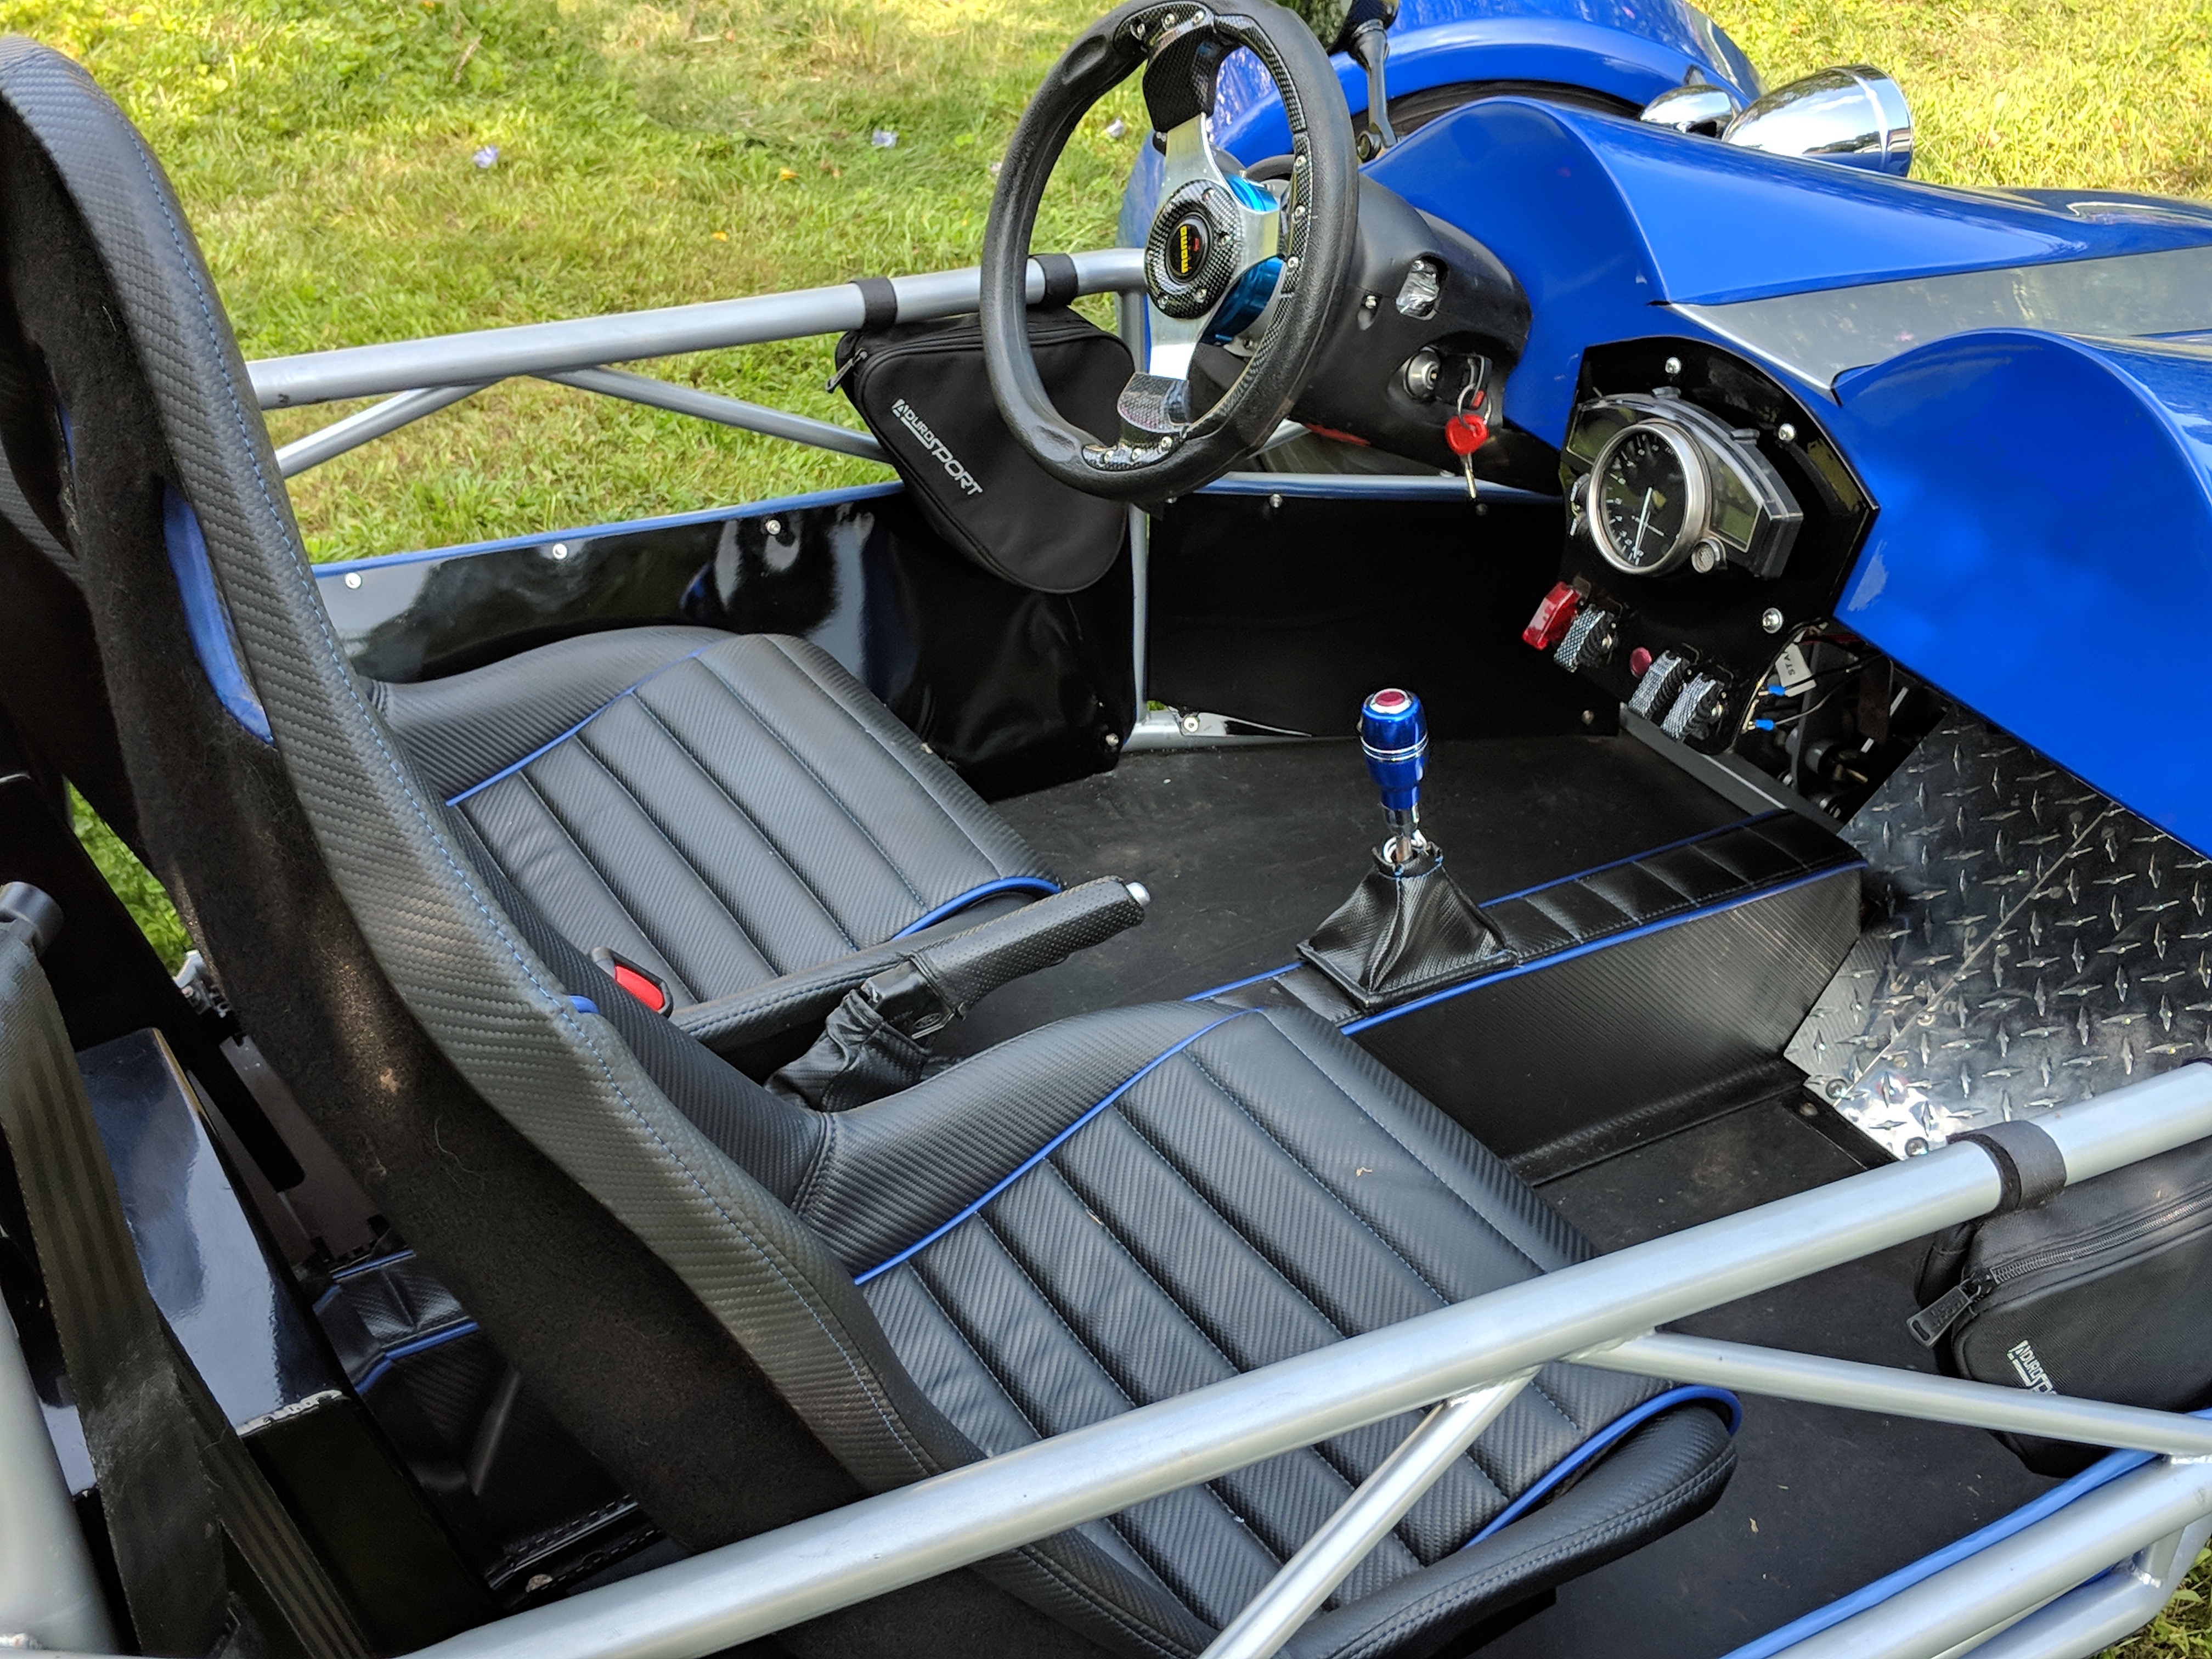 MVIMG_20180819_153813 MVIMG_20180819_153813 by Roger Baker, on Flickr The interior is done. I managed to get the seats lowered, to be beneath the rollbar. The c0ckpit layout works pretty well and the cable gear selector is a bit spongy feeling but I have NO trouble finding gears. |
|
|
|
Post by roger on Mar 8, 2019 0:49:41 GMT -5
I have thought on this for quite some time. I believe I am finished with my TR1ke. It's solid, pretty nice looking and performs quite well. It is as close to a SUPER CAR as I will ever get. With that, I will stop with the build information and enter a few road trips and day drives. I am done with this build. Its riding time. Roger Worcester, Massachusetts It is sad that Reverse trikes are just viewed as "Toys". The Gen Pop just does not get how well these would fit in real world use. A little less so with R1 or Hyabusa power but a trike like the ECO-EXO done in EV or small gas engines for a commuter would save a lot of pollution, replacing a car that has 1 person commuting to and from work that gets 30 MPG, with a Trike that has the same 1 person doing the same commute but getting 70-80 MPG GAS or 220 MPGe on electric. This MEVOWNERS forum is a good place to see some good designs but it is mostly a forum of guys and girls that want a "TRACK DAY" car that will not see everyday use. Kind of generalized opinion but from my reading of topics that is my overall view. The NEED of a replacement vehicle to commute has always been a hard sell. This is why Elio will no doubt fail. Nobody wants a cheap, economical, 1 (or 2) person commuter. Elio has a wonderful idea and has spent his fortune and a good deal of others money to land exactly where he is now, broke and begging for a chance to prove his idea of the All American Commuter car can be a reality. On the other hand, you offer a snazzy body, a 175 HP engine and call it a Slingshot, Vanderhall or T-Rex then it's another Kettle of fish. In my case, it's an Eco-Exo and a TR1ke. The Eco-Exo gets 55-60 MPG, The TR1KE gets at least 35 to 40. My hybrid car gets 40 to 45 MPG in town, sometimes more if I can run 100 percent in EV Mode. A vehicle rarely becomes more than its original intended use. The big guns in Detroit (and elsewhere) rarely allow vehicles to see their full potential. Ford gave us the Pinto in the 70's, Chevrolet the Vega, and Chrysler the K-car. All were disposable vehicles that, at the time, we're great on gas mileage compared to a full sized vehicle of the day. Imagine what they would be like today if allowed to be refined into small commuter cars. However in the UK, they were making the best selling car in the world..... The Mini and had been making it since 1959, a fun car, very easy on gas, and went like a bat out of hell. The new Mini not an evolved old Mini. It's something else altogether different. Some people want a Track car. I want a hot rod and something fun to drive. Some people do want a cheap economical commuter, there are millions, maybe billions of them out there already. They are called bicycles and cities all across the USA and in Europe are modifying street markings and making special lanes and paths for them. Portland Oregon is the home of the commuter bicycle hybrid vehicle. It will go 25 MPH and go a distance of about 35 miles on battery power alone,is solar rechargeable ND is called the ELF. I don't disagree with you Dave, it is just unfortunate set of circumstances for those that try to make something economical and fail. The ELF has a very good start. The company is small and I assume still in business. They ship world wide and stand behind their product. It is a sure bet no one there is interested in racing or taking their ELF to a track day. Check them out. Also, in Washington State Paul Elkins makes a LOT of neat stuff that is environmentally friendly, from shelters to boats to transportation. His Web site is Elkins DIY I believe you and him would have a lot in common. Hang in there Dave, some day the need for an environmentally friendly single seater electric vehicle will be filled. Roger Worcester, Massachusetts Wow I just had a chance to see the pictures. I am blown away on your finished masterpiece!!! I might even trade mine for it;-) Super job Roger and a big WELL DONE!!! The side cases look great in that position. Hopefully I will see you in a month if everything goes right. For the years I have had mine I have met a lot of people that thought it would be the perfect vehicle for them and all said that must be a blast to drive around in. I am glad to have found this site , Become good friends with Roger and be able to build the Eco Exo R and enjoy the finished machine after all these years. Roger built two and he is slightly older then I am. I hope the Solo and FUN make it to mass production. We will see in the next two years if that happens. Dave you have two new vehicles to wet your appetite again. For me this will be my last vehicle I will build but it sure is a keeper! Dave you are lucky to be in an area that is in the heartbeat of small commuter vehicles. You can either ride the 650 Burgy and dream or do something about it. I am glad Roger and I did the latter. Good luck Dave and Roger try to keep at least three wheels on the road some of the time It has been a long haul getting this project done. As with all endeavours, sometime's frustrating, sometimes not, but always a pleasure in the end. One of the purposes of the forum is to learn from others a better way to do a build as well as passing on information that you yourself learned. There were regular viewers and guys that commented. I relied on the experience of previous builders as well as those that had very good mechanical abilities. My special thanks to Eddie, Slugshot, Dave and Peter Dove of Dove Racing. Thank you all for being a part of this experience. If ever anyone needed guidance, it was me. The kit was actually made in 2014 and one of the last ones from Road Track Race. I have to say, it was (is) flawless. The welds were perfect and the fitment precise. As soon as the rainy weather ends, I will be taking a nice long ride up the Mohawk trail and straightening some curves along the way. It's not been the best of weather lately. It's rained for the last two weeks. Between the showers there may be a chance to do some short hops. Cheers everyone and thanks for making my build easier and better.... now to "Drive it like I stole it". Roger Worcester, Massachusetts For those days it rains  |
|
|
|
Post by roger on Mar 8, 2019 0:59:43 GMT -5
PAGE 22 I had a boat once. JUST ONCE!! I was checking over the trike after taking all of the pictures on the previous page and found I lost a couple of bolts that were screwed into rivnuts. I am NOT a huge fan of using rivnuts to secure anything if I have an alternative method. In this case there wasn't much I could have done. I will remove them and install something???. I am looking at what works best, rather than just "what works". Maybe weld-o-lets, or coupling nuts welded in. While I had the bonnet off, I installed a battery isolation switch, not mandatory in the U.S. I just wanted to be able shut off all power when it goes into storage this winter. I also installed a new AGM battery. One of the unofficial acid tests for checking a battery is to blast the horn a couple of times. I did that but my horn sounded like I was chocking the life out of a budgie. Not the masculine sound I wanted to have associated with my TR1ke. I had an air horn I bought at the Americade motorcycle rally a few years ago, so I installed that. Big difference in sound. I went from budgie to big rig in the matter of a few minutes. It is in line with why bikers have loud pipes: "If you can't be seen, be heard" or "Its better to be loud than dead". Roger Worcester, Massachusetts 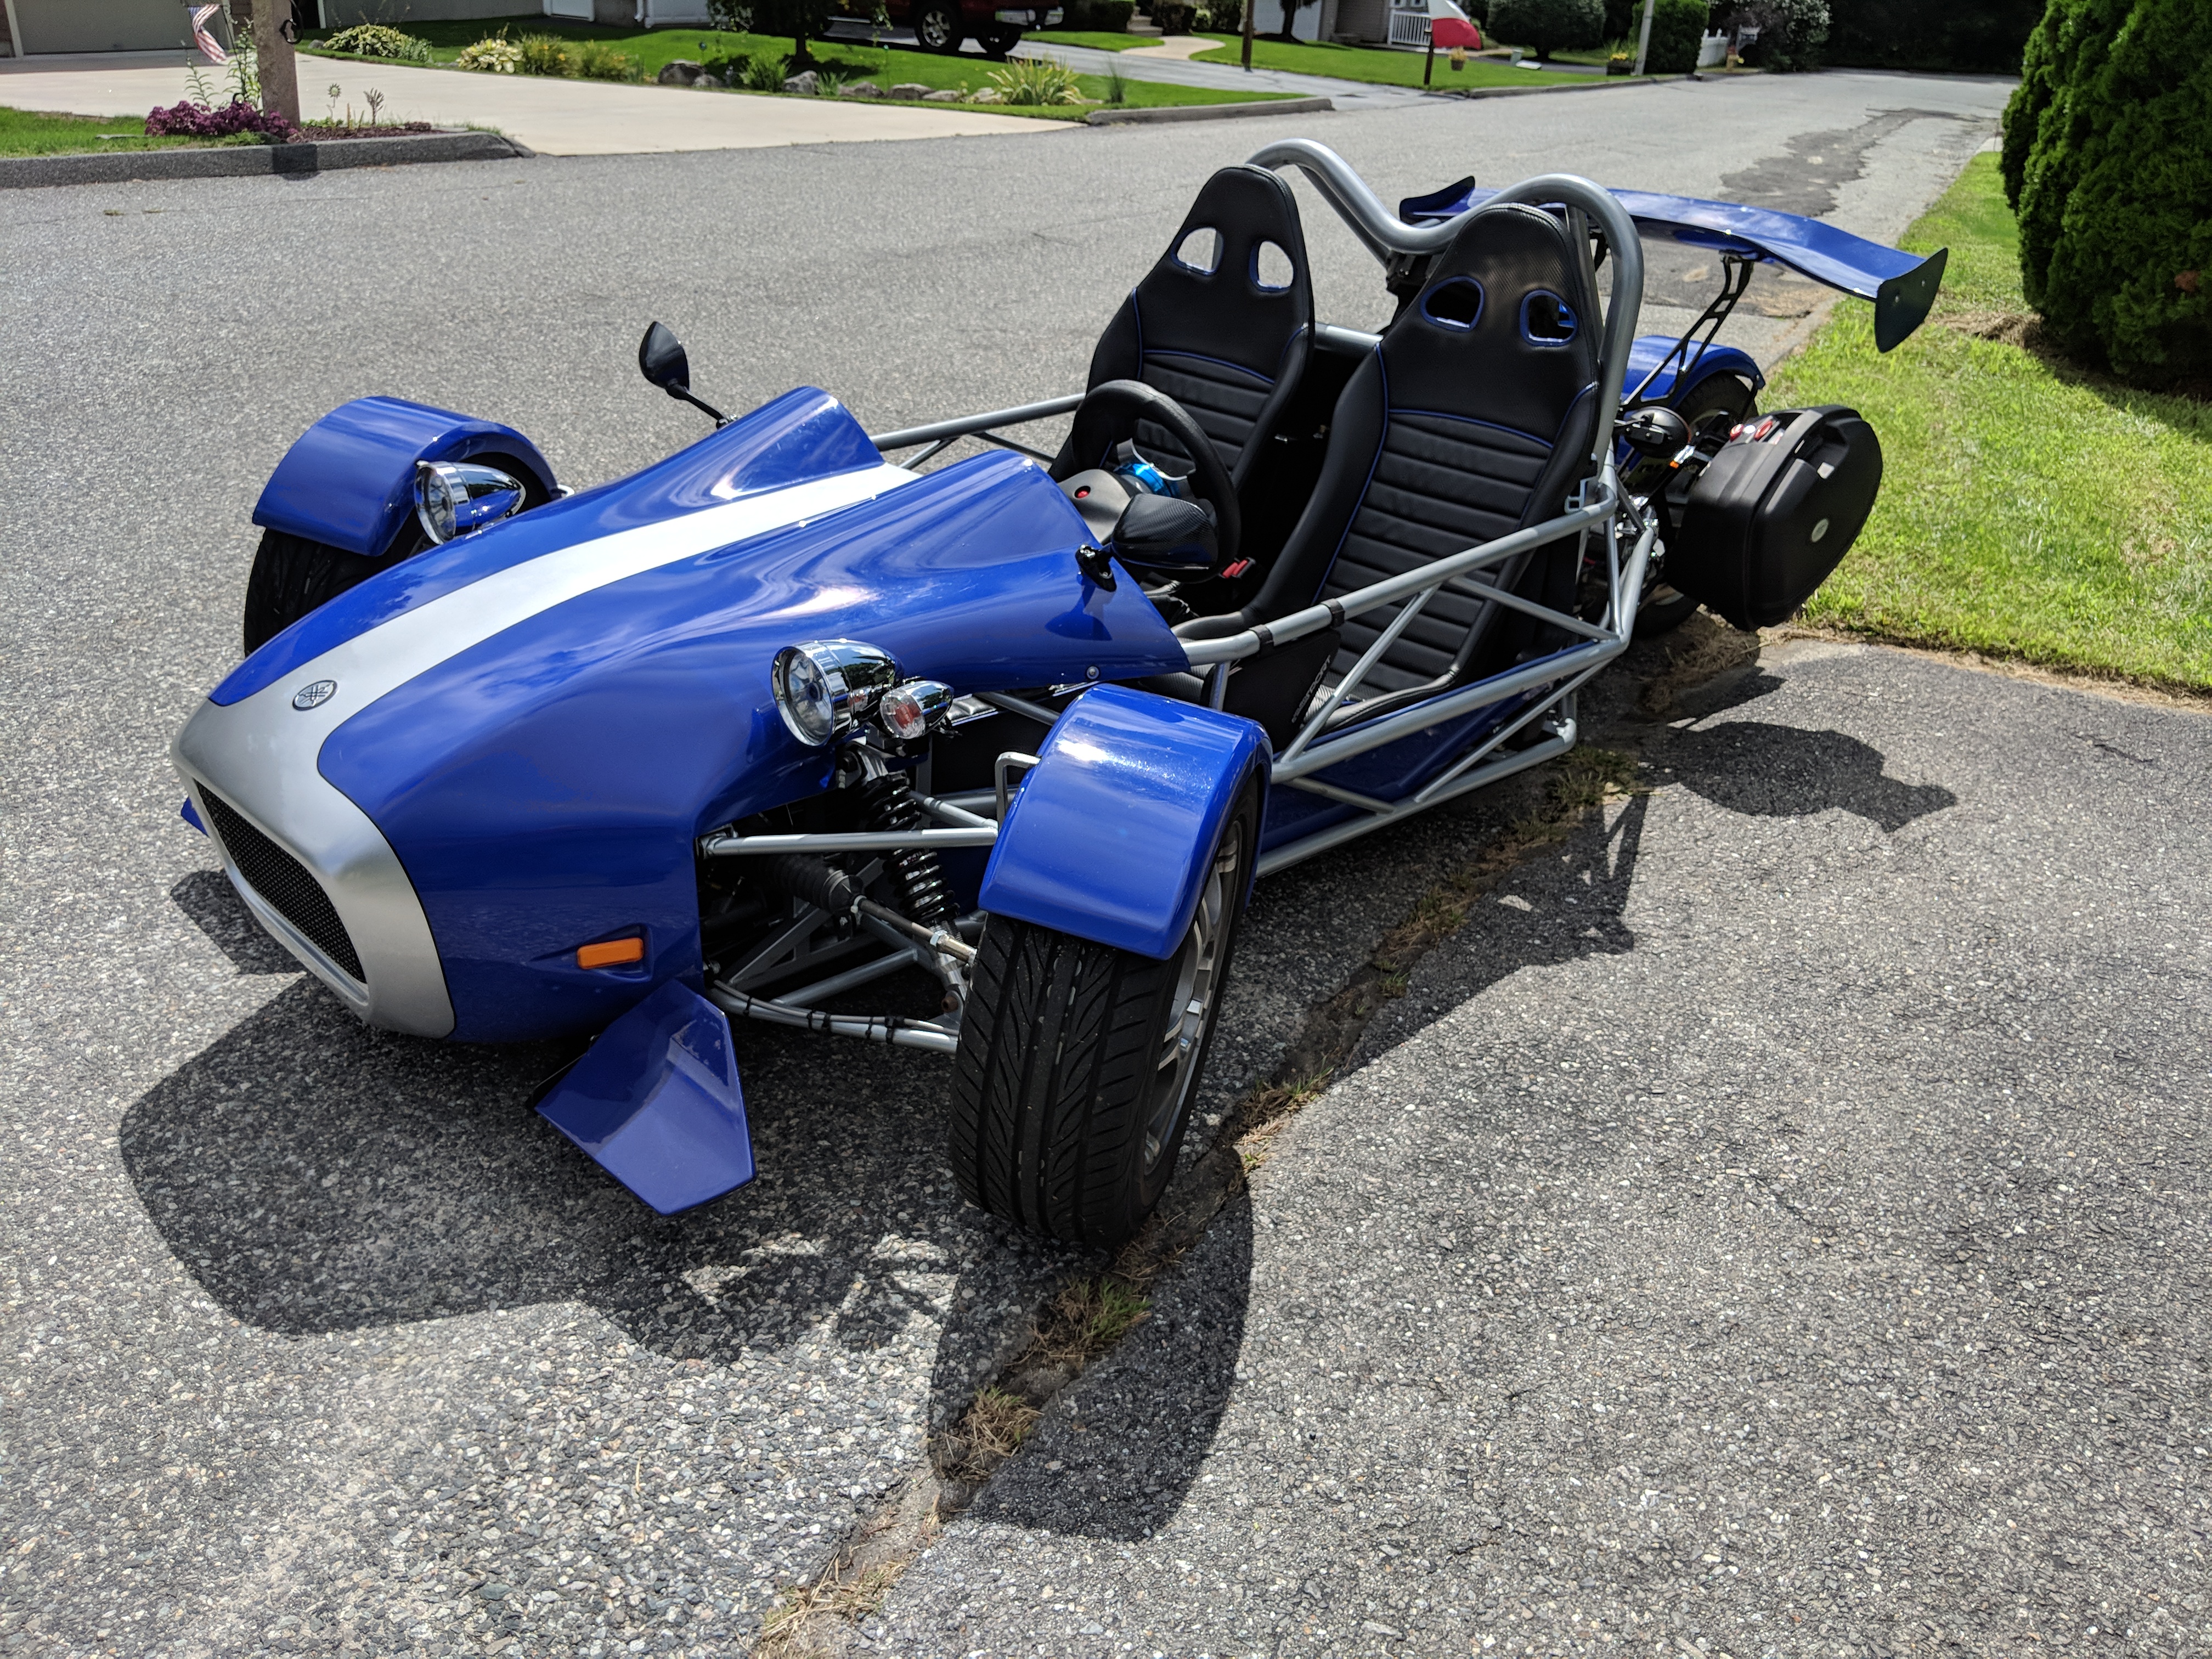 MVIMG_20180822_141038 MVIMG_20180822_141038 by Roger Baker, on Flickr  MVIMG_20180822_141103 MVIMG_20180822_141103 by Roger Baker, on Flickr A couple of photos I took a day or two ago. Okay, I removed the old rivnuts and installed new ones. There just wasn't any other way to this. I am speaking of the front canard mounts. I installed two struts or braces to augment the support. I removed the old supports and moved the mounting point to the rear canard wing attach point. I used Heim/Rose joints and 1/2" aluminum rod to make the braces. There is absolutely no bouncing or movement in the canards. Anyway, it all works good. The picture really doesn't show much, but at least you can get an idea of what I did. Roger Worcester, Massachusetts 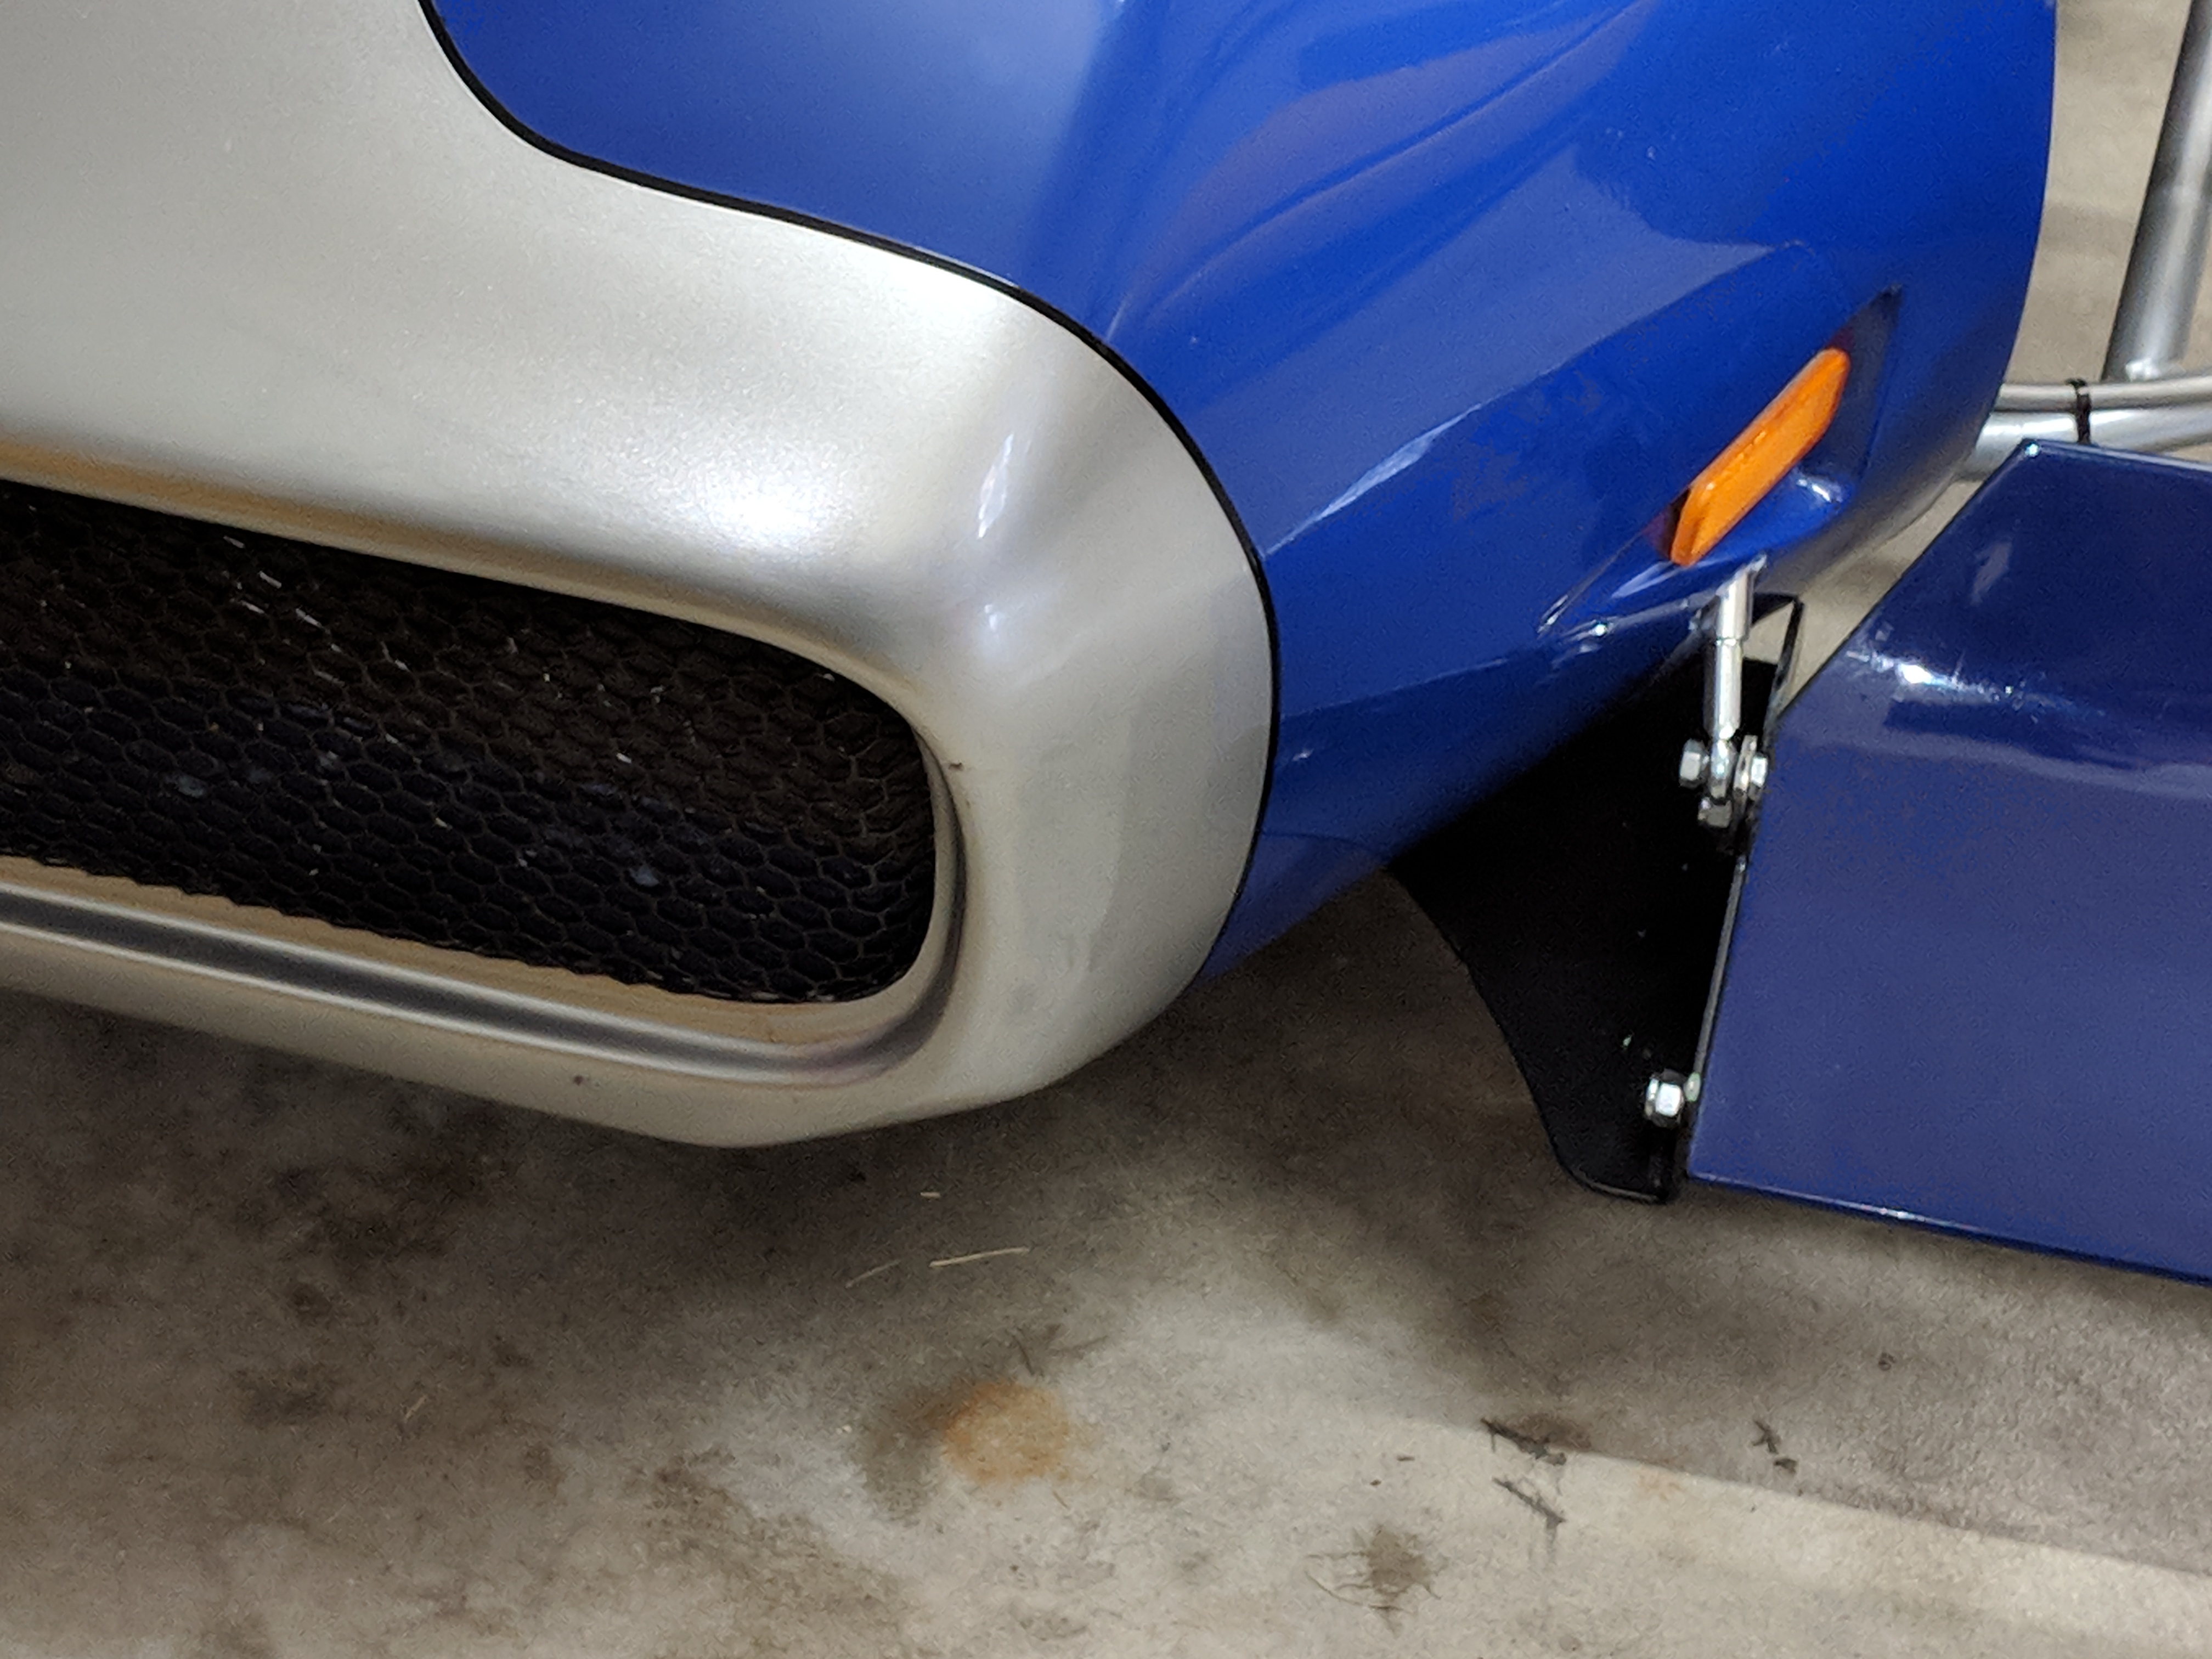 IMG_20180824_171303 IMG_20180824_171303 by Roger BakerI had a couple of good outings with the TR1ke. The addition of the canard struts improved the stability and handling. The canards used to bounce and giggle about when I drove. It sort of felt like the wheels needed to be balanced but not as bad. Once I stabilized the canards, the bounce, the vibration are gone. As far as the rear bags go, I cannot tell if they are even mounted. No wind noise, no weird effect coming from the rear end at all. Mind you, these are not huge bags, but enough to carry a few tools, rain gear and a jacket & gloves. The battery switch will prove to be the best thing I installed.... that is after the super loud air horns. The shakedown rides were about 75 miles and included some very nice countryside vistas. The trike ran smooth, no problem with anything. Roger Worcester, Massachusetts Great to hear Roger! It is so great when a plan comes together and everything works as it should. Been busy getting ready for the install of the whole house filter, twin tank softener and 50 gallon water heater. I am tearing everything out and starting fresh! Other than that just enjoying the trike. I still like it better each day I ride so now it just is an extension of myself whenever I drive it. You are a hard working and lucky guy to have two to play with.  Eddie: If I can manage it this season and the snow isn't early I would like to take both trikes up early October for the foliage drive and do some autumn leaf peeping. It starts earlier up country and we get peak colors a week or two later. So there is an envelope of time to wait for sunny weather. I've taken both out this summer. Next year, I will,not be gone so long on my vacation. Probably 3 weeks or less. That means more riding time here. About the only thing I would like to do is to make a couple of aluminum escutcheon plates to dress up the holes in the bonnet of the TR1KE. This is where the canard struts come through just below the front side markers. The holes are pretty neatly dressed already without the escutcheon plates, but would rather make the opening "tight". I appreciate the good comments, coming from " THE MASTER" I feel a bit like "Grasshopper". I know the feeling you have with your trike, it's the same here. Be good, stay busy, and enjoy what you do... those hot water tanks can get pretty pesky. Roger Worcester, Massachusetts Looking good! I was wondering if you suffer buffeting at certain speeds? This often occurs when the air flow shears at the top of the bonnet bulge or flyscreen and (instead of flowing in the direction of up and back as we expected) flows towards the drivers chin, under the helmet and shakes the head. Some have tried small vertical plates that disperse the air enough to cut the shake out, the effect varies of course at different road speeds and wind speed/direction. Below is a picture of an Atom with additional plastic screen. I've seen other TR1ke's with similar plexiglass or lexan pieces to divert the air over the top. I've been at 85 MPH in the trike, the wind does strike me square in the face and at those speeds it tends to sting a bit when the front tires kick up a little debris. I do not notice the wind so much at lower speeds, but then again, I am on a motorcycle quite a bit too and have grown acustom to wind buffeting. The wind really doesn't get UNDER my helmet so much. However, it has caused me to close my flip up face shield every time I ride. It would be great to have a nice conformal screen that could be bolted in place that would look decent and divert the slip stream to a higher path. Roger Worcester, Massachusetts |
|
|
|
Post by roger on Mar 8, 2019 1:09:21 GMT -5
About a month or so back, I installed a "Speedohealer" speedometer correction device. This little box not only calculates for non OEM sprocket sizes it also has an offset calculation for factory error and tires. I have to say, once I installed it and did the programing it has been very accurate. I got a chance to do some measured miles using the freeway mile markers. While these are not exactly placed, they are quite close especially when measuring 5 mile increments. In addition to that, I was able to accurately figure my MPG. I am getting 41 miles per US gallon, or 49 miles per Imperial Gallon. The calculation was based on a combination of city and highway driving. My speed was around 55 MPH, but I have to admit, I was utilizing the gearbox and taching the engine up quite high at times. (There is nothing like the sound of an R1 engine when it's tached up to about 9 grand) I am running 17 tooth front sprocket and a 49 tooth at the rear. I take it out again today. I've got a full tank of gas and no where in particular that I need to be. damn, this is fun!! Roger Worcester, Massachusetts There hasn’t been a whole lot to write about since the post above. I have been taking the Eco-Exo and the TR1ke out in alternate turns. I have to admit, I enjoy them both. I normally go alone in the TR1ke, and lately I’ve got a lot to reflect on. I lost a true friend to a massive heart attack on Monday. He was my “go to” friend for technical advise and an occasional pizza and beer conversation about what we were doing. He was a Mopar guy with a love for cars that was equal to a religion. He was only 63. Back to the TR1ke: I’ve taken it out on some longer drives. 180 miles last week and 150 miles today. It runs great, handles REALLY well and hasn’t broken down on me on any of the rides. It was only around 60 deg F today so a jacket and gloves were in order. I headed up toward the Berkshires (mountain range) but got rained out. I had to make a quick diversion and drive in the mist of a heavy dense fog for about 45 minutes. Of course you guys in the UK must get a special stamp on your drivers license to operate a vehicle in the ever present fog. Sort of like a pilot getting an IFR qualification : ). I was gone about 5 hours, stopped twice for coffee and to rest a bit. All and all, it was a good afternoon. The TR1ke is back in the garage but needs to be wiped down and polished up. Until later.... get those rides in before it gets to cold to enjoy the moment. Roger Worcester, Massachusetts Your loss is a tough one I am sure. Sorry to hear that. You are almost talking about me there. I like Pizza and good beer. I am a Mopar guy as is my son. And I am 62 years 4 months old. I have had heart issues since I was 32 years old when I took a 208 Volt AC 50 Amp shock across my chest. I was lucky when my left hand broke the earth contact so the amperage did not hit hard. It knocked me across a 20 foot room.In the last 30 years I have been to the ER about 12 times, two were possible heart attacks but no damages. I have had "NitroStat" on my person for these 30 years. So, yes, your loss hits close to home for me too. Again, sorry to hear it. Thank you Dave for your comments. As the weather becomes less and less inviting I am actually using my trikes a little more often. It gets down right cold the middle of November and riding times are catch as catch can, and the fun will briefly end so winter can run its course. Once the first snow falls and the roads are treated with salt it isn’t worth riding an hour then wiping all the salt off for the next five. Some guys ride 12 months a year, even the guys that live in snow country, like here. It isn’t what I do. I will be doing some minor maintenance like replacing a few seals on my R1 engine and doing some touch up on some paint. I’ve never been to pleased with idea of removing the front fenders to take off the tires so will probably weld the nuts onto the fender mount to at least make the job easier. When I mounted my rear view mirrors they were barely adequate to see traffic behind me. I “can” see but not all that well. I bought the longest mounting stem I could find but they simply fell short. I get a “Jim Dandy” view of my elbow and arm and maybe a glimpse of traffic behind me when I round a curve or corner. I decided to fix the problem and fabricated a 2-1/2” extender link from aluminum bar stock to place between the mount and pivot point of the mirror stem. Does it look fantastic and super duper, Hell no. It looks added on but functional. Before I go out and buy some very expensive replacements I want to make sure what I buy is going to work. What I made, works but doesn’t look all that well engineered as you can see from the photo below. I will more than likely keep this arrangement until I can find a mirror set with longer mount stems. That’s it for now. I will be riding today if it isn’t going to rain. Cheers everyone Roger Worcester, Massachusetts 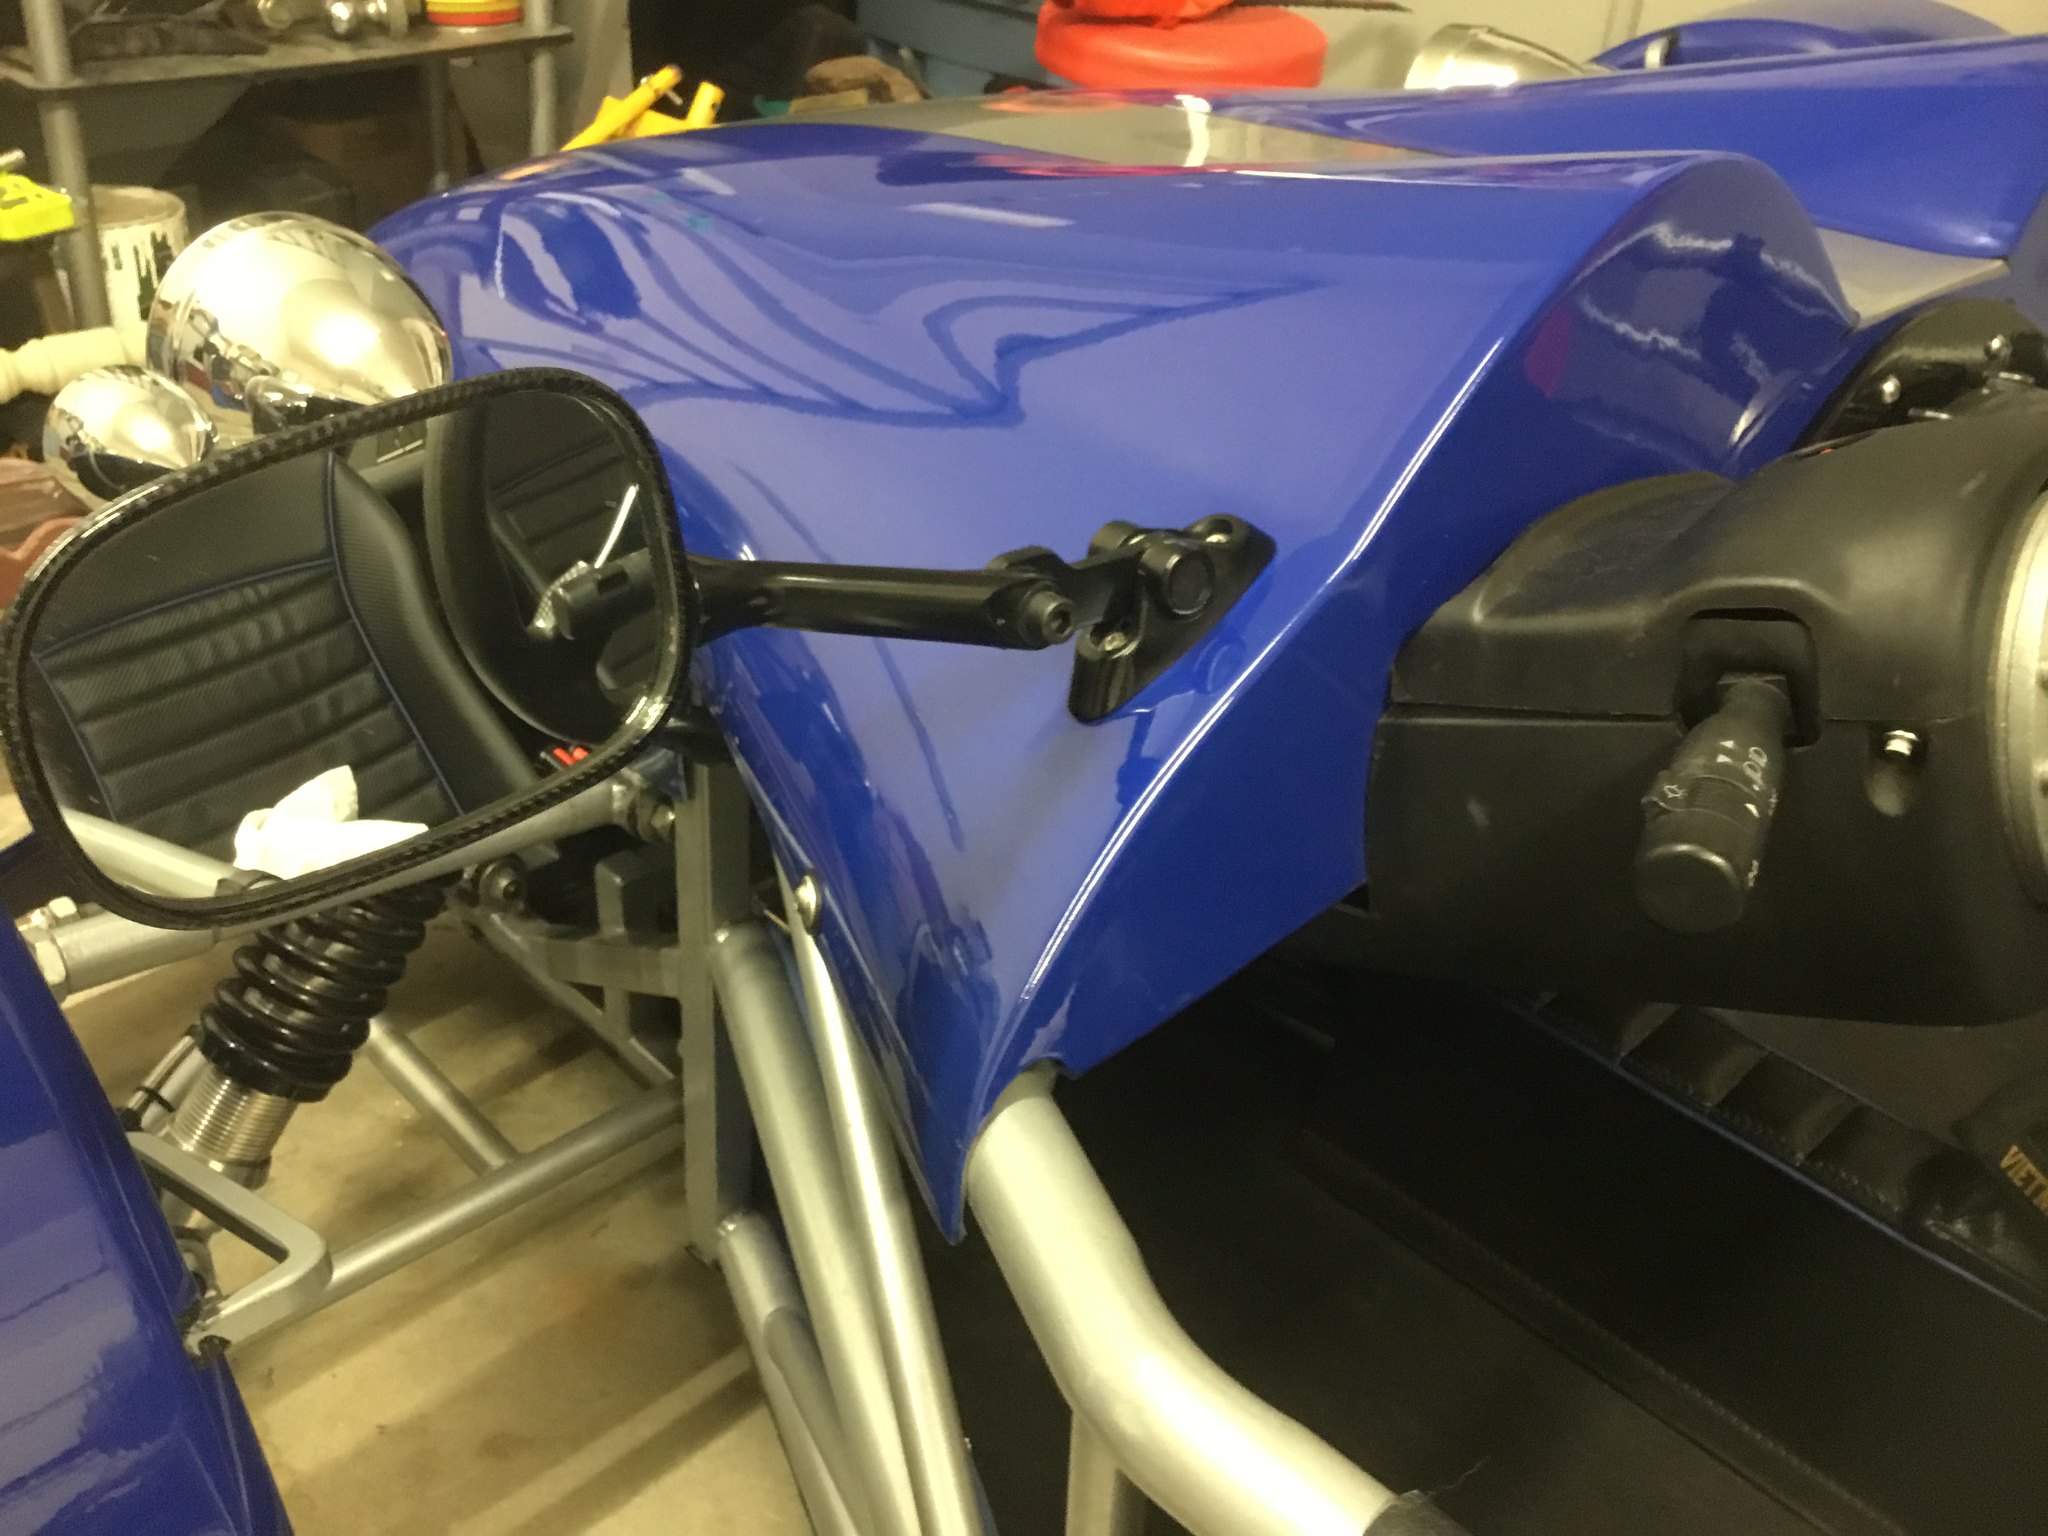 E36549BF-E22C-4099-A96C-7C77C15B34C8 E36549BF-E22C-4099-A96C-7C77C15B34C8 by Roger Baker, on Flickr 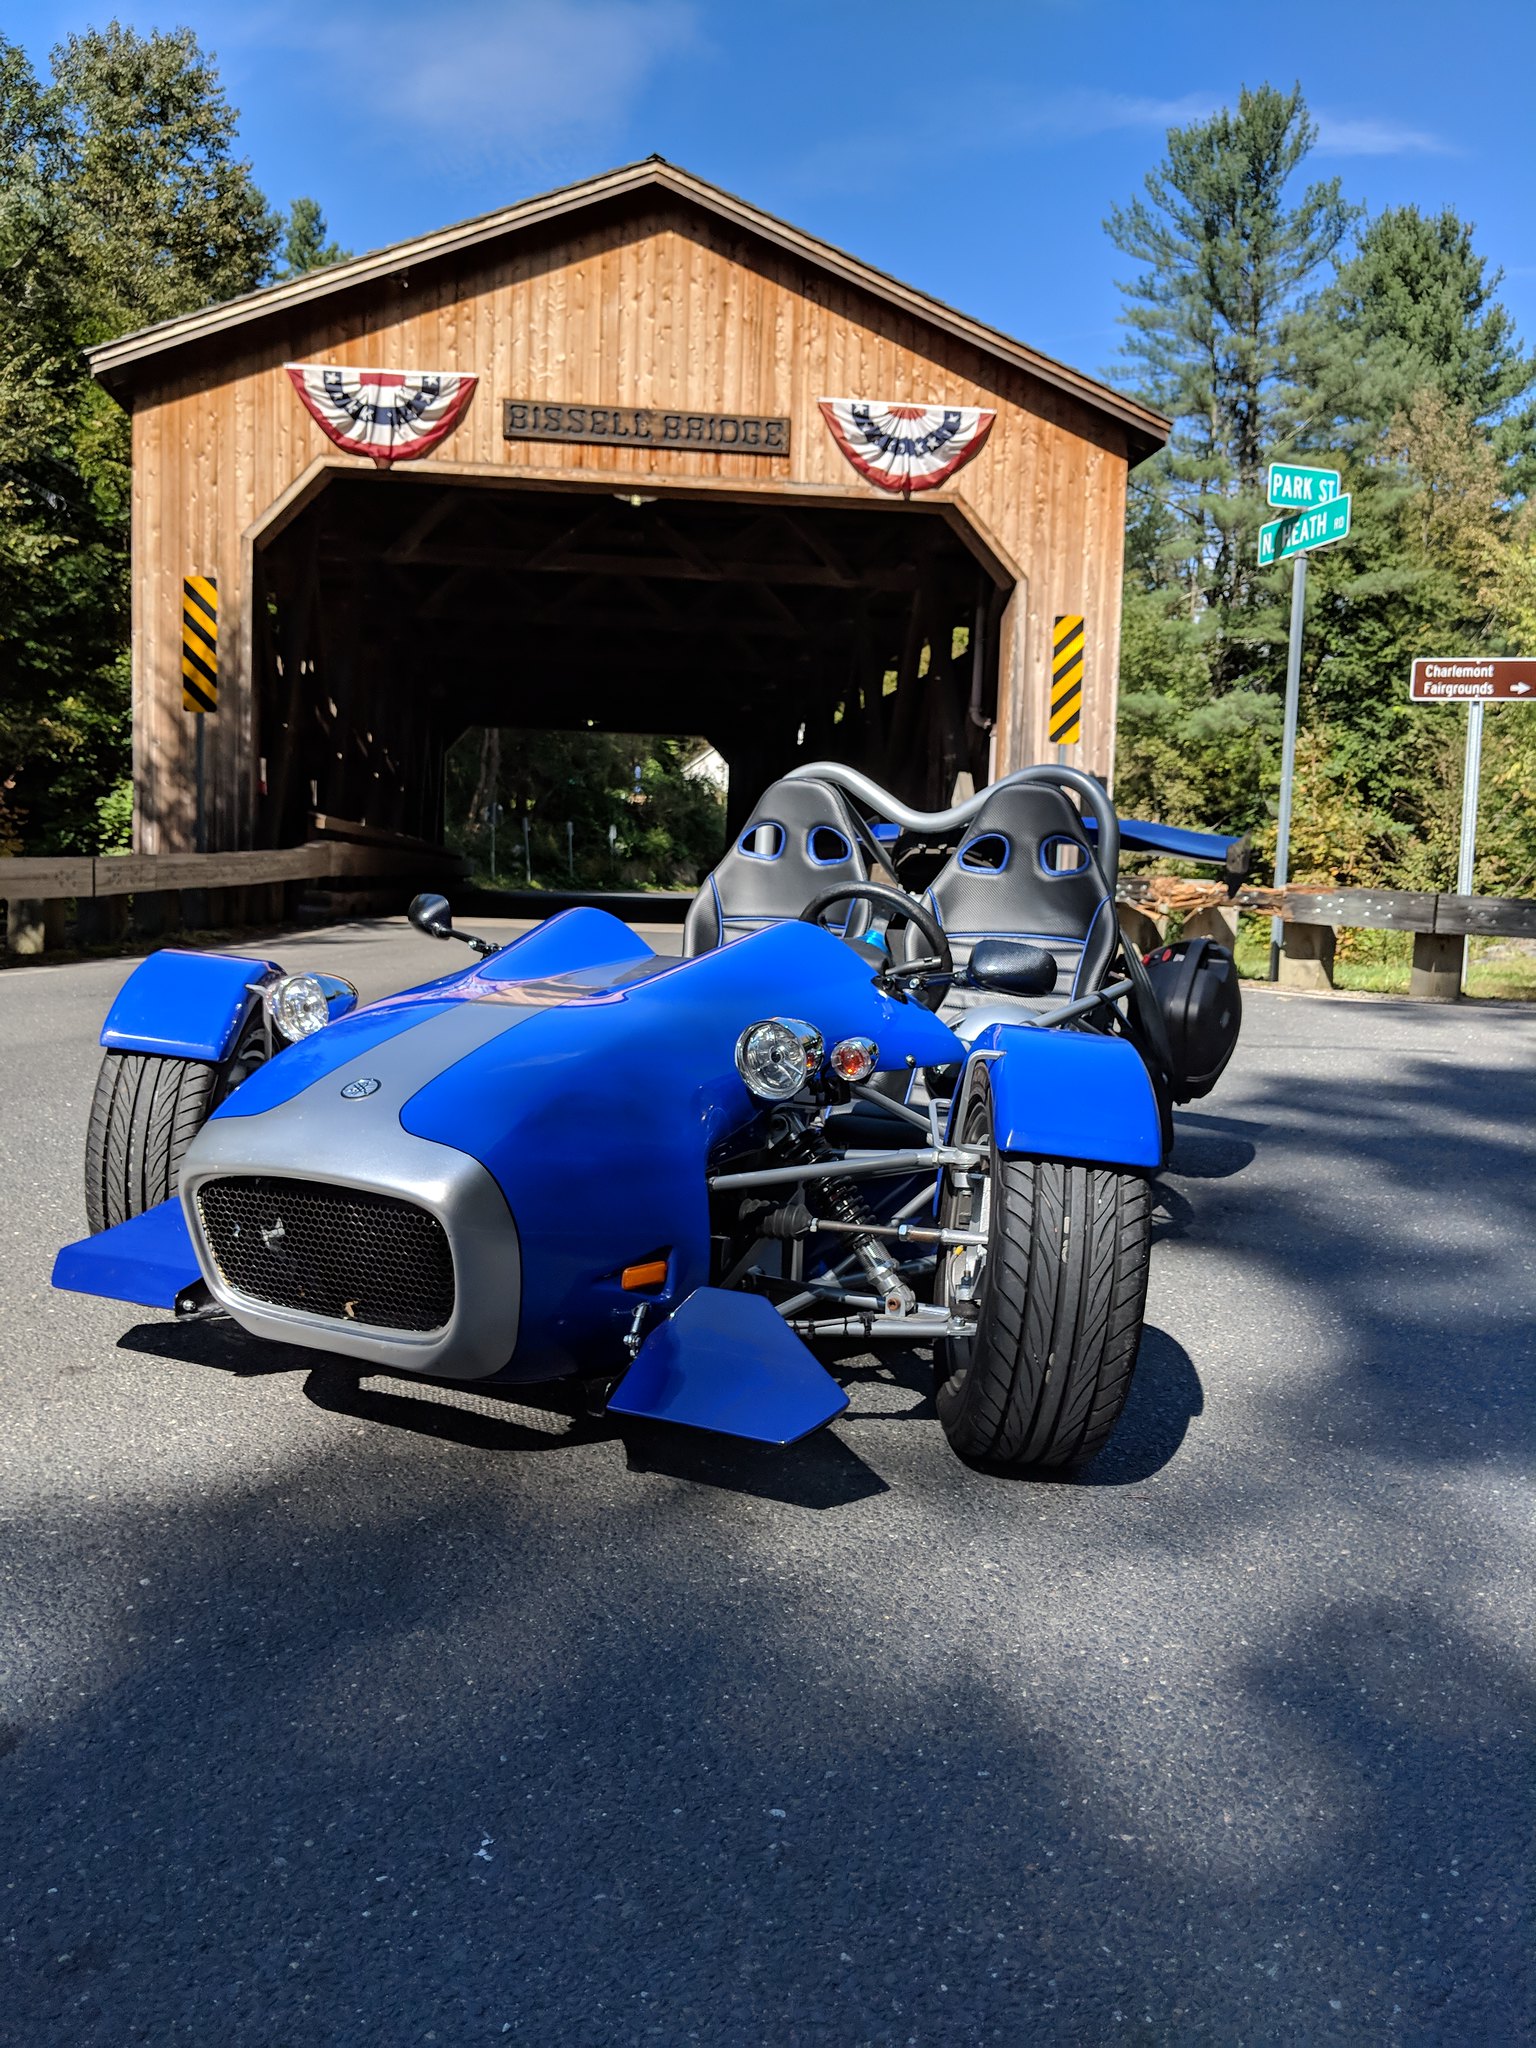 MVIMG_20180930_124702 MVIMG_20180930_124702 by Roger Baker, on Flickr It was a nice fall day here in New England. I decided to take a ride through New Hampshire, Vermont and Massachusetts. At the covered Bridge in Charlemont Massachusetts |
|
|
|
Post by roger on Mar 8, 2019 1:18:27 GMT -5
PAGE 23 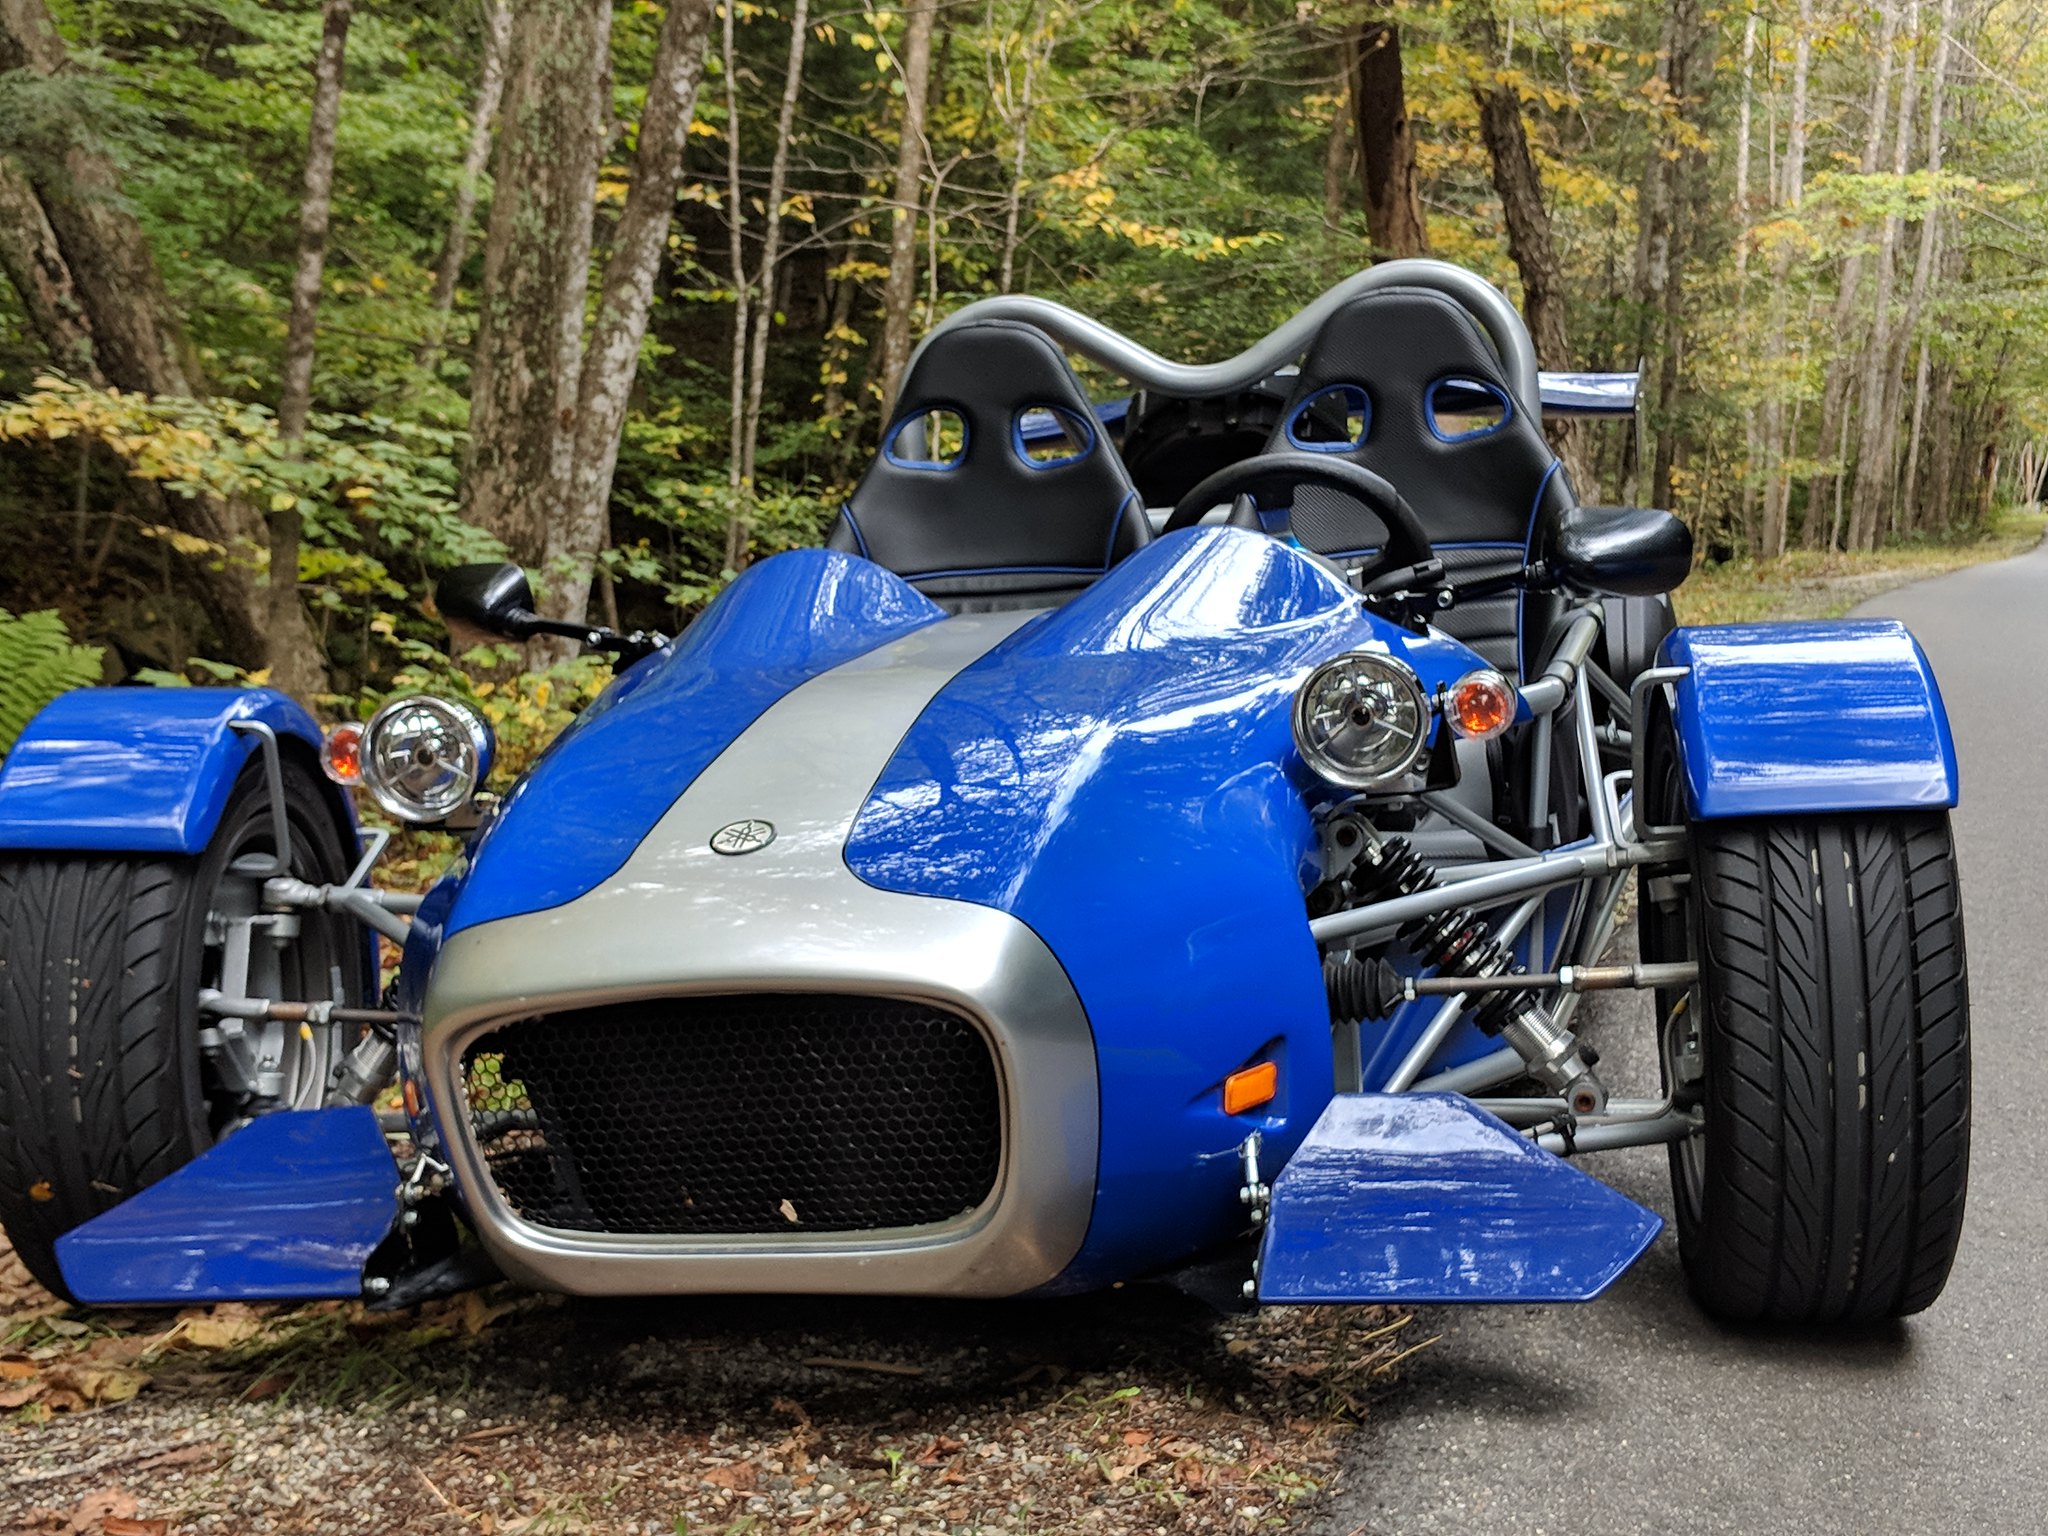 MVIMG_20180930_123754 MVIMG_20180930_123754 by Roger Baker, on Flickr More pictures of the ride. It was about 160 miles from start to finish. I am getting between 38 and 41 MPG, So roughly 4 gallons used for a cheap day outing along with a couple tacos and a burrito it made for a musical ride home. 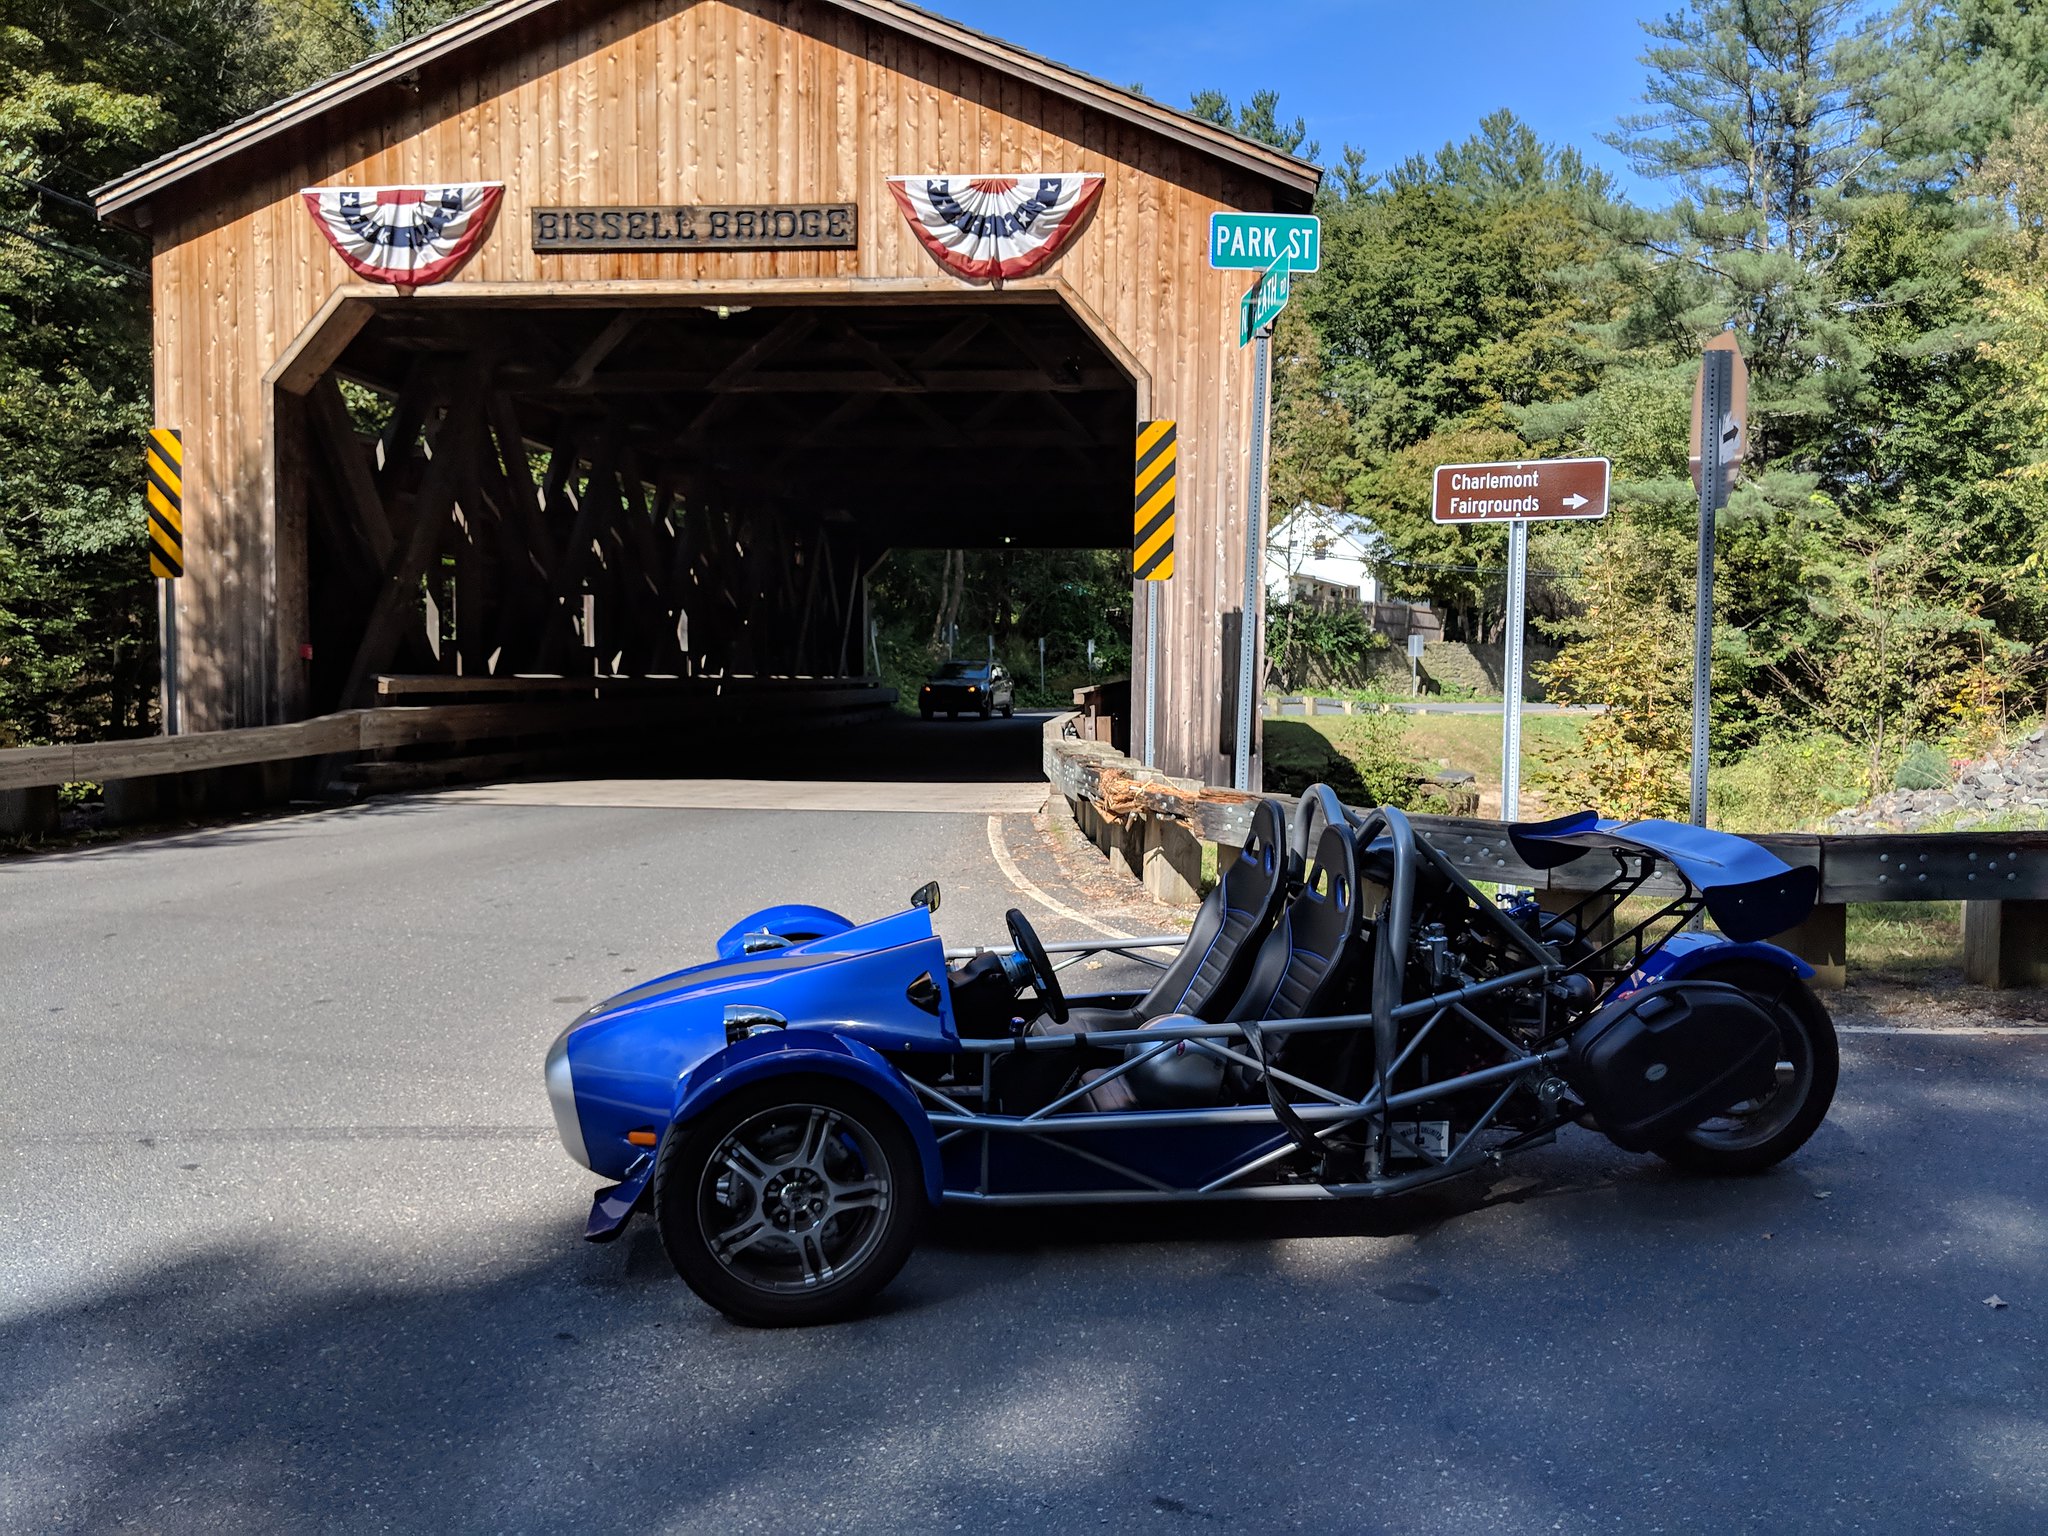 MVIMG_20180930_124559 MVIMG_20180930_124559 by Roger Baker, on Flickr One last picture of today’s ride. The motor was purrrrrrring right along. I believe I am getting used to the touchy twitchy clutch and adrenaline feeding accelerator pedal. I can quiet the engine right down when the ever watchful eye of the police are casting glances in my direction..... as in WHO ME?  Making all that noise disappear. I'm jealous. Yours looks awesome. Ordered mine 3+ months ago....still has not arrived. No wonder not many people have these since they are hard to obtain. Maybe I'm just getting impatient. More patient needed.... You are where I was 2 years ago. I took delivery of my kit October 2016. I don’t know who you are buying your kit from. If you told me, I have forgotten,...... anyway, I ordered mine in August 2016 from Dove Racing LLC in Trenton Texas. When I ordered my Eco-Exo it came from the UK. The Turner family had a cottage business building the kits. Unfortunately the Eco-Exo is no longer available. The person that bought the rights to manufacture from the Turners, did not manufacture anything.., not one single kit. As it was, it took about three months to get the kit delivered. On the TR1ke, I have ridden it exclusively this summer..... above the Eco-Exo and my 1990 GL1500. You will find the TR1ke a beast. There is a tremendous volume of power packed into that 1 liter engine. The RPM is limitless..redline is 13,500 RPM. They should call this the GLH trike....... (Goes Like Hell) Be patient.....it will arrive. You might want to start your thread. Highlight your donor, maybe the mag wheel choices and maybe your steering wheel and interior. Roger Mine is also coming from Dove Racing. My donor is a 2004 R1. I started tearing it down but I stopped because I'm starting to get excuses as to why it's been so long...so, call me crazy, but I'm starting to wonder if I'm going to get it. Remaining hopeful and staying positive. It took me quite a long time to receive my TR1ke from Dove Racing. He actually had a kit in stock with a couple of color choices. I didn’t order the basic kit. I ordered almost every option, from custom upholstery to the reverse system. The more options you order, the longer it takes. When it comes to a kit car, or trike in this case, almost everything is custom made and needs to be ordered from various businesses and vendors. When did you place your order? I know you joined the forum early August and If your order to Dove Racing was around that time it is still a little early to expect delivery, especially if Dove needs to order the kit from Exo Sports Cars. Dove Racing has always come through for their customers it simply takes time. It is worth the wait. Like any small business that specializes in a unique product there are always reasons why items are slow to arrive....... from out of stock to back orders from manufacturers. Hang in there..... Roger Worcester, Massachusetts |
|
|
|
Post by roger on Mar 8, 2019 1:27:34 GMT -5
It’s been a few days since I took the TR1ke up to the Berkshire Mountains. It actually does quite well through the twisty windies and climbing the steepest of inclines. There is one place I did not go to yet and that is the summit road to Mount Graylock near North Adams Massachusetts. It is sort of like the “Tail of the Dragon” NORTH when it comes to how narrow and curvy the road is. I’ve gone up and down it on a motorcycle. I will put it on my To Do list for next season on the TR1ke. When I finished my build and took it through the inspection process it was the end of actively “building” it. It has been a solid driver ever since. I’ve not had any major mechanical issues at all. The steering and handling is fantastic, the engine runs quite strong and no electrical problems, however the refining is a continuing and on going process. So, since the build has been completed here is a short list of things I’ve done to improve my trike. 1. I’ve added a deep cycle battery for the reverse system. It is connected to the charging system via an automatic switching relay. Along with this I added a battery isolation switch. 2. I lowered the seats so they were beneath the roll bar, this was purely for aesthetics. I am not to happy with the seat adjusters so might replace them.. 3. I modified the rear view mirrors to extend them outward for better visibility. 4. I am adding a rear view Camera for reversing as well as the ability to switch it on to act as a mirror. (Winter project) 5. Added the saddlebags 6. I raised the overall ride height and stiffened the suspension 7. The front canards were a bit floppy so I added angled supports. 8. I am adding a voltage gauge (winter project) Most of the items listed were modifications to improve performance or for aesthetics. If I did nothing at all the trike would still be very dependable and run quite well. If I had to pick anything that impacted the drivability it would be the addition of the secondary battery. This is strictly for powering the reverse motor without killing the main electrical system. The maintenance I need to take care of is to fix a very minor oil drip. I have a few drops of oil beneath the engine. It is so minor, the oil level has not been affected. It seems to be coming from an external tube on the forward right side of the engine just above the oil pressure sending unit. Probably a flat O-ring. I am also going to remove the oil pressure sending unit and replace the seal and tighten the electrical connections on that as well. Ive been getting a flickering oil light when I hit a bump, so want to check into this as a priority. I also noticed the side motor mounts need to have shims installed on both sides. There is about 1/8th of an inch gap between the mount and the engine. My bad.... That’s about it. I know there are other small issues that I’ve taken care of, but considering everything, the maintenance, and planned modifications haven’t been to bad. It goes with owning a kit vehicle, the build is truly never done. Roger Worcester, Massachusetts Hi Roger, Maybe I missed it in an earlier post but did you ever discuss a windscreen option? Also, mine was purchased on 7/18 Thanks, Dennis Dennis: When I bought my trike the windscreen was not an option. According to Peter Dove, ESC is modifying some of their product line (with the same or similar bonnet as the TR1ke) to have a windscreen added. I have been sort of on the fence about molding a fiberglass windscreen that would be about 4 - 5 inches taller than the mold line of the dash and bonnet. It would be curved and angled slightly top back about 15 degrees. This would not be a clear screen, but more of an air deflector similar to what you may find on a motorcycle with the windshield cut down. Line of sight would be over the top of the deflector. The mounting would be on the face of the dash panel. I would have to experiment a bit to get a satisfactory result, but as I said, I’ve been sort of on the fence about it as well. Keep in touch about the delivery of your TR1ke... Roger Dave I really need something a lot wider. These things are only 15” wide and 6” tall. I do like the mount system for them though. I will be working on something, not sure when I will start. I need to get the house winter ready and start raking the leaves....UGH!!!! I was actually thinking of a color matched conformal spoiler/windscreen that attaches to the bonnet and will divert air above your helmet and not beneath your chin. Plenty of time to think about what I will. Get two of the $21 units and use the mounts. (I bought 3 just for that idea) Then go to Tap Plastics and get some Lexan. The can even show you how to bend it. Bending Lexan really isn’t a problem until you get to compound curves. On something as large as a windshield I’d need an oven to heat the lexan to do a “Drape Mold”. Since a I do not have a huge oven then fiberglass/marine epoxy is the next best thing. I can shape it in any direction. The windshield doesn’t need to be transparent because it will only be 6 inches or so tall. I can easily see over it. I realize lexan and plexiglass look similar, but their properties are altogether different. I would never trust plexiglass for a windshield, it is brittle and prone to cracking around mount holes. In some instances you do not even need to heat Lexan to bend it. It is sort of like clear aluminum. What a I need to come up with is a design that will look good, not to complicated to make without expensive equipment and is durable. If you look at the Adam West/Burt Ward Batmobile that was made from a prototype Lincoln Futura around 1954/55 you can see the type of windshield I am considering. Not as tall but the mold line is similar. I really like the way the TR1ke bonnet is shaped with the raised cowling that lead to the dash line. The trouble is, making a windshield to compliment this without degrading the look of it is a challenge. I just don’t want to plop something on the bonnet that works, but doesn’t match the style of the trikes design. Like I said, I have time to think about it. It could be simply placing an arched piece of Lexan sticking above the cowl is the best solution. I believe Erik’s TR1ke is fitted with this type of wind deflector. I appreciate sharing your ideas. I will be posting more once I start the ball rolling. Roger Worcester, Massachusetts |
|
|
|
Post by roger on Mar 8, 2019 1:41:07 GMT -5
PAGE 24 How about how the windscreen is on the new Atom. They don't worry about sculpting it to the fairing...instead, they bolt on a vertical deflector. Wonder if it even helps? Anyway, just got word my trike is ready for shipment from the UK. Pete (Dove Racing) has been great with the communication. Trying to get this photo to display in the browser...not working. I'm doing something wrong...lol ![]()  I will be removing the bonnet from my TR1ke during the holidays to sculpt a form fitting windscreen whether it is fiberglass or Lexan. I would prefer the Lexan but would have a better finish by doing it with fiberglass. It could be completely molded around the contour of the bonnet. Granted, it would not be transparent, but then it doesn’t need to be. The Airial Atom type is okay. It doesn’t keep all the wind off you, however, it does keep the wind from getting beneath your helmet and lifting it up. I was thinking of something about 4-6 inches tall and slightly angled back. Maybe even curved in at the sides. It is good news about your TR1ke being shipped. You know what this means don’t you..... you can resume stripping the donor bike and start looking at custom rims and tires. No matter what you do, congratulations and good luck with your build. Is it being shipped straight to you or to Dove Racing? Let me know if I can be of assistance. Roger Worcester, Massachusetts This Sunday, November 11th is Veterans Day here in the USA. Along with a free breakfast for anyone that wishes to come, It is an opportunity rub elbows and “Hob Nob” with our elected city officials. At some point in the day there is a parade. For the last few years I’ve been one of those that participate by entering my Yellow Eco-Exo-R. I’ve posted photos of it on the Eco-Exo portion of the forum. This year I will enter the TR1ke. I usually decorate with American flags, and Red White & Blue bunting. Weather permitting the parade will go on as scheduled and I will post a few pictures. When the parade is finished and I drive the TR1ke into the garage and start the winterization process. I’ve never needed to add gas stabilizer but since it takes premium fuel I believe I will add it to the tanks this winter. I have a few modifications and tweaks to do over the winter months. I will be adding a J&M CB radio. J&M makes a few models of this system. The one I bought has an intercom incorporated into its system. I can also plug in my cell phone/MP-3 and utilize the helmet microphone and speakers. I will be modifying my headlamps. When I bought them from Ed VanBelcom (Eco-Exo forum) he also included a complete LED light system. I will be installing those as well. I’ve got to repair a minor oil drip coming from the external oil line on the just to the right of the exhaust manifold. It is probably a cracked O-ring..... there are a few more items that need to be taken care of and will be posting the results as I get them completed. I haven’t been writing much since I completed the project. I have been going out on rides and enjoying the thrill. Here it is the beginning of November and its time to wrench. That’s it for now Roger Worcester, Massachusetts 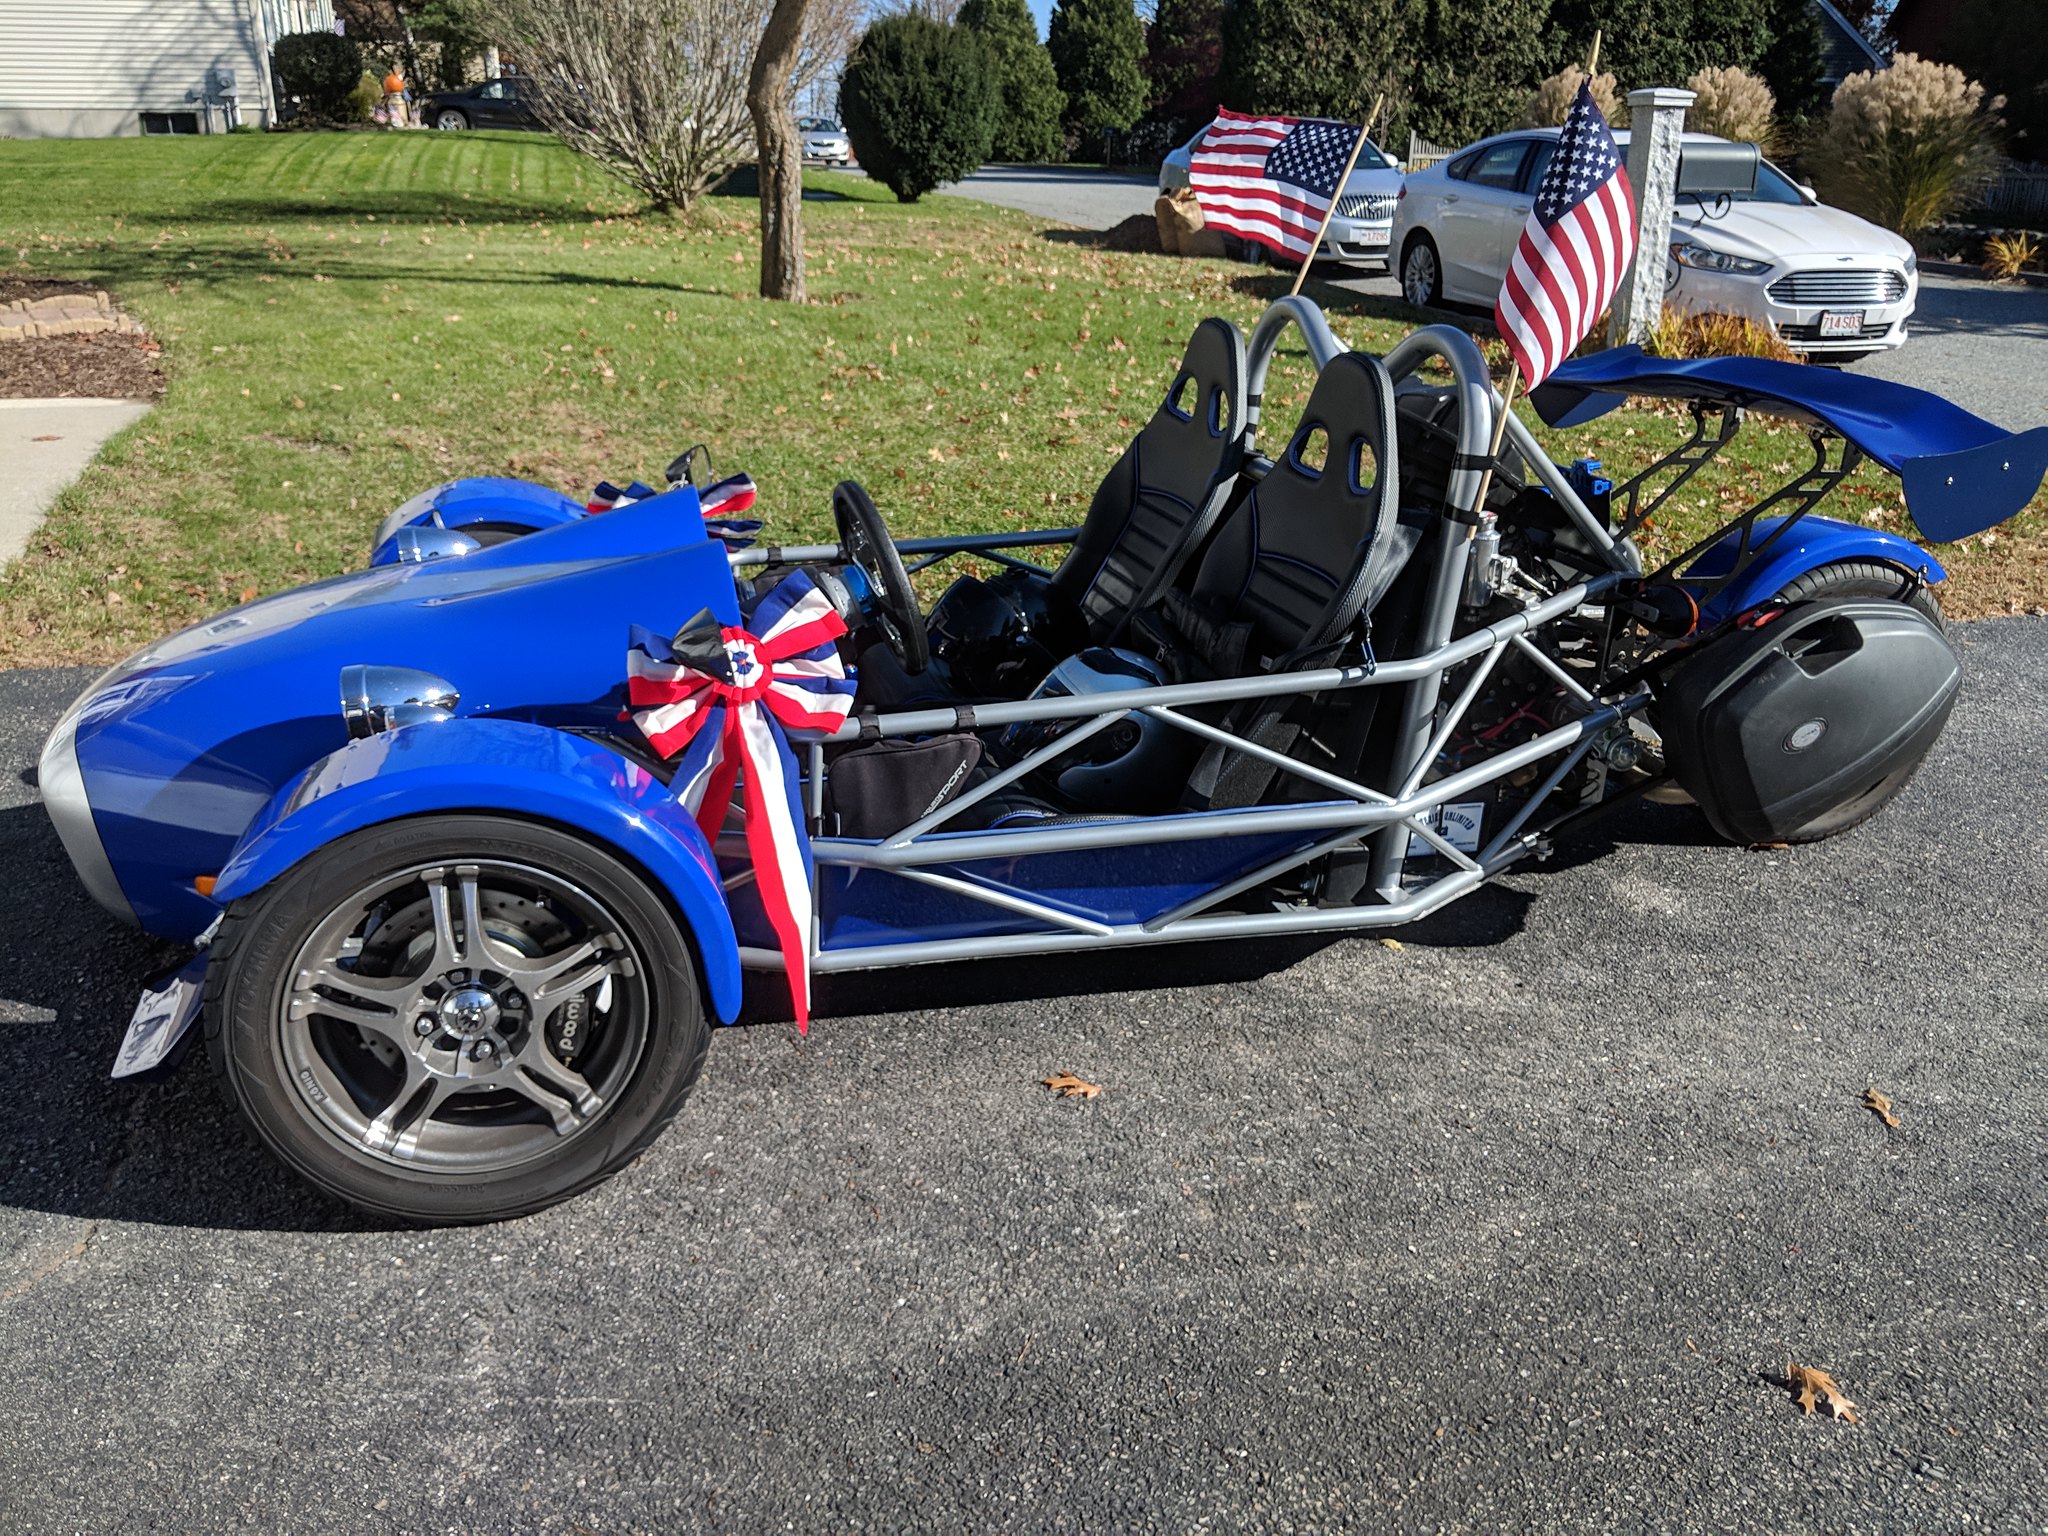 MVIMG_20181111_113222 MVIMG_20181111_113222 by Roger Baker, on Flickr Possibly the last ride of the season. Worcester Massachusetts Veterans Day Parade decorations... got loads of thumbs up and a few very young ladies requesting a ride...ahhhh, to be young again. 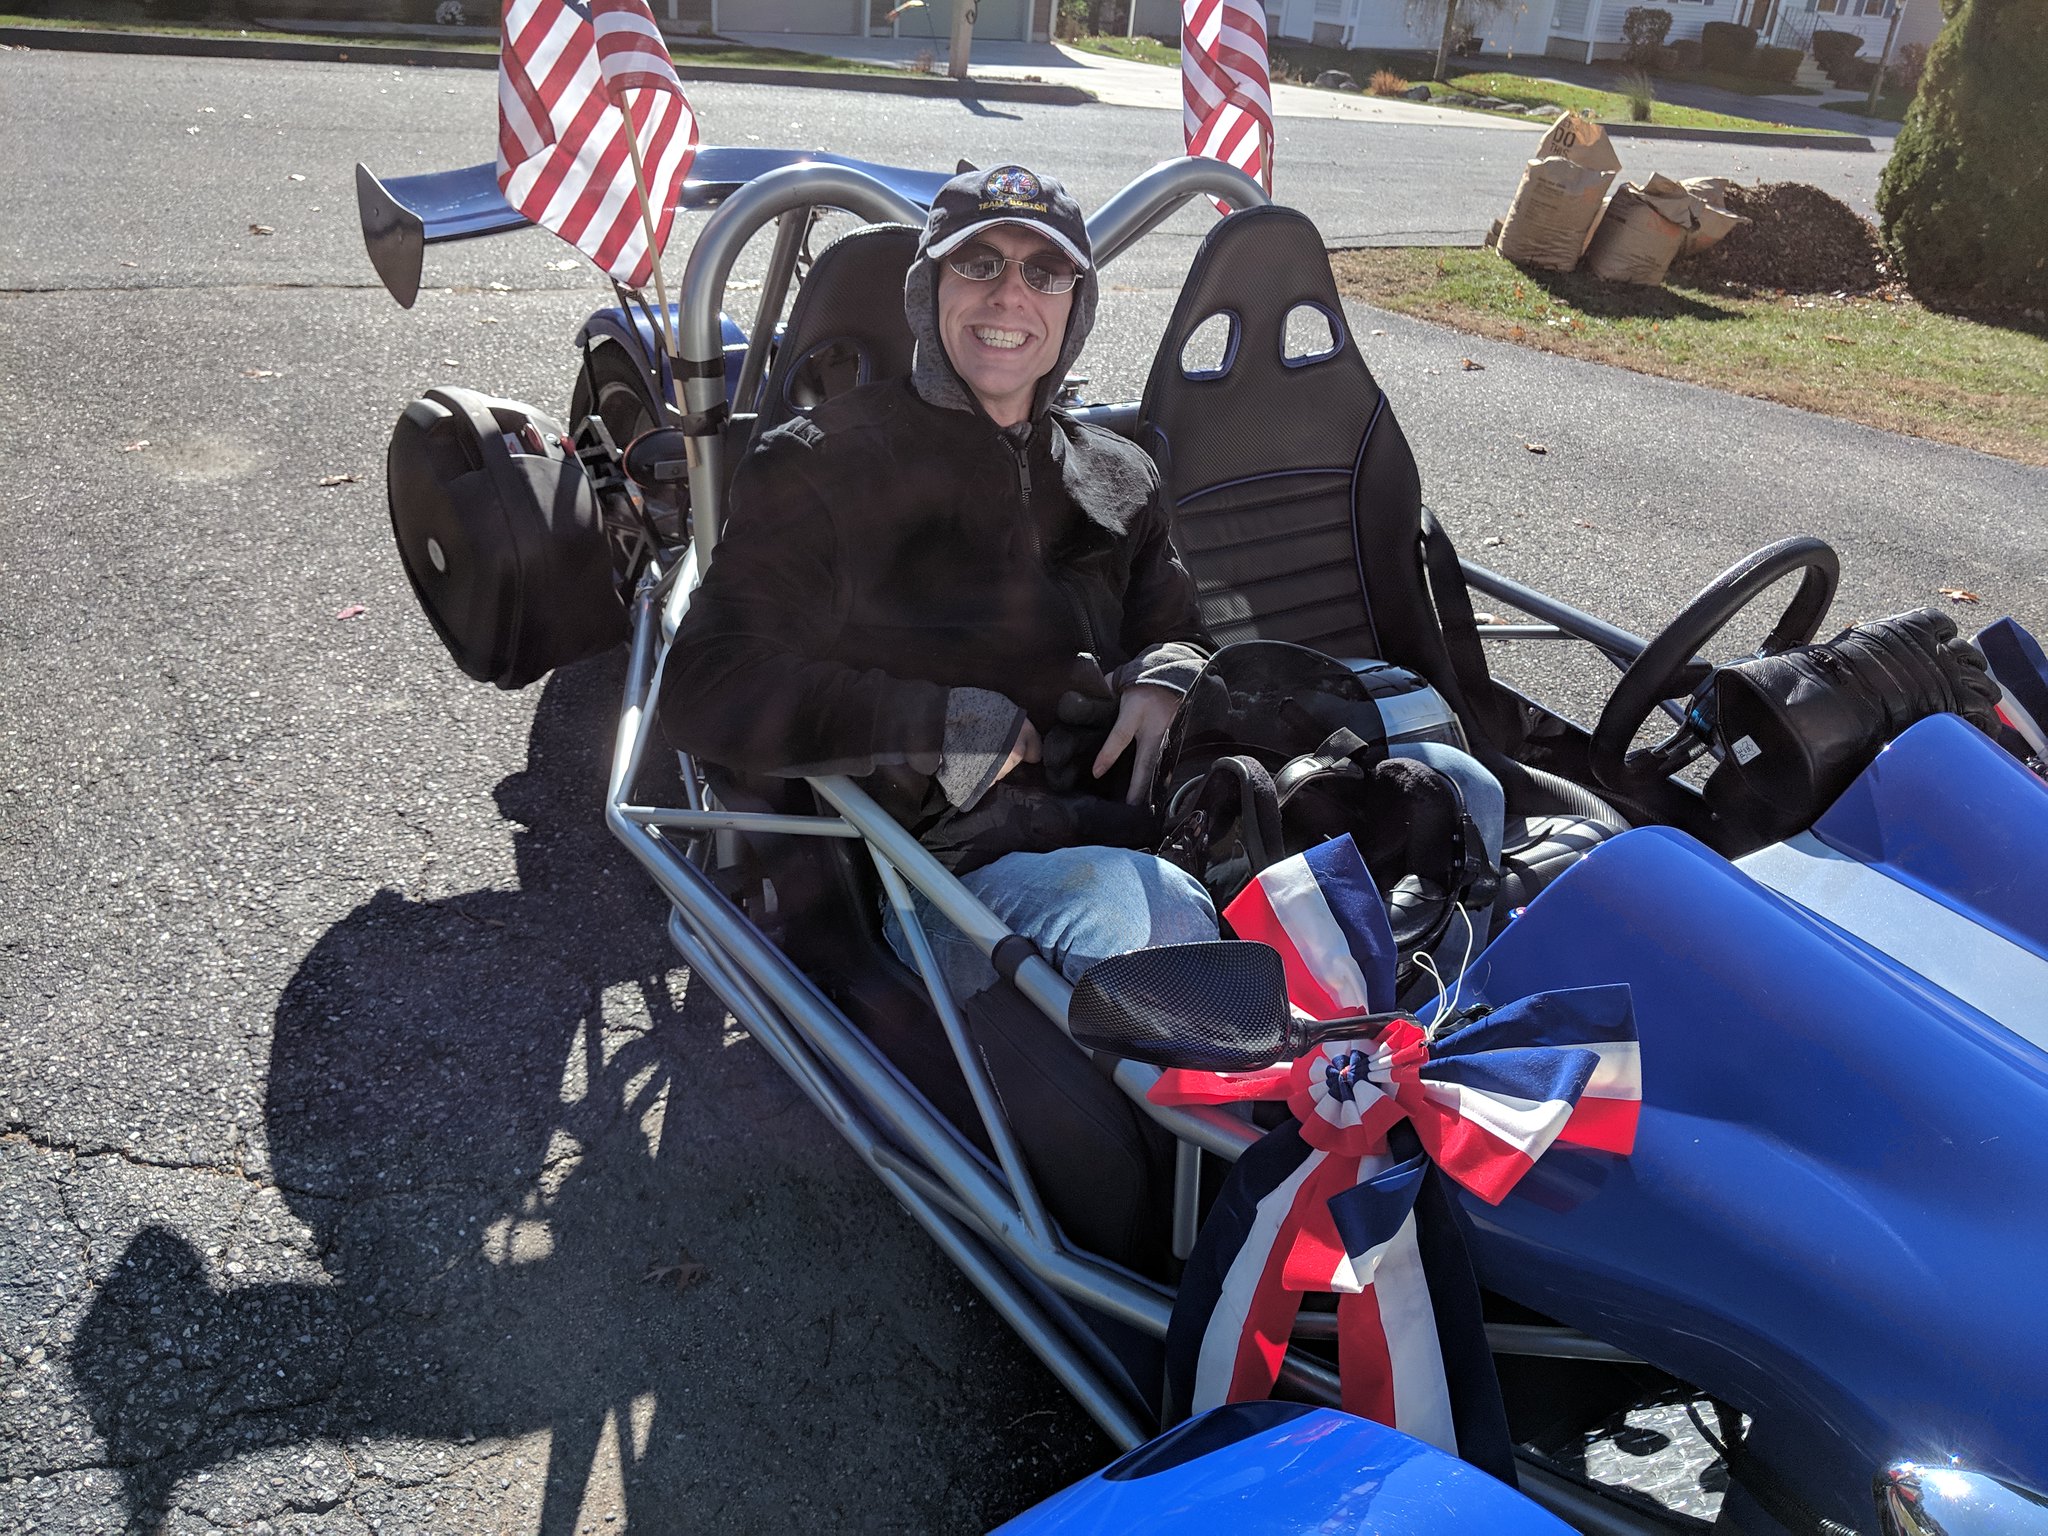 MVIMG_20181111_113120 MVIMG_20181111_113120 by Roger Baker, on Flickr My friend, Bruce. He was US Army medic. I asked him to ride with me in the parade today. Great guy, sacrificed much!! Thanksgiving has already come and gone. I ate to much and today was not much different from yesterday. I call it “Fat Friday”. I will get my energy level up and take care of some important stuff tomorrow. I will be adding a few options to my TR1ke. Over the past few months I have been getting a few items together to improve the build. One such item is a rear view camera to take care of the blind spot when backing up. It can also be used as a rear view mirror while driving. I tested it already. The resolution is great and can be seen in bright light. I will put in the CB radio and LED headlights. I’ve noticed small ball bearings rattling around on my floor pan. They came from the seat rail sliders.... Yes, I ordered replacements for them as well. Anyway, all of this starts tomorrow. I will leave the bonnet off for the greater part of the winter. I will be experimenting on a new design for a windscreen. Not exactly sure how it will turn out. I am not dedicated to getting anything at any cost as a result. It may be something as simple as a piece of Lexan sticking straight up as a wind break.... or something conformal and sleeker than the hair on a cat. The winter months will tell the story on that. I will be posting pictures of the additions and modifications as well as highlighting my attempts at moulding a windscreen. I realize I completed the build, but as the story goes, “You never really finish”. There is always something you need or like to do. I haven’t given up on making a better hand brake. I think Slugshot got it pretty close by adding a hydraulic hand brake, then swapping it out for a mechanical caliper when MOT time rolled around. My idea is to use a Suzuki Burgman rear caliper. It is a combination mechanical/hydraulic type. If I can make it fit and work, then that’s the way I will go. That’s about it.. Roger Worcester, Massachusetts 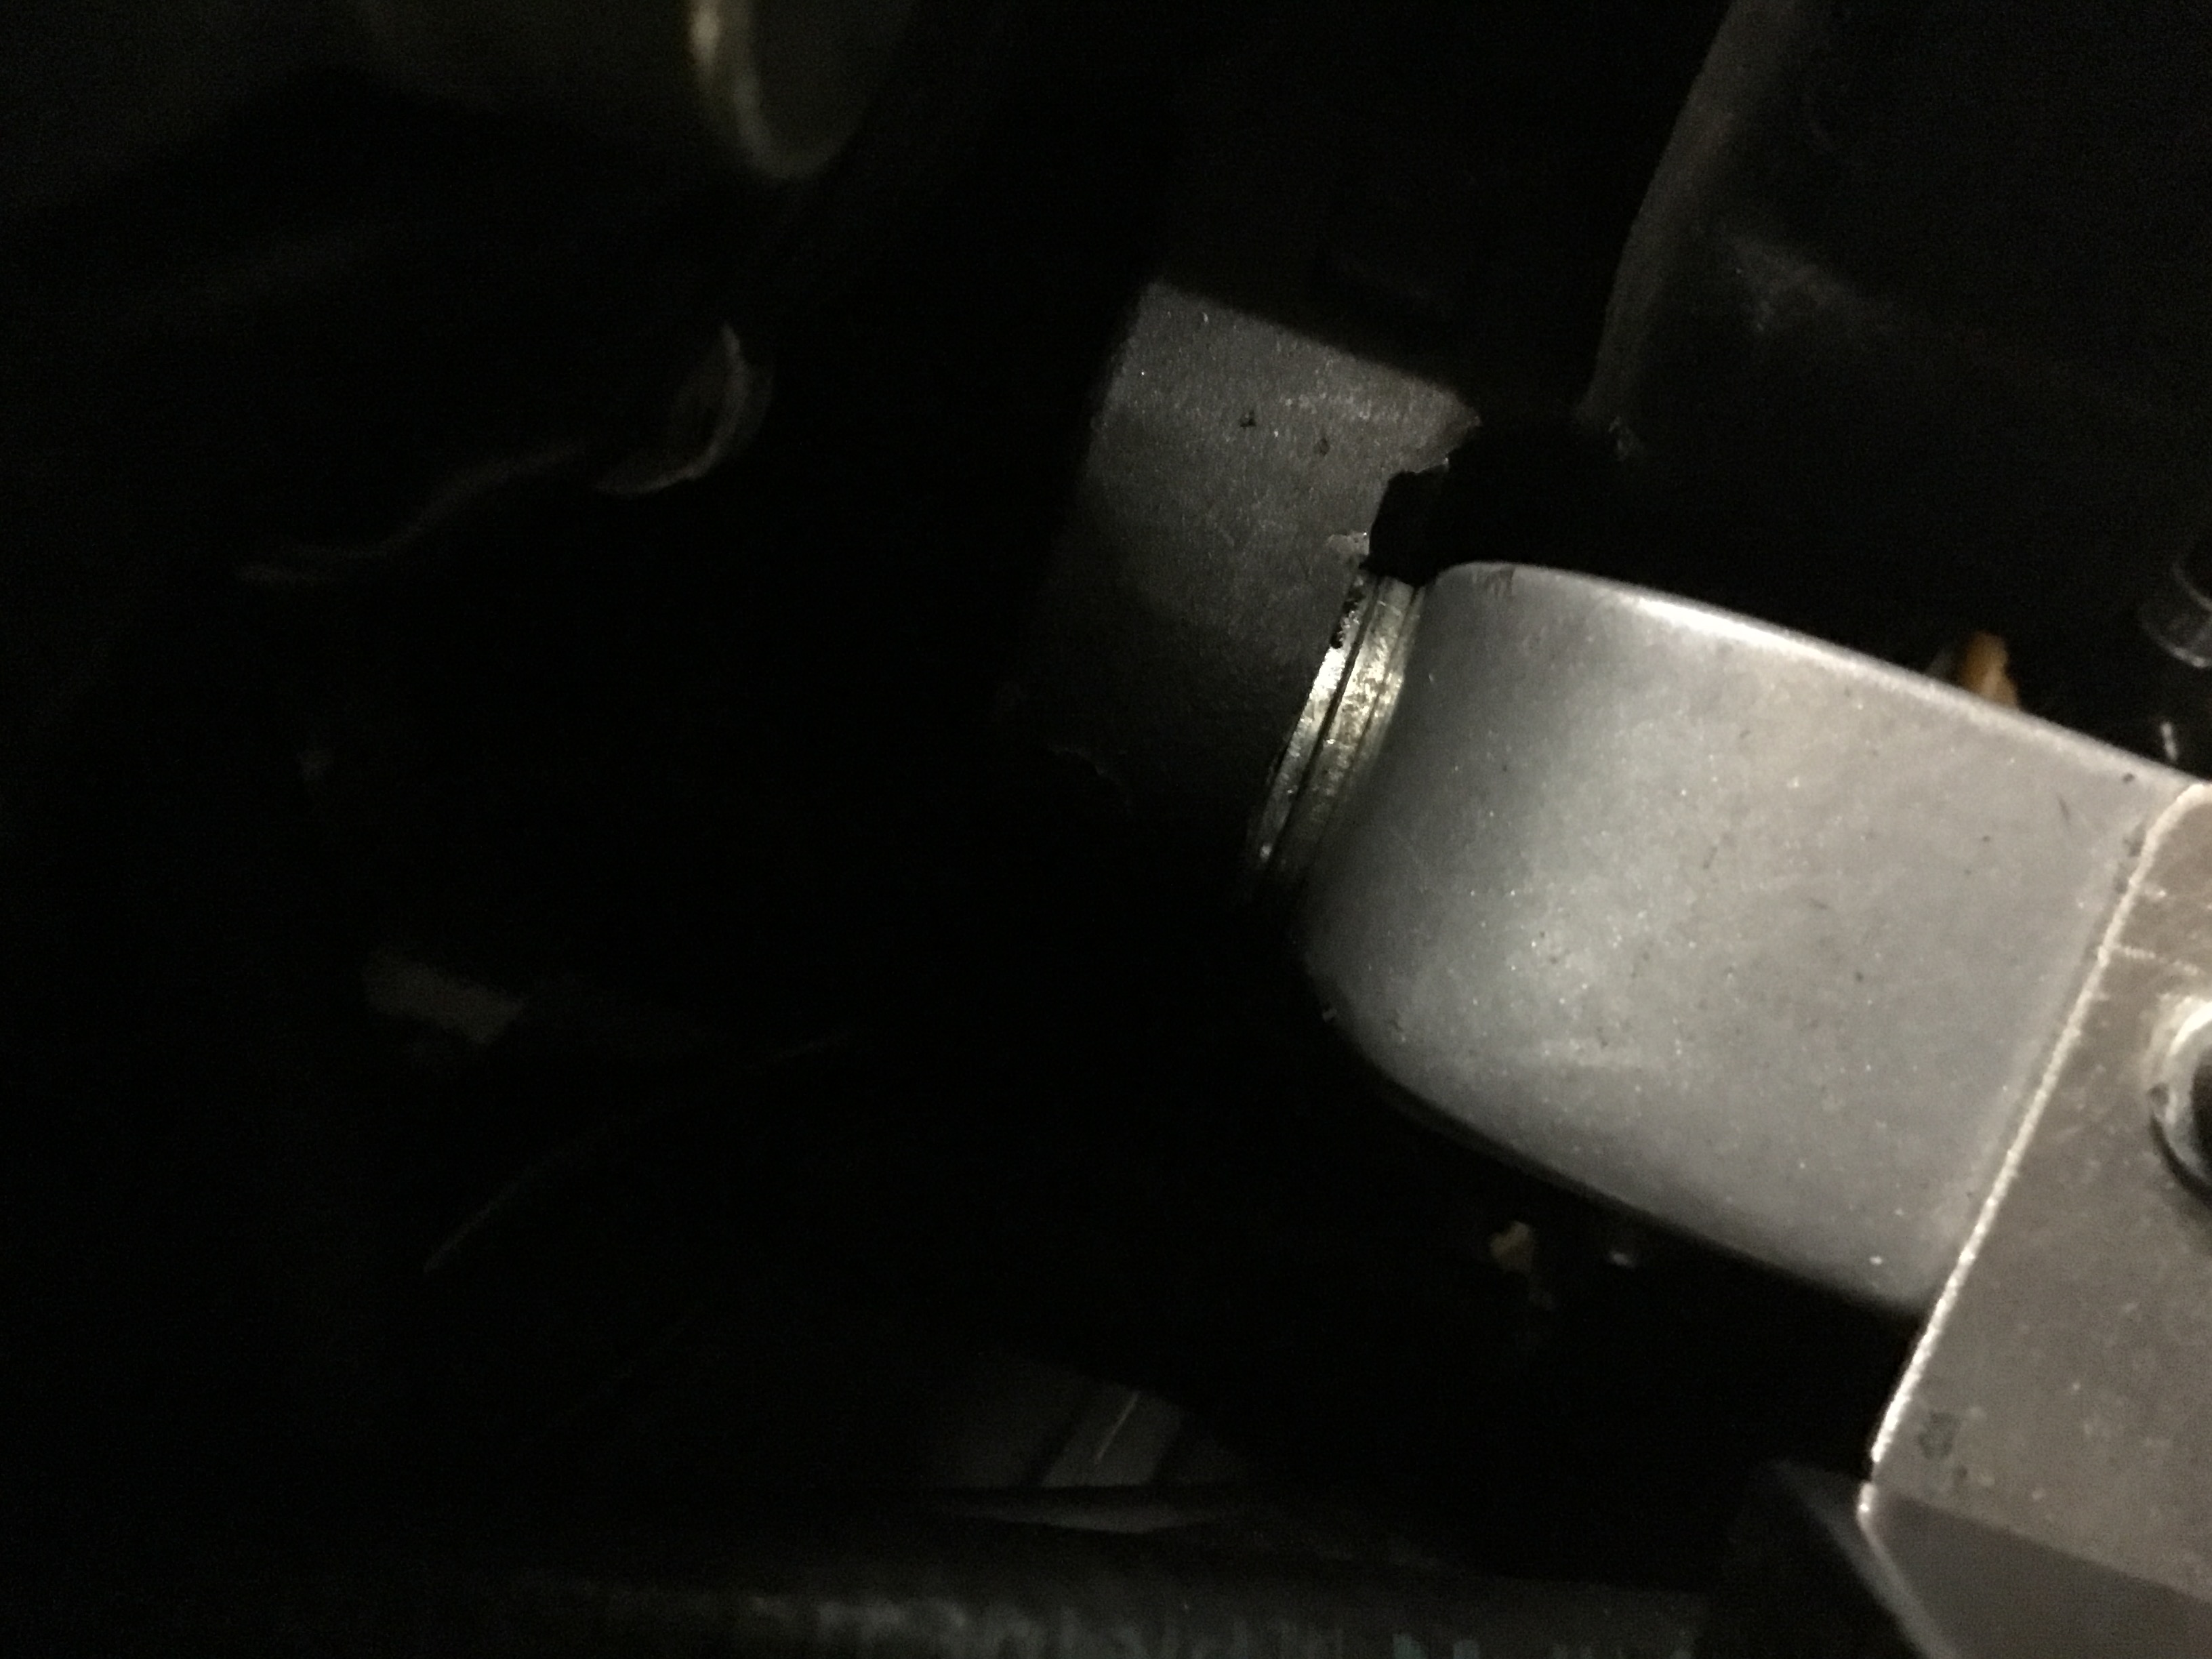 EEF995FE-C7FF-4325-A792-ED2F54D78525 EEF995FE-C7FF-4325-A792-ED2F54D78525 by Roger Baker, on Flickr As you can see if you look hard enough the tops of two washers that I used as spacers in the upper forward motor mounts. I don’t know how I overlooked the gap between the frame hard mount and the engine mounting point, but it was corrected today. Both sides needs spacers. I am surprised the mount bolts didn’t back off and cause a serious incident, or damage to me and/or the TR1ke. Anyway, the spacers equaled about 3/16” per side or 4.8mm. At least this is one item off the fixit list.....more to come. Roger Worcester, Massachusetts |
|
|
|
Post by roger on Mar 8, 2019 1:46:37 GMT -5
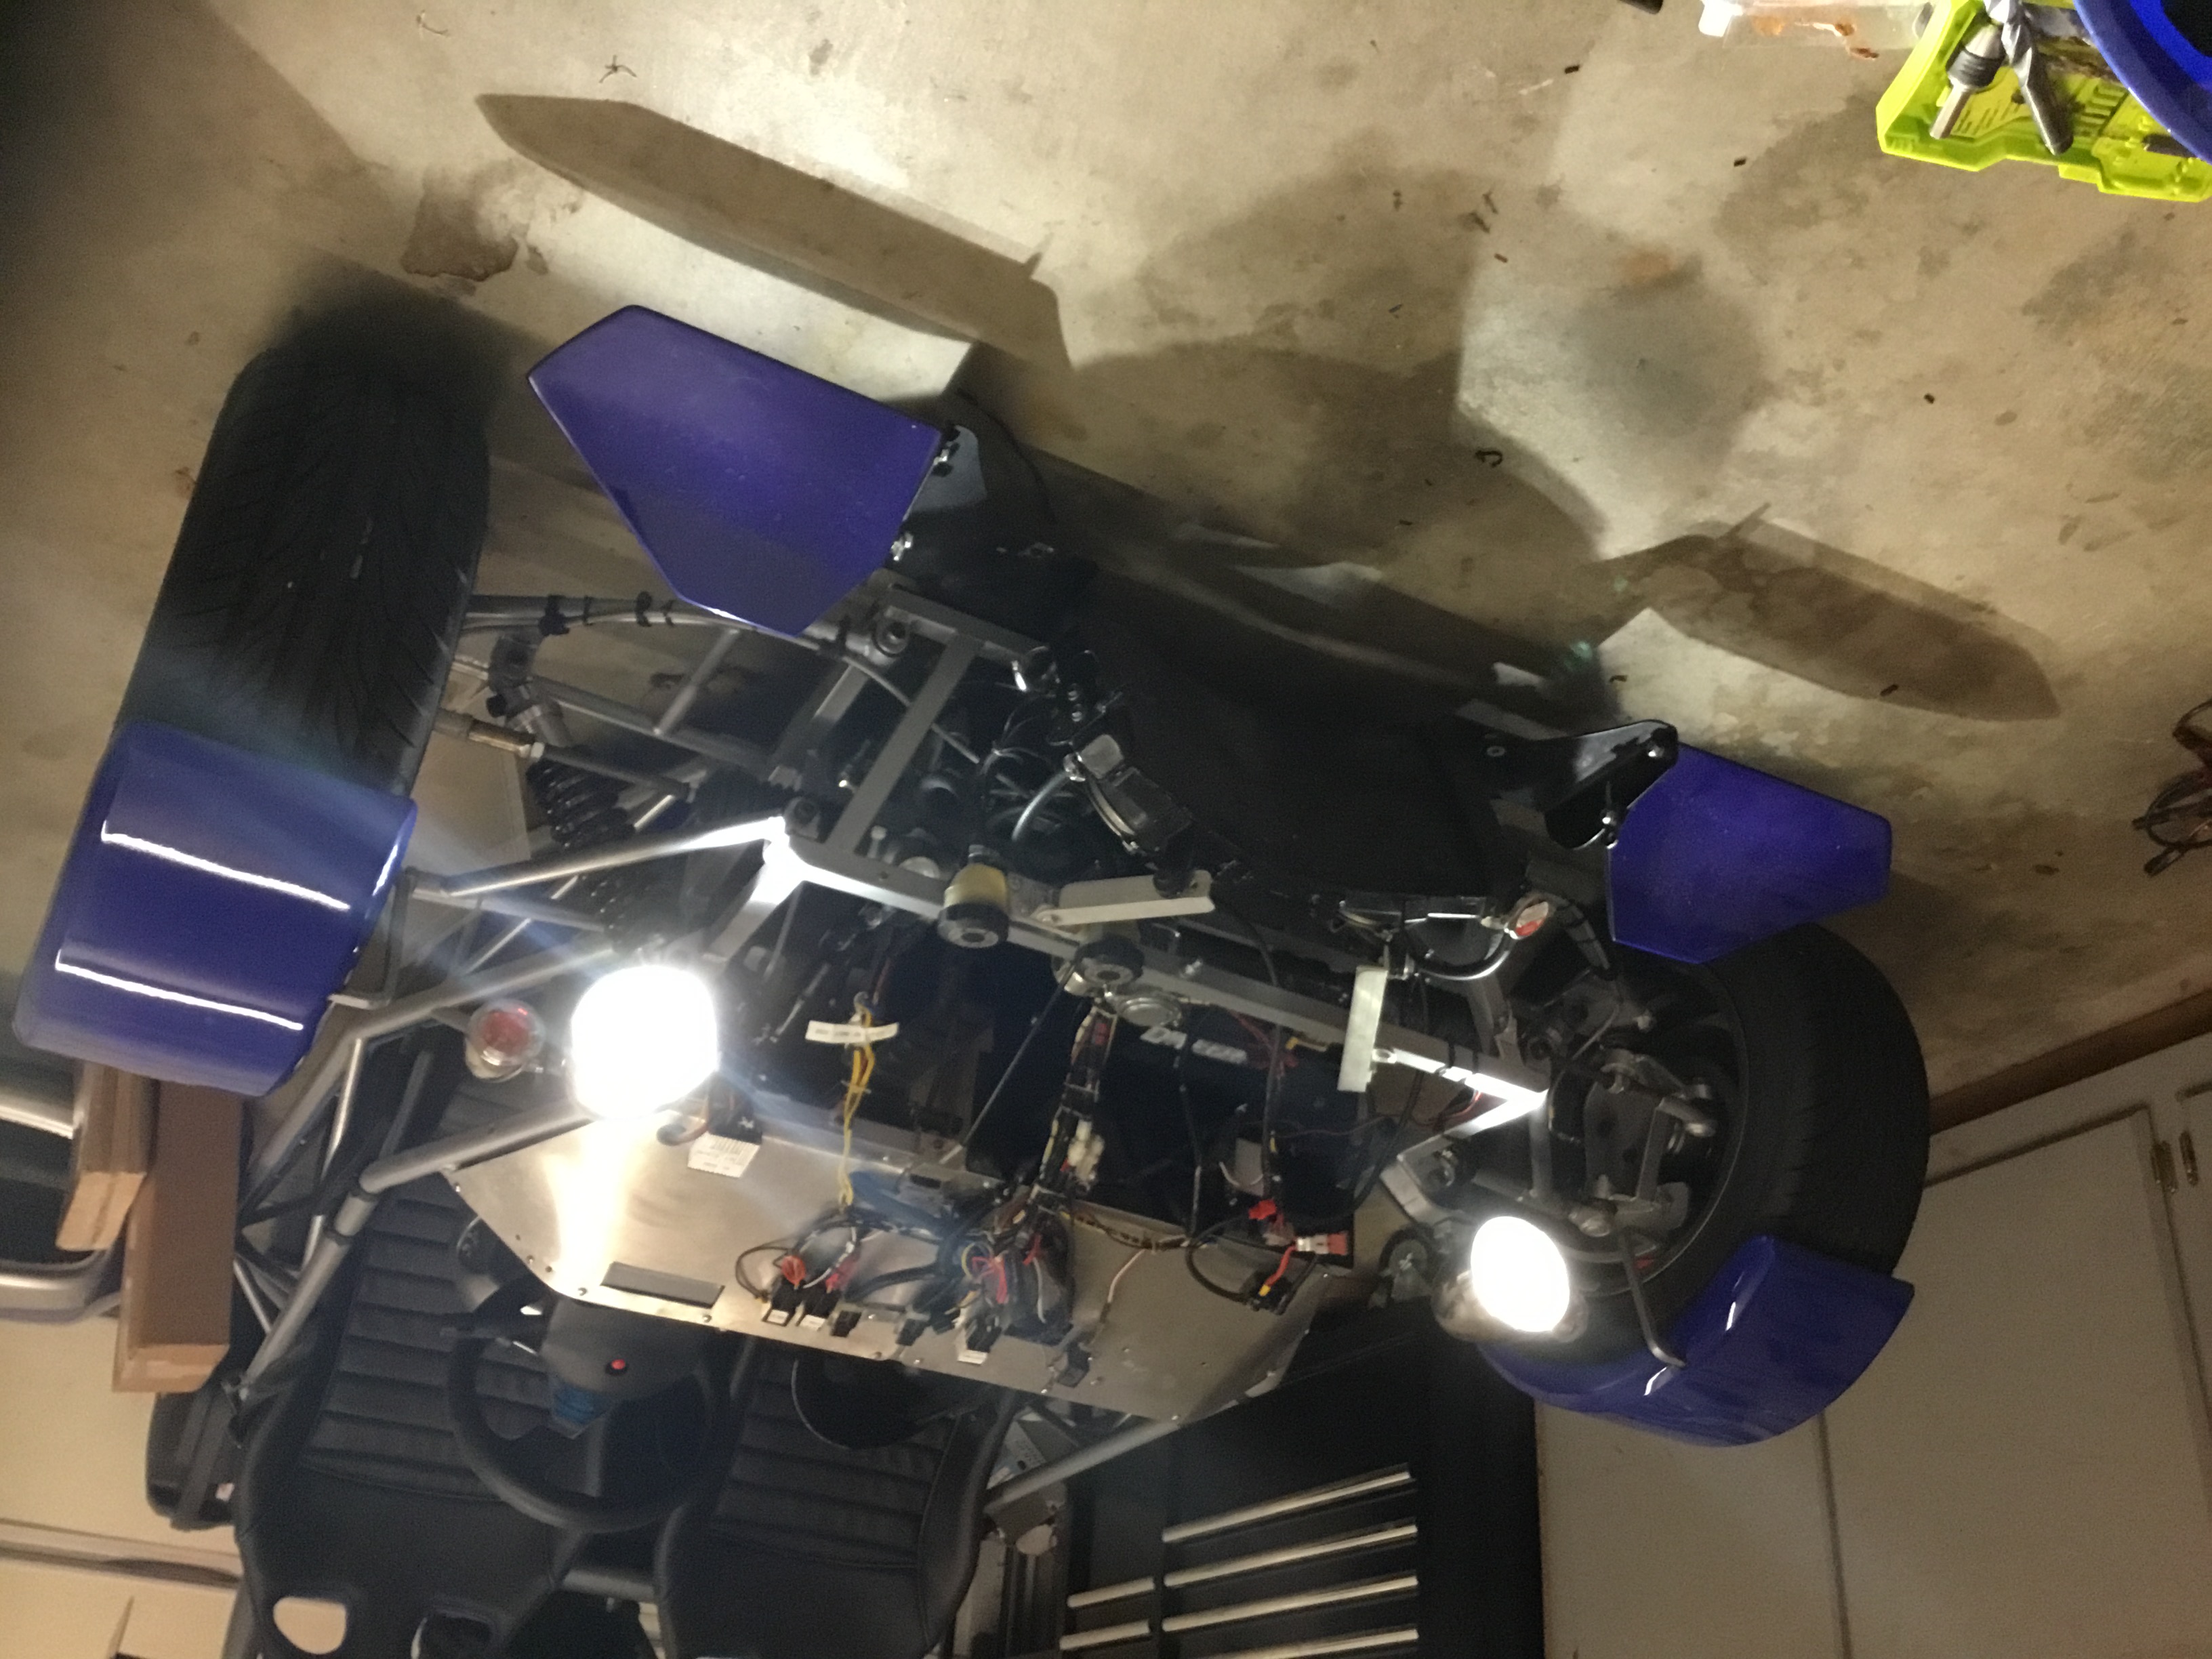 7AFB7FD5-CF26-4F3C-B1E6-EA1B50E1EDE5 7AFB7FD5-CF26-4F3C-B1E6-EA1B50E1EDE5 by Roger Baker, on Flickr I removed the Halogen lamps and installed the LED units. These lamps have the external power supply/magic box and not attached to the lamps at all. I realize taking a picture of headlights that are lit isn’t much of a testimonial to their brightness, but wow, what a huge difference in person. The lights are almost pure white, and really broadcast a wide, long beam. 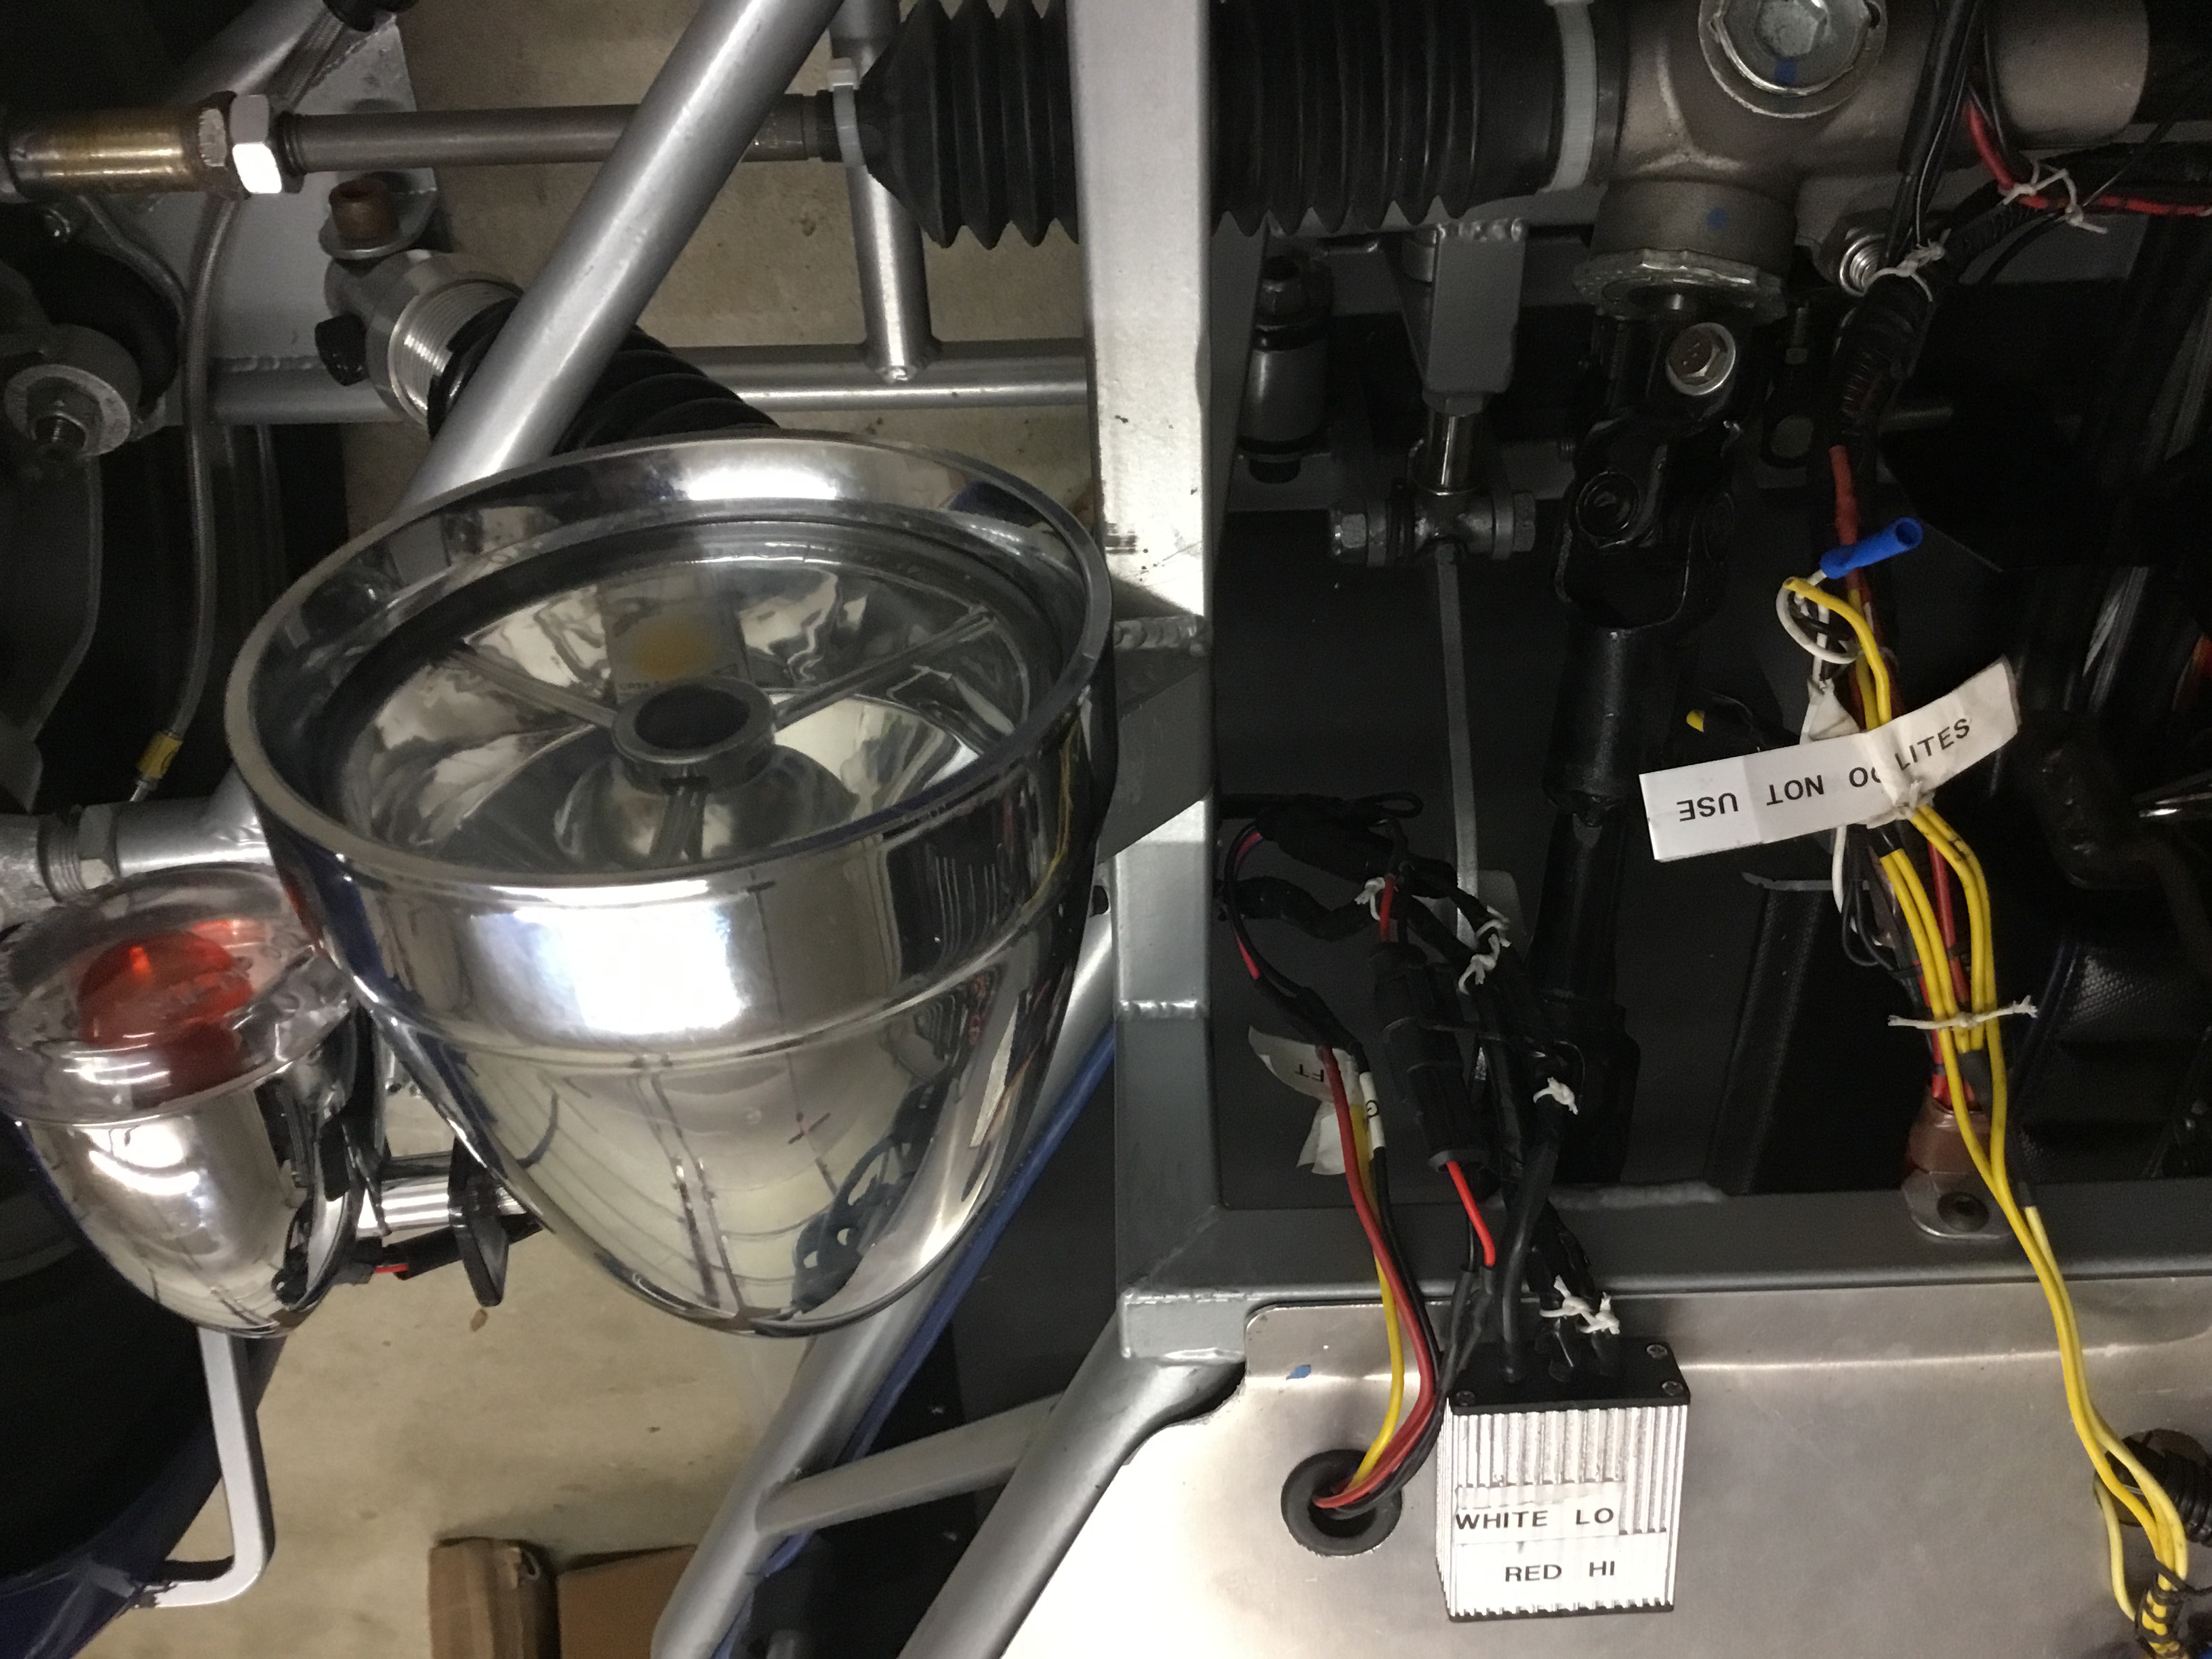 322317F9-ACFD-4A21-93B4-63F249EAA6E2 322317F9-ACFD-4A21-93B4-63F249EAA6E2 by Roger Baker, on Flickr The little silver box is the power supply or relay, or what ever else might be in there. I am not altogether sure what it is, but one thing is certain, it all works.... the headlight buckets and reflectors are from Adjure. Nice system with the LED’s Roger Worcester, Massachusetts Interesting find on the motor mounts. I'm surprised it's not iso or rubber mounted. I guess this does not vibrate to the chassis? Good smooth motor? I just got mine out of the frame of the donor bike and it is hard mounted. I’ve gone a few thousand miles in this thing and the engine is in fact very smooth. There was a slight vibration as I transitioned from low speed, to high speed. It was noticeable going from 2nd to 3rd gear. It was maybe a second or two where the engine sort of shook. Nothing serious mind you, but enough for me to start looking at why this was happening. Whether the mounts were or weren’t the problem, they are now tight and the potential for something bad to happen has now been averted. I will be removing the seats next and installing new seat adjuster rails. I bought a pair of NRG adjusters that will require some mods, like mount points for the seats. While the seats are out I will run the wiring for the rear camera and the CB radio. More pictures later. Every time I adjust the seats I hear ball bearing dropping out of the adjusters. Not a good sign that things are ok under there. That’s it for now Roger Just a fast update. I have been trying to clear enough time to get some progress on the winter TR1ke improvements and updates. I installed a pair of 12 volt electrical busses. One switched, one constant supply. I already have the new seat rails installed, and the other items mentioned in previous posts. As far as the reverse camera goes, I mounted it on the license plate mount. I am not to happy with the location but will leave enough slack in the camera feed cable to relocate it further aft if this current location does not work out. The camera will serve as a rear view mirror while driving as well as for reversing. I installed the CB antenna on the right side of the license plate mount. I angled it slightly to the rear. There was “just enough” cable to attach to the head unit, speaking of which will be mounted between the dash and the turn signal stalk in the left side of the steering wheel. Currently the bonnet has been removed as well as the seats and floor tunnel. The wiring is in the process of being secured with ties and waxed electrical twine. The addition of a cell phone and/or accessory charge port will also be a consideration. I will be installing a rollbar mount for my GoPro and naturally there will be a 12 outlet to keep the battery from going flat. As far as the engine oil drip goes... It has not been addressed yet. I have a stock of “0” rings designed to tolerate petrol based oils and hold up to engine heat. I will take care of that last, since it appears to be the easiest fix of all the things I need to do this winter. I am hoping to complete the bulk of the modifications before the Christmas holidays. This will free up time to experiment with fabricating a windscreen for the bonnet. That will be the most challenging of the winter maintenance items to do. Roger Worcester, Massachusetts I like your winter plans. I hate wire ties as a final fix. The waxed lacing cord always looks better. I use wire ties to bundle it all but then do the waxed cord. I have all the needles and curved hooks from my telephone career. You can get the waxed cord in many colors too. When I worked on the F-15 Fighter back in my USAF career all of the wiring was secured using waxed dacron cord. It was white with red ticking. If you had to cut into a wire bundle, the lacing was always nicely done and wrapped very tight. When I did the TR1ke I used the plastic wire ties to gather the bundles then lacing cord. I used a half hitch type knot/stitch. Since none of the wiring bundles in the TR1ke are long runs the half hitch stays tight, is easy to wrap, and easy to remove if necessary. If you know of a mail order business that sells waxed cord in colors I’d like to know who. I had a heck of a time finding just the white. Roger Worcester, Massachusetts |
|
|
|
Post by roger on Mar 8, 2019 1:55:25 GMT -5
I removed the first flat one's link above. The second one is around 1/16", round, 9 ply and has 150 pound pull to yeald. Somewhere in the garage I have a spool each of White/Cream, Black, Red, Blue and Orange. Yep, once you pull these tight and tie a square knot, it is NOT coming loose. But they cut off with scissors. But with waxed twine it will not cut you if you run your arm on it. A cut wire tie has caused enough cuts and gouges, I had to get 5 stitches in my arm from 1 nylon wire tie's cut tip. I too use mostly the cream color twine. But when I was doing repairs to a GTE small telephone switch, I used different colors for each system, Red was POWER leads, Black was Grounds, Blue was cooling fan system leads. 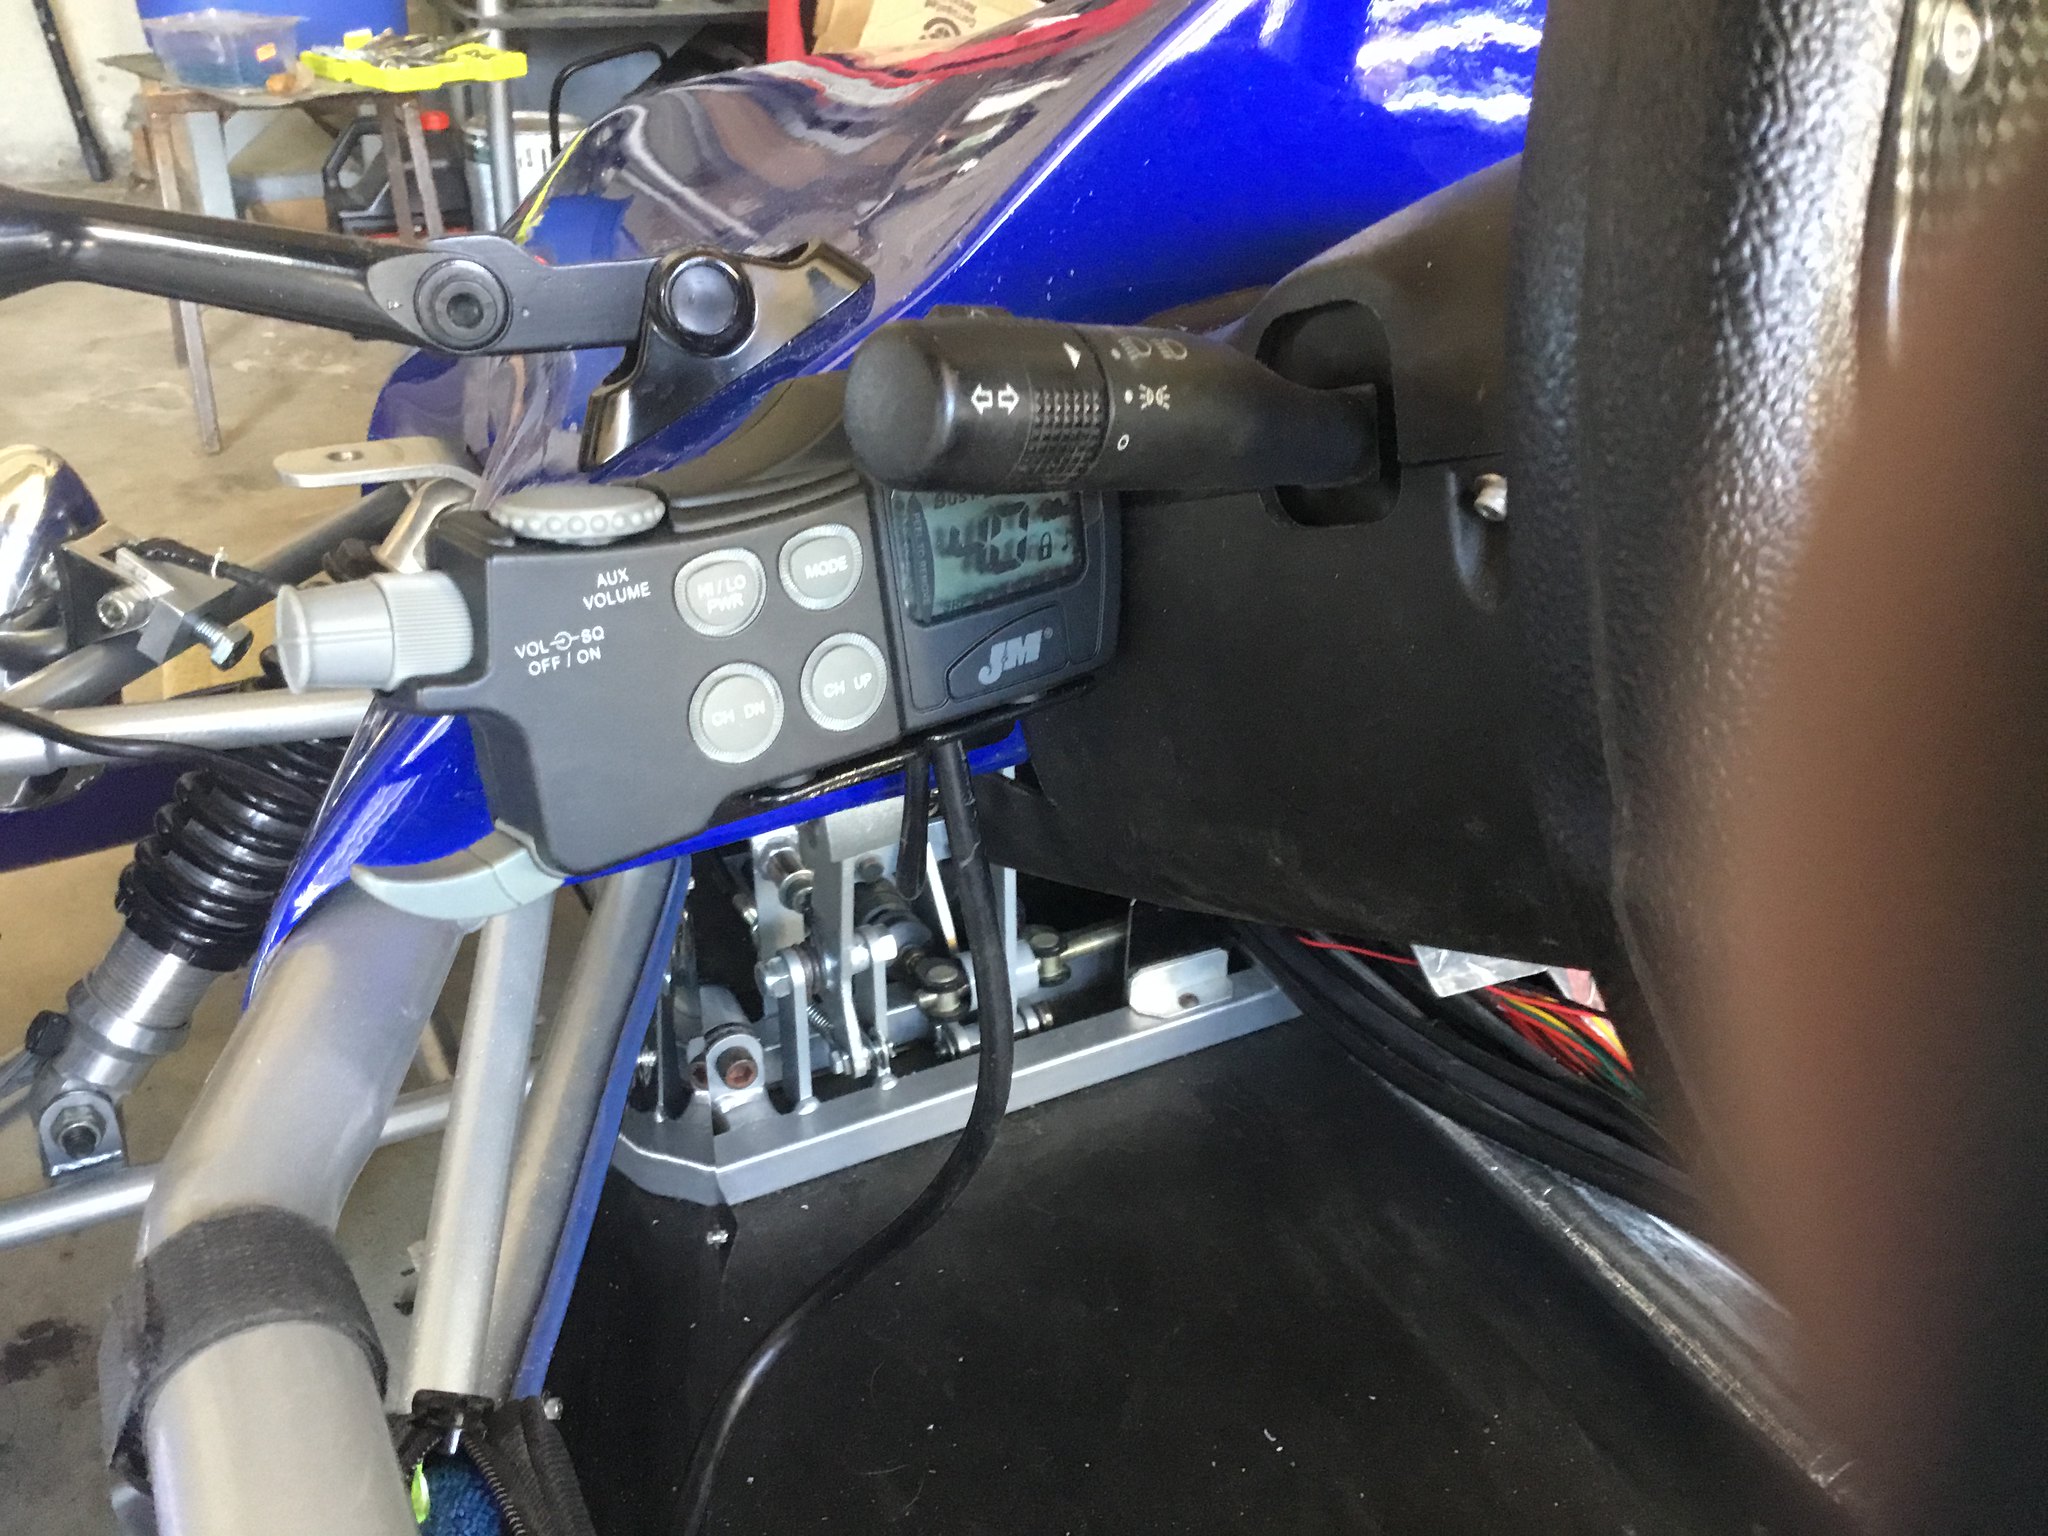 BBE5FE45-EA93-45D7-AC0D-2FE3045A5E66 BBE5FE45-EA93-45D7-AC0D-2FE3045A5E66 by Roger Baker, on Flickr Here is the picture of the mounted J&M CB. It fits good behind the turn signal stalk. I can easily see the channel and can reach the controls without shifting my weight forward. This unit also has a built in intercom with a constant hot mike open to both headsets. 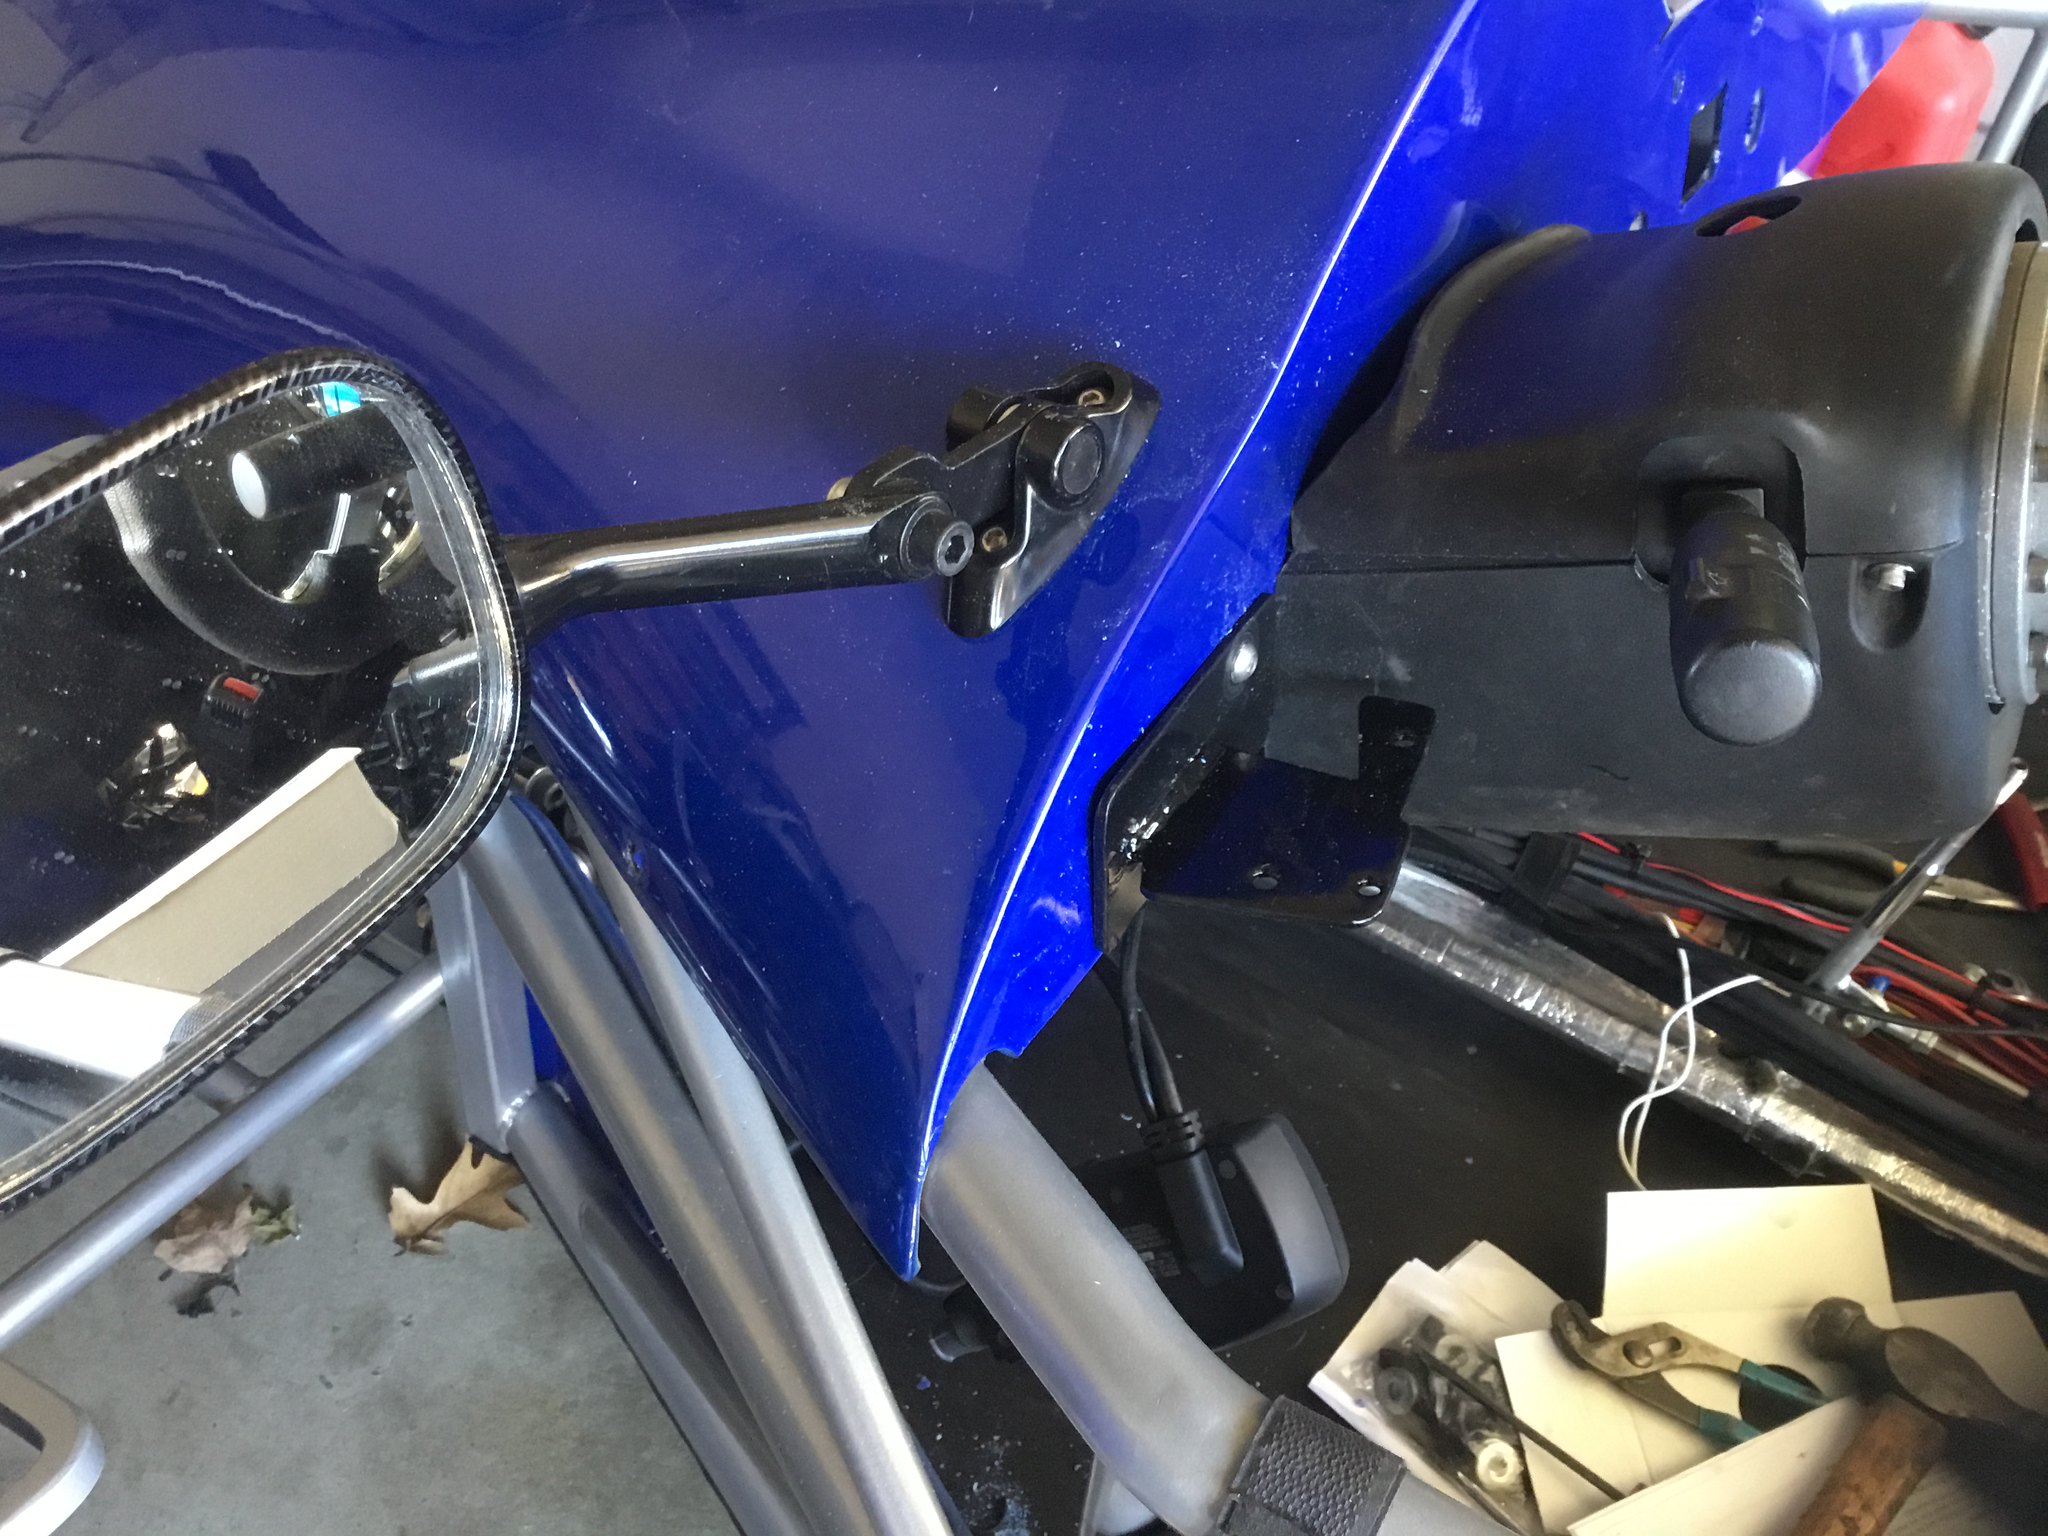 0806F8C5-28EE-40FC-8E26-EA5534D7912C 0806F8C5-28EE-40FC-8E26-EA5534D7912C by Roger Baker, on Flickr The actual mount for the CB looks a bit like the “Wonky Donkey” but once the system is mounted and secured, nothing of the mount is actually visible. Behind the GRP I installed a triangular piece of flat stock 3/16” steel. The steel has 3 each threaded 1/4” x 20 holes that sandwich the bonnet GRP and the mount. It is quite solid. I started routing the wires and cables for the J&M CB radio yesterday. What a snarled bunch of wiring that turned out to be. The temperature in the garage was around freezing. The electrical wiring was stiff and not exactly pliable. When I unbundled it, naturally it coiled right back up, like it had tension memory or something. I brought the bundles into the house and placed them by the heat register to warm them...... meanwhile back at the garage..... I drilled passage holes and marked the route for the wires. After the wiring harness warmed up and became user friendly I returned to the garage and laid the wires out. I managed to get it almost all done. I connected the power, antenna and ground along with the noise filter. In the end the CB powers up and the channel memory functions as it should, so all is good with the electrical wiring side of the install. Since the unit is designed with only a preamp for helmet speakers and helmet microphones only, no other wiring was necessary except to run the 6 pin helmet connectors. If the connector wiring is long enough they will be routed through the tunnel then exiting to go beneath the seats and pop up at the left and right sides of the seating area..... (OR) I will route them along the middle side rail at the top edge of the splash shield I installed this summer. By the time I get around to securing the connectors I may need to borrow the wife’s hand held hair dryer to make the connector cables pliable. I need to get about a dozen black teflon wire clamps after Christmas to complete the job. As it is the wiring is finished with the exception of the aux power socket. There isn’t much more I can install. The main wiring bundle is taking on a life of its own. In the end, it will be a decent reliable vehicle that I can take for extended outings. The installation of the CB radio is as much for the built in intercom as it is for communications with other riders. The aux power socket is next, but will wait until after the Christmas holidays. MERRY CHRISTMAS & HAPPY NEW YEAR EVERYONE...... Roger Worcester, Massachusetts Roger, is that head unit "Bluetooth" linkable with other bikes intercoms? Imagine working with telephone cables filled with a waterproof jelly inside when its 12 degrees F. It will not bend as you need it to. Been there many times and a hair drier does help. The CB is not Bluetooth or wifi. It is strictly a Citizen Band transceiver and intercom. It does have Noaa radio and I can plug in an MP3 or cell phone for music or iPod nano and get FM Stereo. |
|
|
|
Post by roger on Mar 8, 2019 1:57:59 GMT -5
OK. I have a Factory 12 channel CB-FM-8 Track in my 1978 Dodge Little Red Express Oh yea, I remember 8 tracks well. I also remember when AMC installed an AM/FM/cassette/CB their cars back in the mid seventies. It wasn’t a bad unit. The CB model I have in the TR1ke has been around for years. I believe 2003 was the first year that J&M put them on the market.. They are very reliable and are full power 40 channel CB’s. 8 Tracks were a little before my time. |
|
|
|
Post by davej98002 on Mar 8, 2019 2:10:06 GMT -5
Roger allowed me to transfer his build over from the MEV forum to here for you all to see. He has built two FINE machines and I'd love to have ether one. He had input from a few members over there so the names are posted but they may not be a member on here. I have known Roger for a few years now. Easy to bounce ideas off of and he is willing to help when he can.
So I hope you all like his two builds. Make some comments, give LIKES where you can.
Thanks Roger.
|
|
|
|
Post by roger on Mar 17, 2019 7:09:30 GMT -5
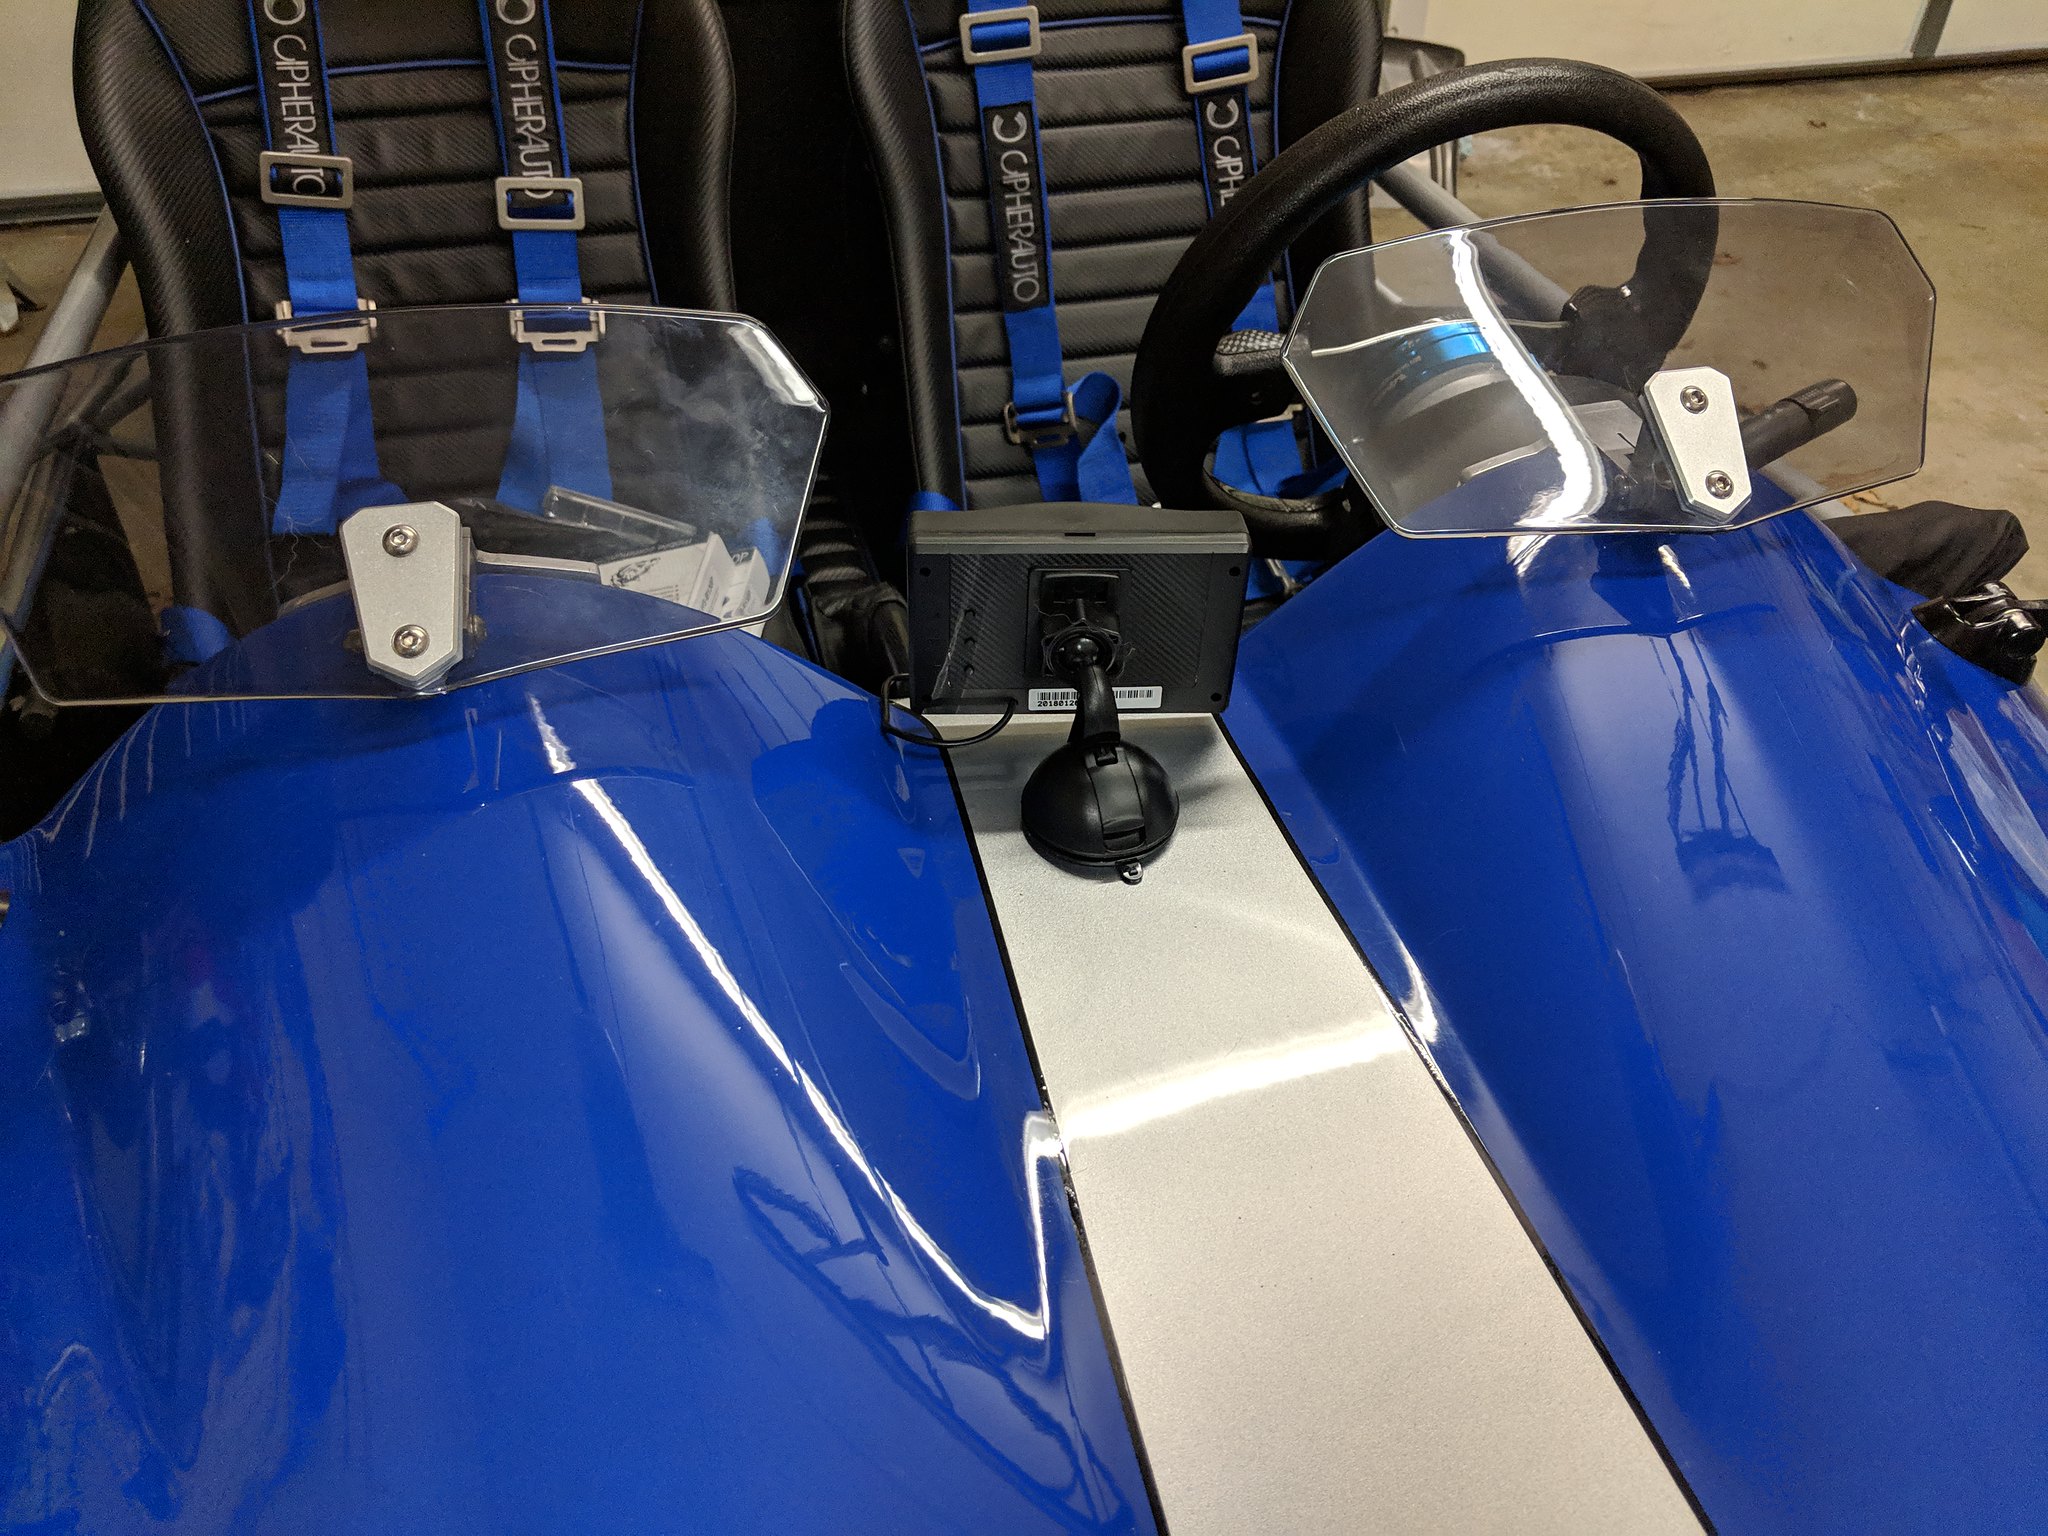 004ABF6E-CBD9-4A9D-A921-0EBAB7FFF21A 004ABF6E-CBD9-4A9D-A921-0EBAB7FFF21A by Roger Baker, on Flickr I finally got the bonnet reinstalled with the new windscreens in place. There is also a reverse camera screen mounted between the two windscreens. The blue 4 point seatbelts replaced the single over the shoulder auto style belt. |
|
|
|
Post by roger on Mar 17, 2019 7:12:57 GMT -5
|
|
|
|
Post by roger on Mar 17, 2019 7:19:59 GMT -5
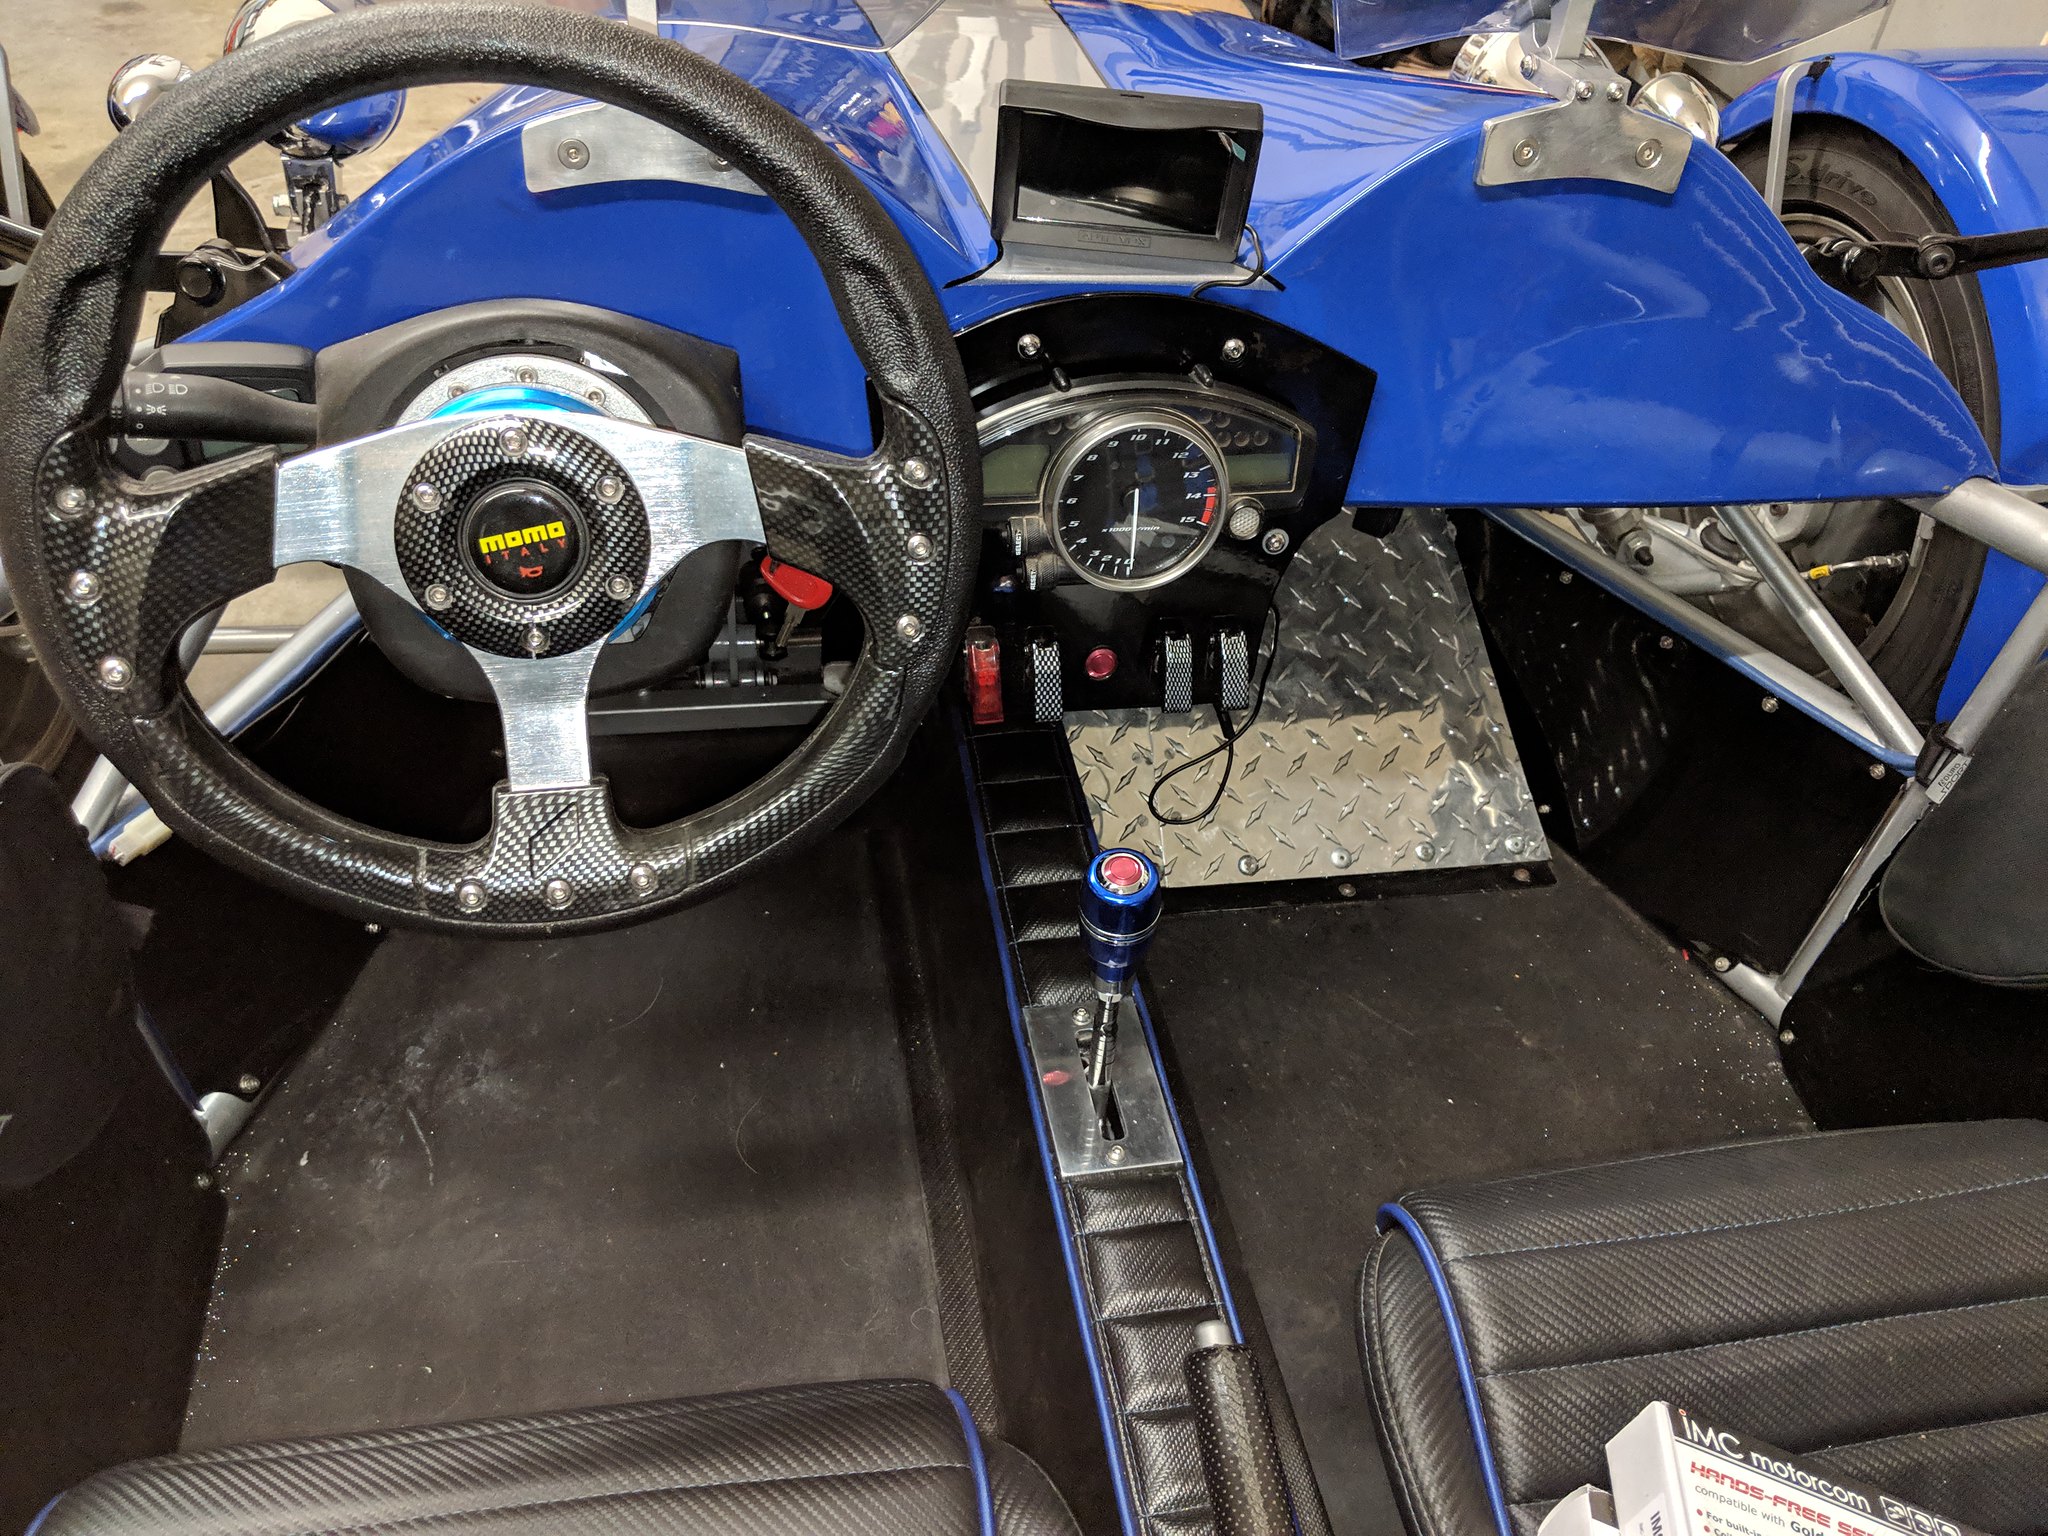 3373D200-D24C-4941-9C5C-115AB3AA8AE0 3373D200-D24C-4941-9C5C-115AB3AA8AE0 by Roger Baker, on Flickr The interior behind the newly installed windscreens has changed a bit. The LED monitor is a very bright high resolution unit that is connected to a reverse looking camera that is attached to my license plate. Also, the gear selector boot was removed and I added the slotted piece of polished aluminum in its place. This keeps side to side movement to an absolute minimum when going through the gears. |
|
|
|
Post by roger on Mar 17, 2019 7:28:30 GMT -5
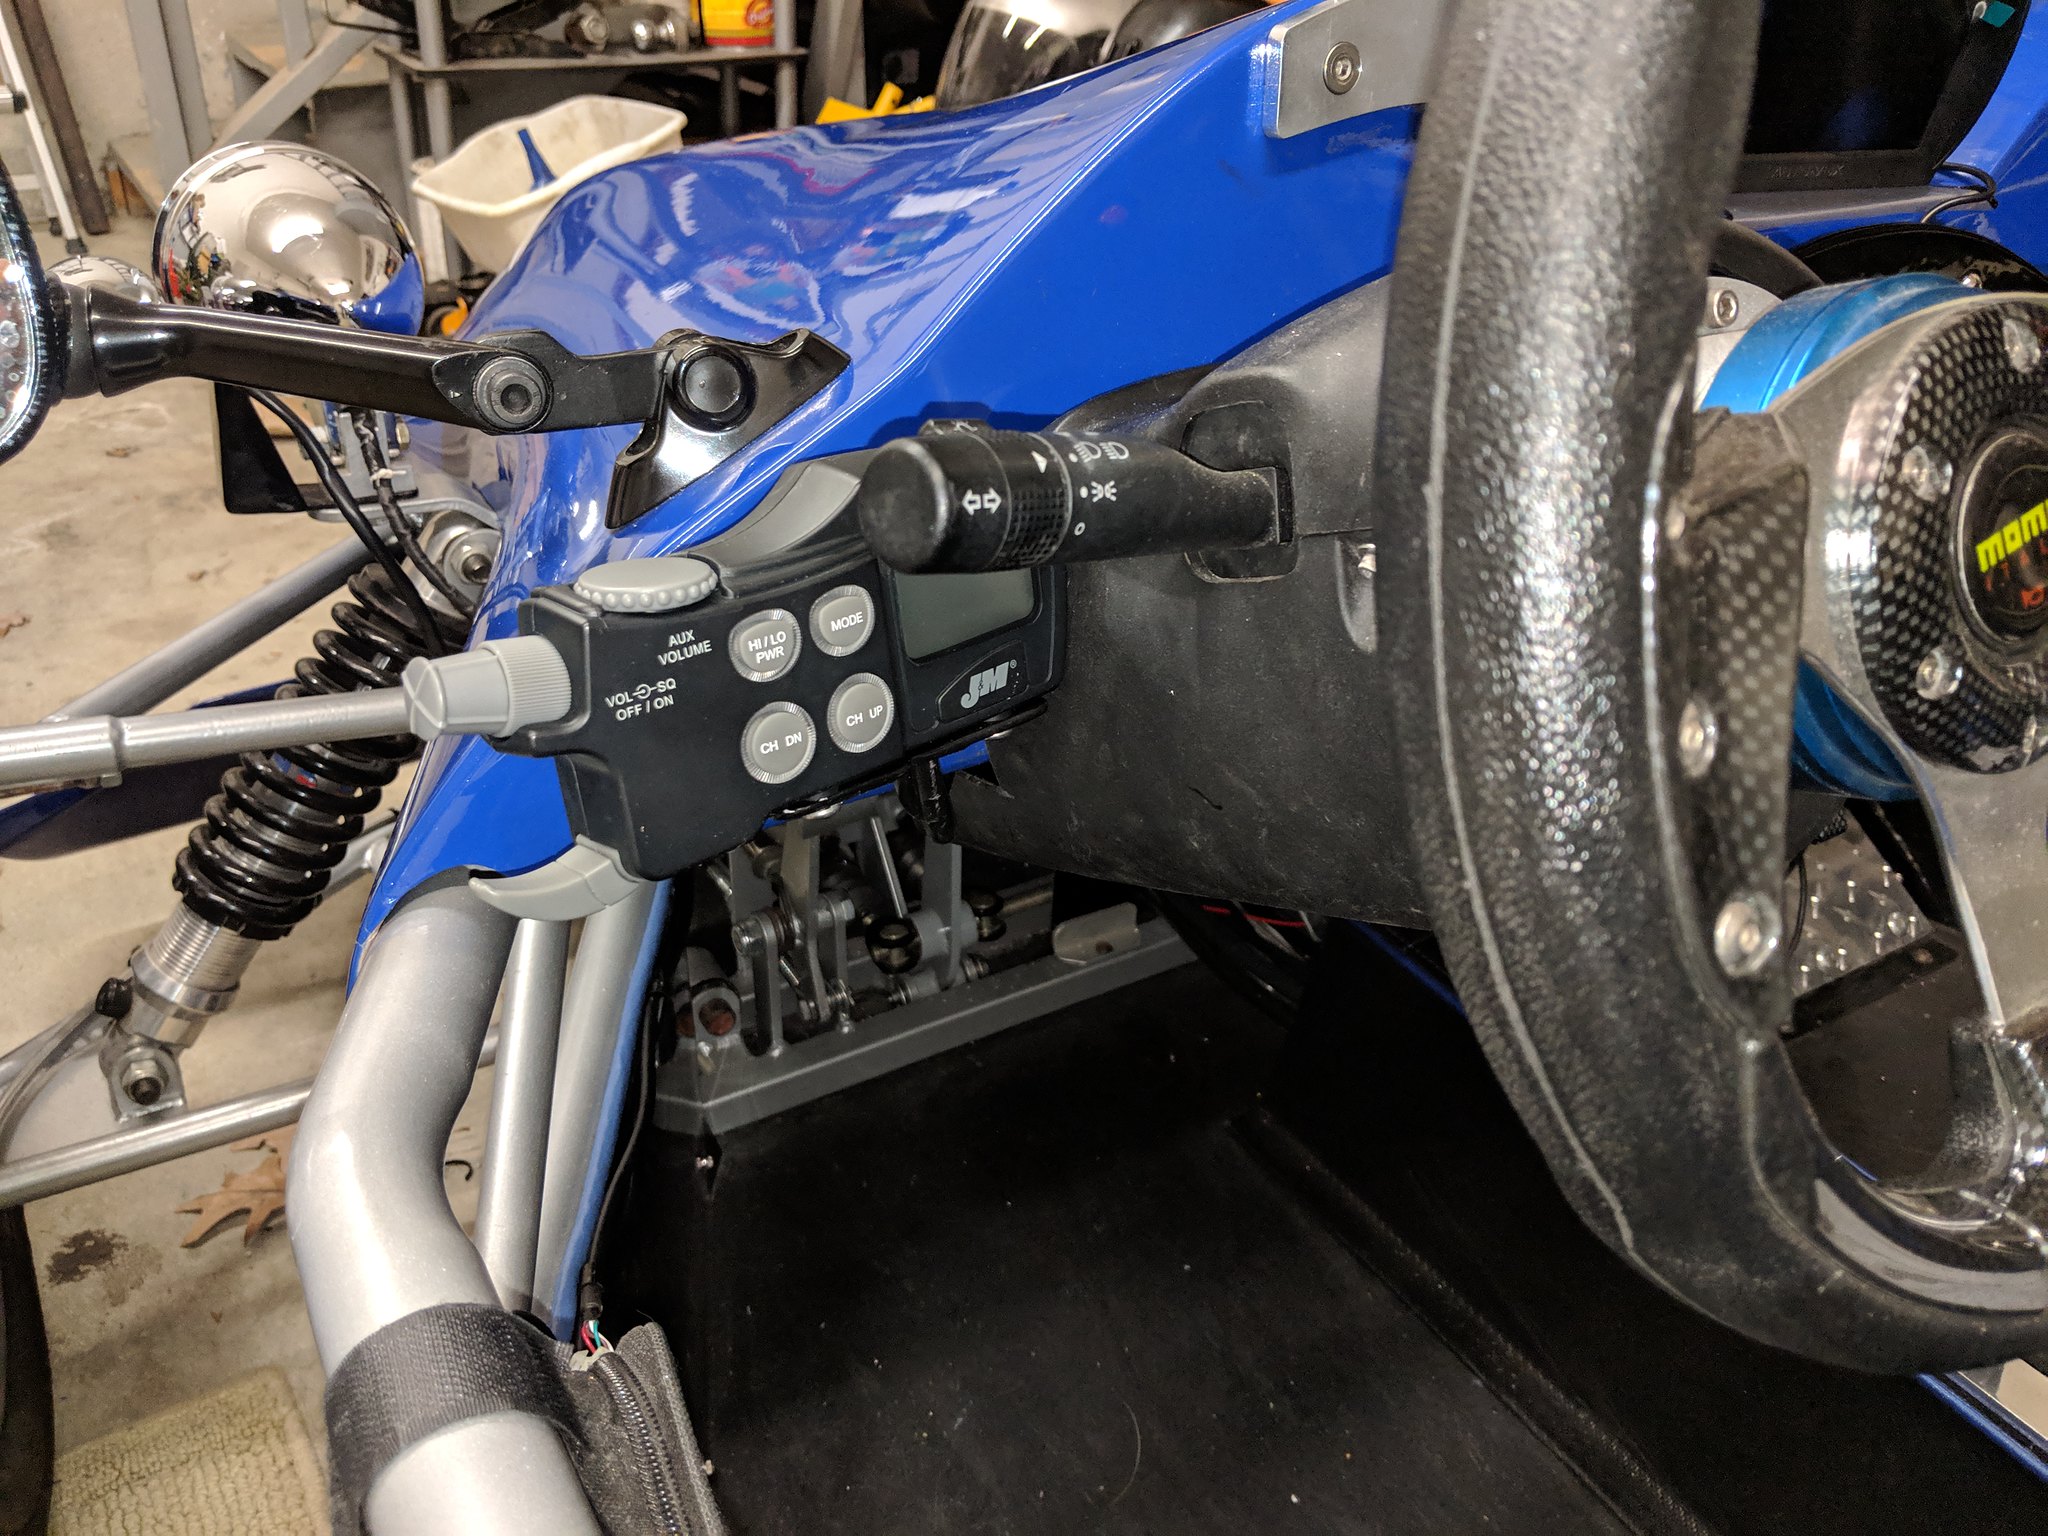 454377CC-2686-4DA4-A737-8FE8284F867A 454377CC-2686-4DA4-A737-8FE8284F867A by Roger Baker, on Flickr The J&M CB radio is mounted in the only accessible location. I can actually key the microphone without taking my hands off the wheel. It not only is an excellent comm device, it also acts as an intercom and will accept an IPod or other mp3 music source that has a 3.5mm plug receptacle. In addition, it is connected to the National oceanic and atmospheric weather system transmitter. |
|
|
|
Post by roger on Mar 29, 2019 17:08:44 GMT -5
I’ve got the trike work that I wanted to get done all finished. The weather is warm but raining. First dry day and I am going out for a ride. The summer days are approaching and regardless of whether or not I actually did everything I had scheduled, It is definitely road ready. I am anxious to see how the wind screens deflect the air. I also installed the new 4 point safety harness occupant retention system. Along with the reverse looking camera, the CB radio and the rest of the work I did, it should be an improvement in safety and comfort. Naturally I will post a few pictures of the outing...
|
|


 A place to look in "Breakers Yards" are 2000's Subaru's with the LL Bean or the XT Turbo cars. My 2006 Outback XT turbo has a Momo wheel from the factory. It has a nice feel.


 .
.

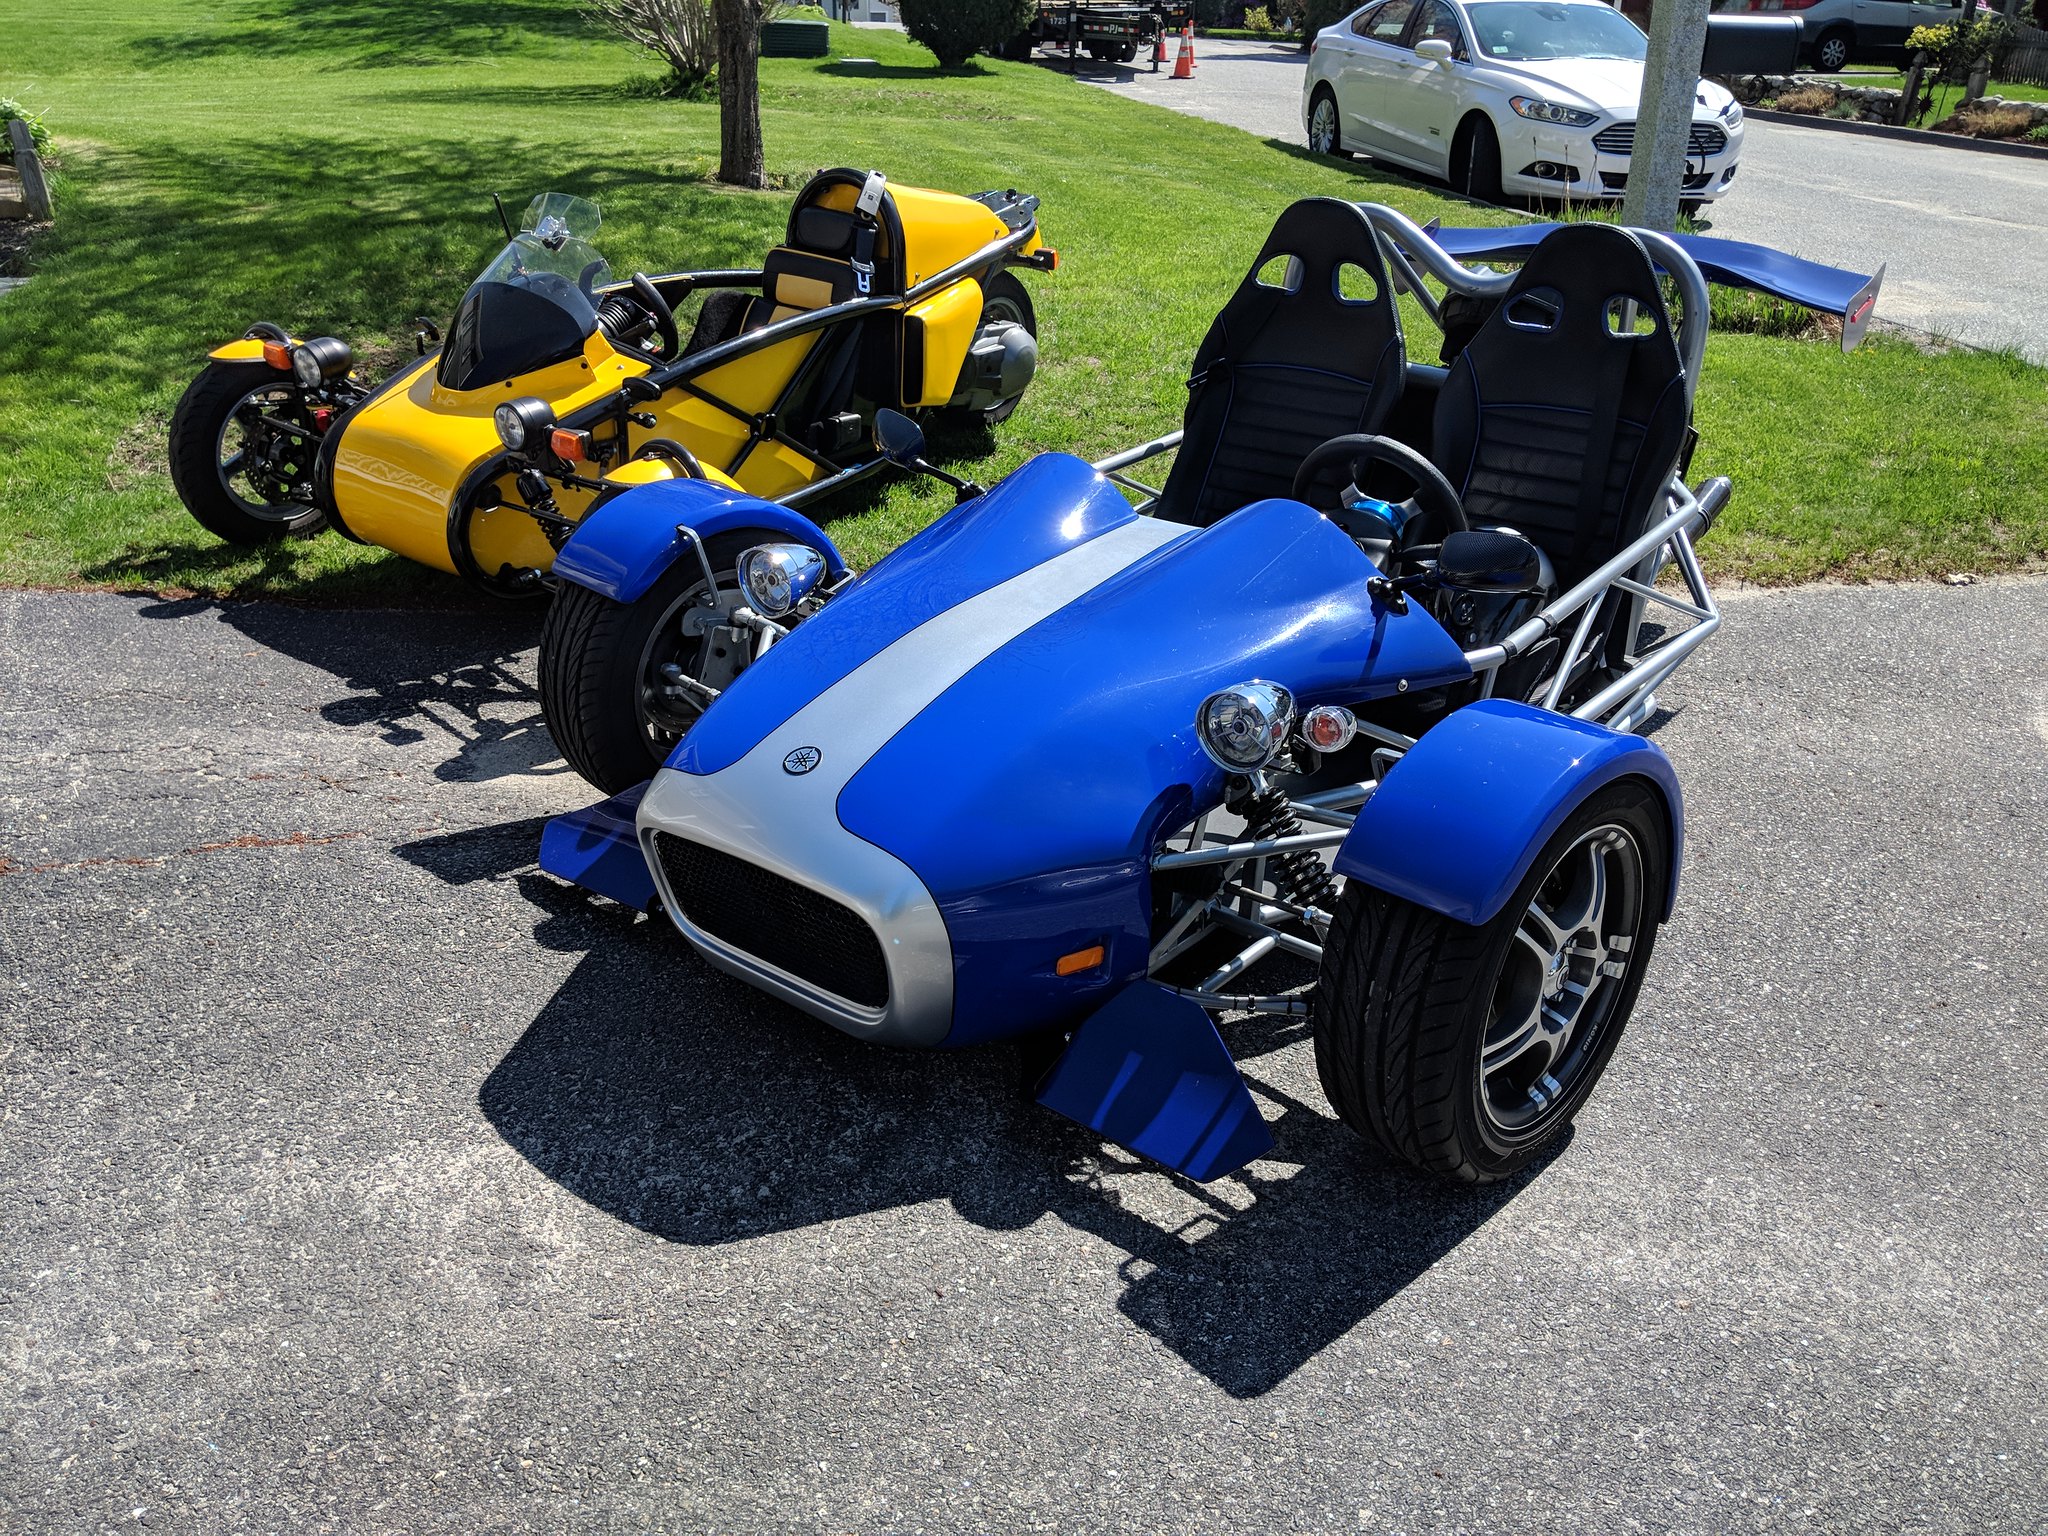
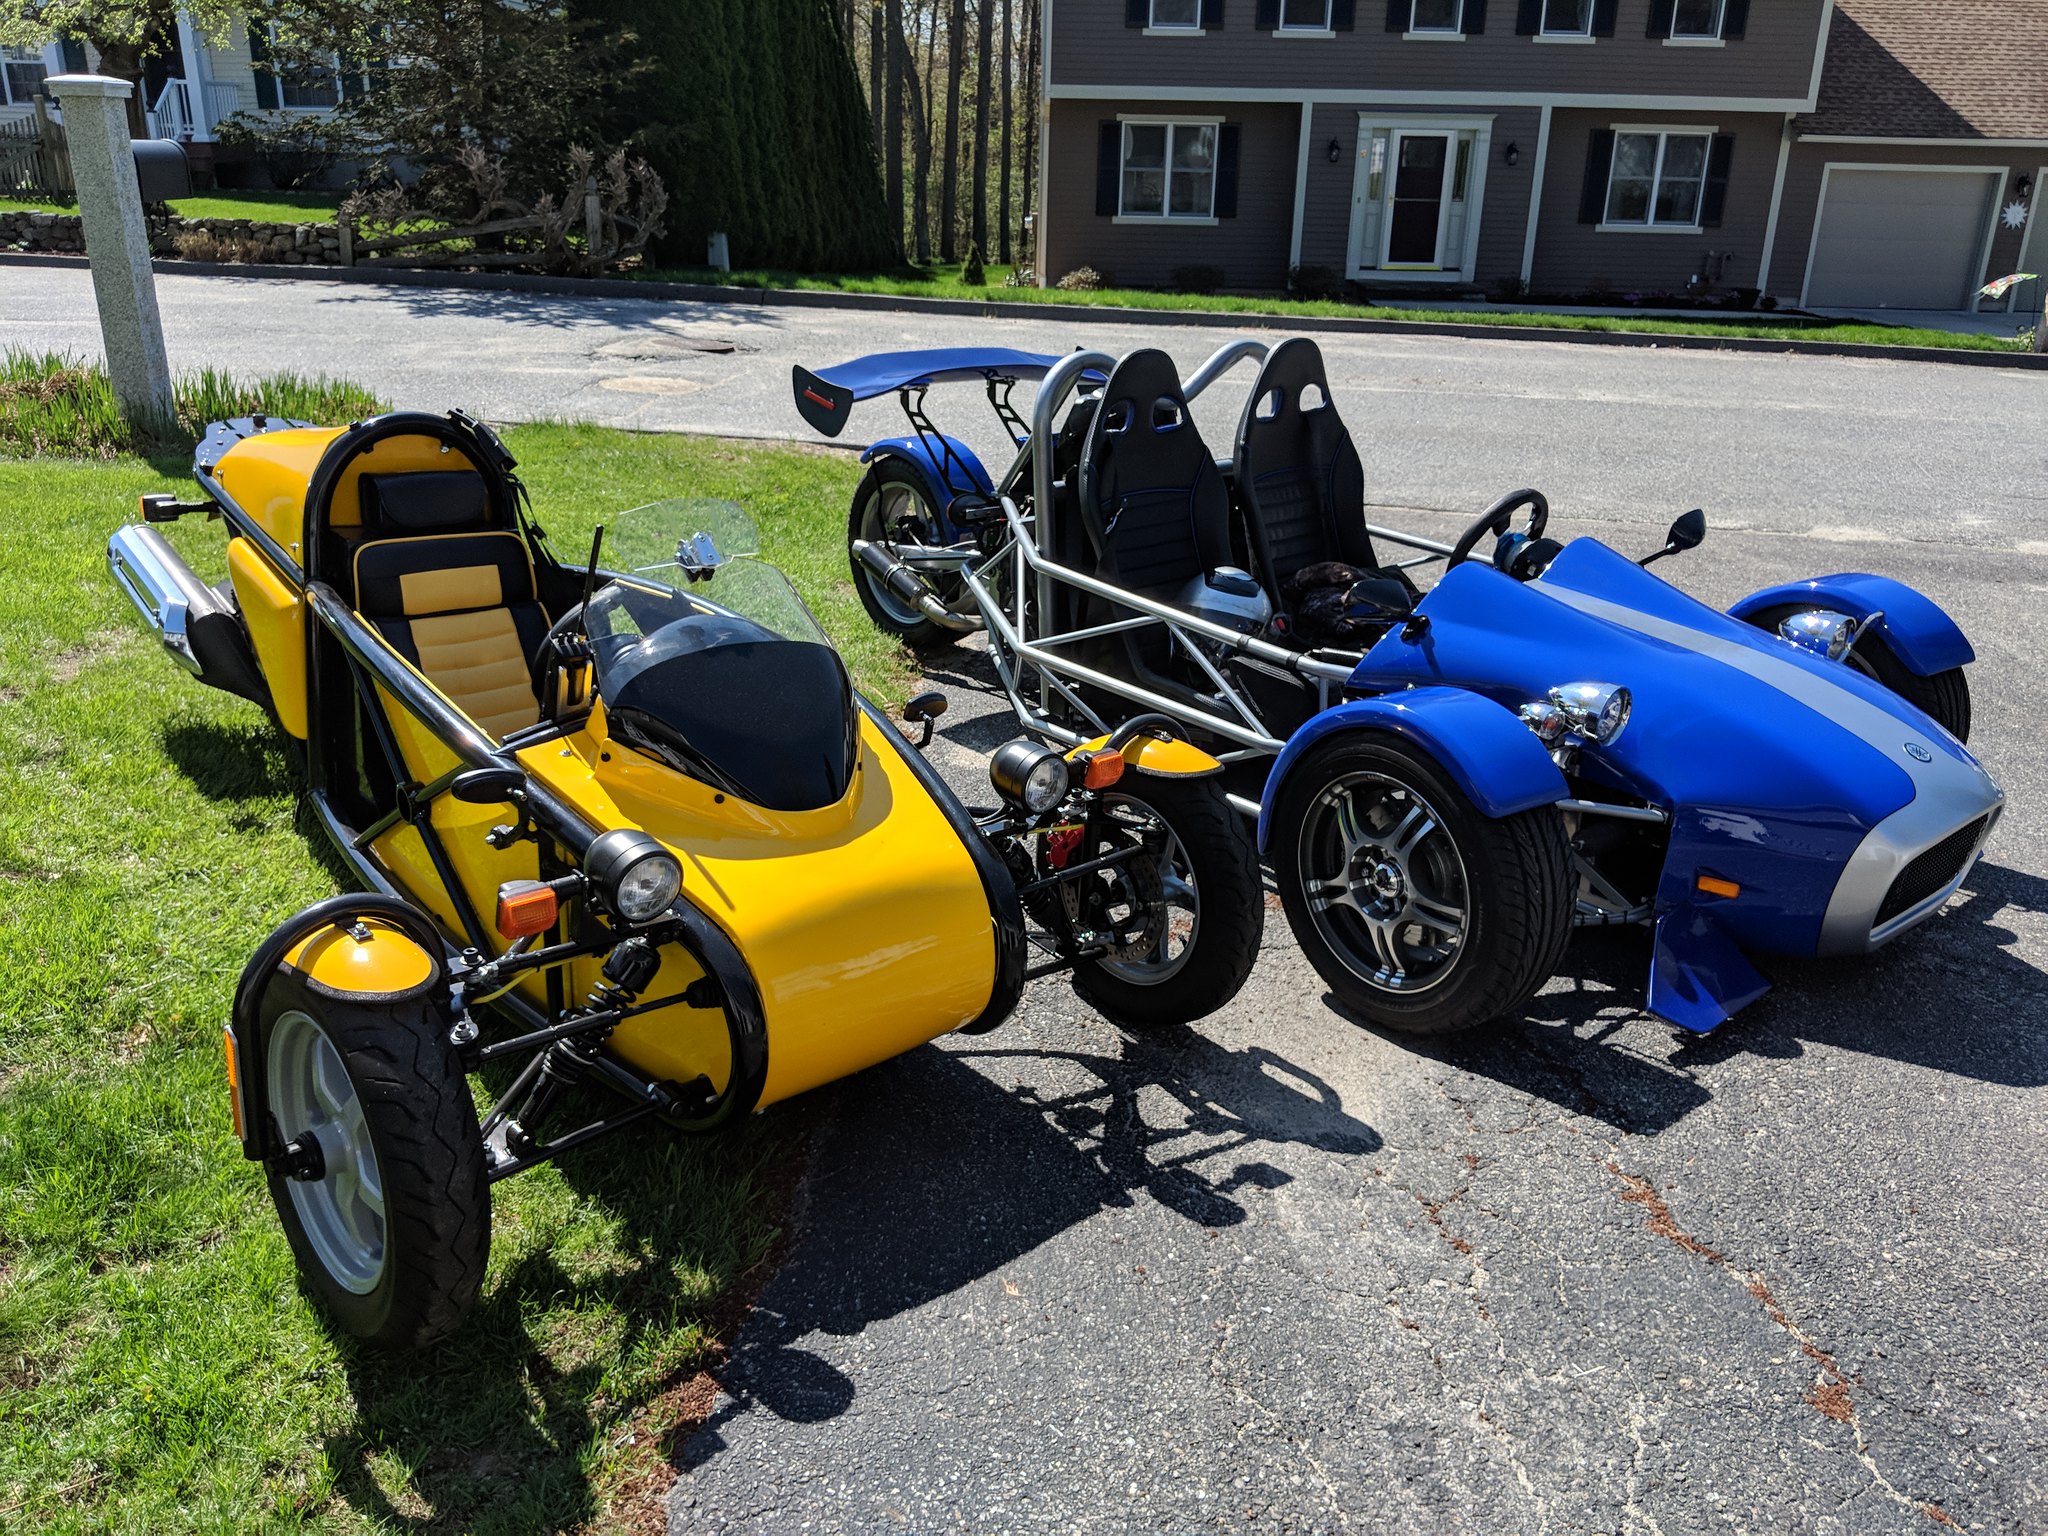
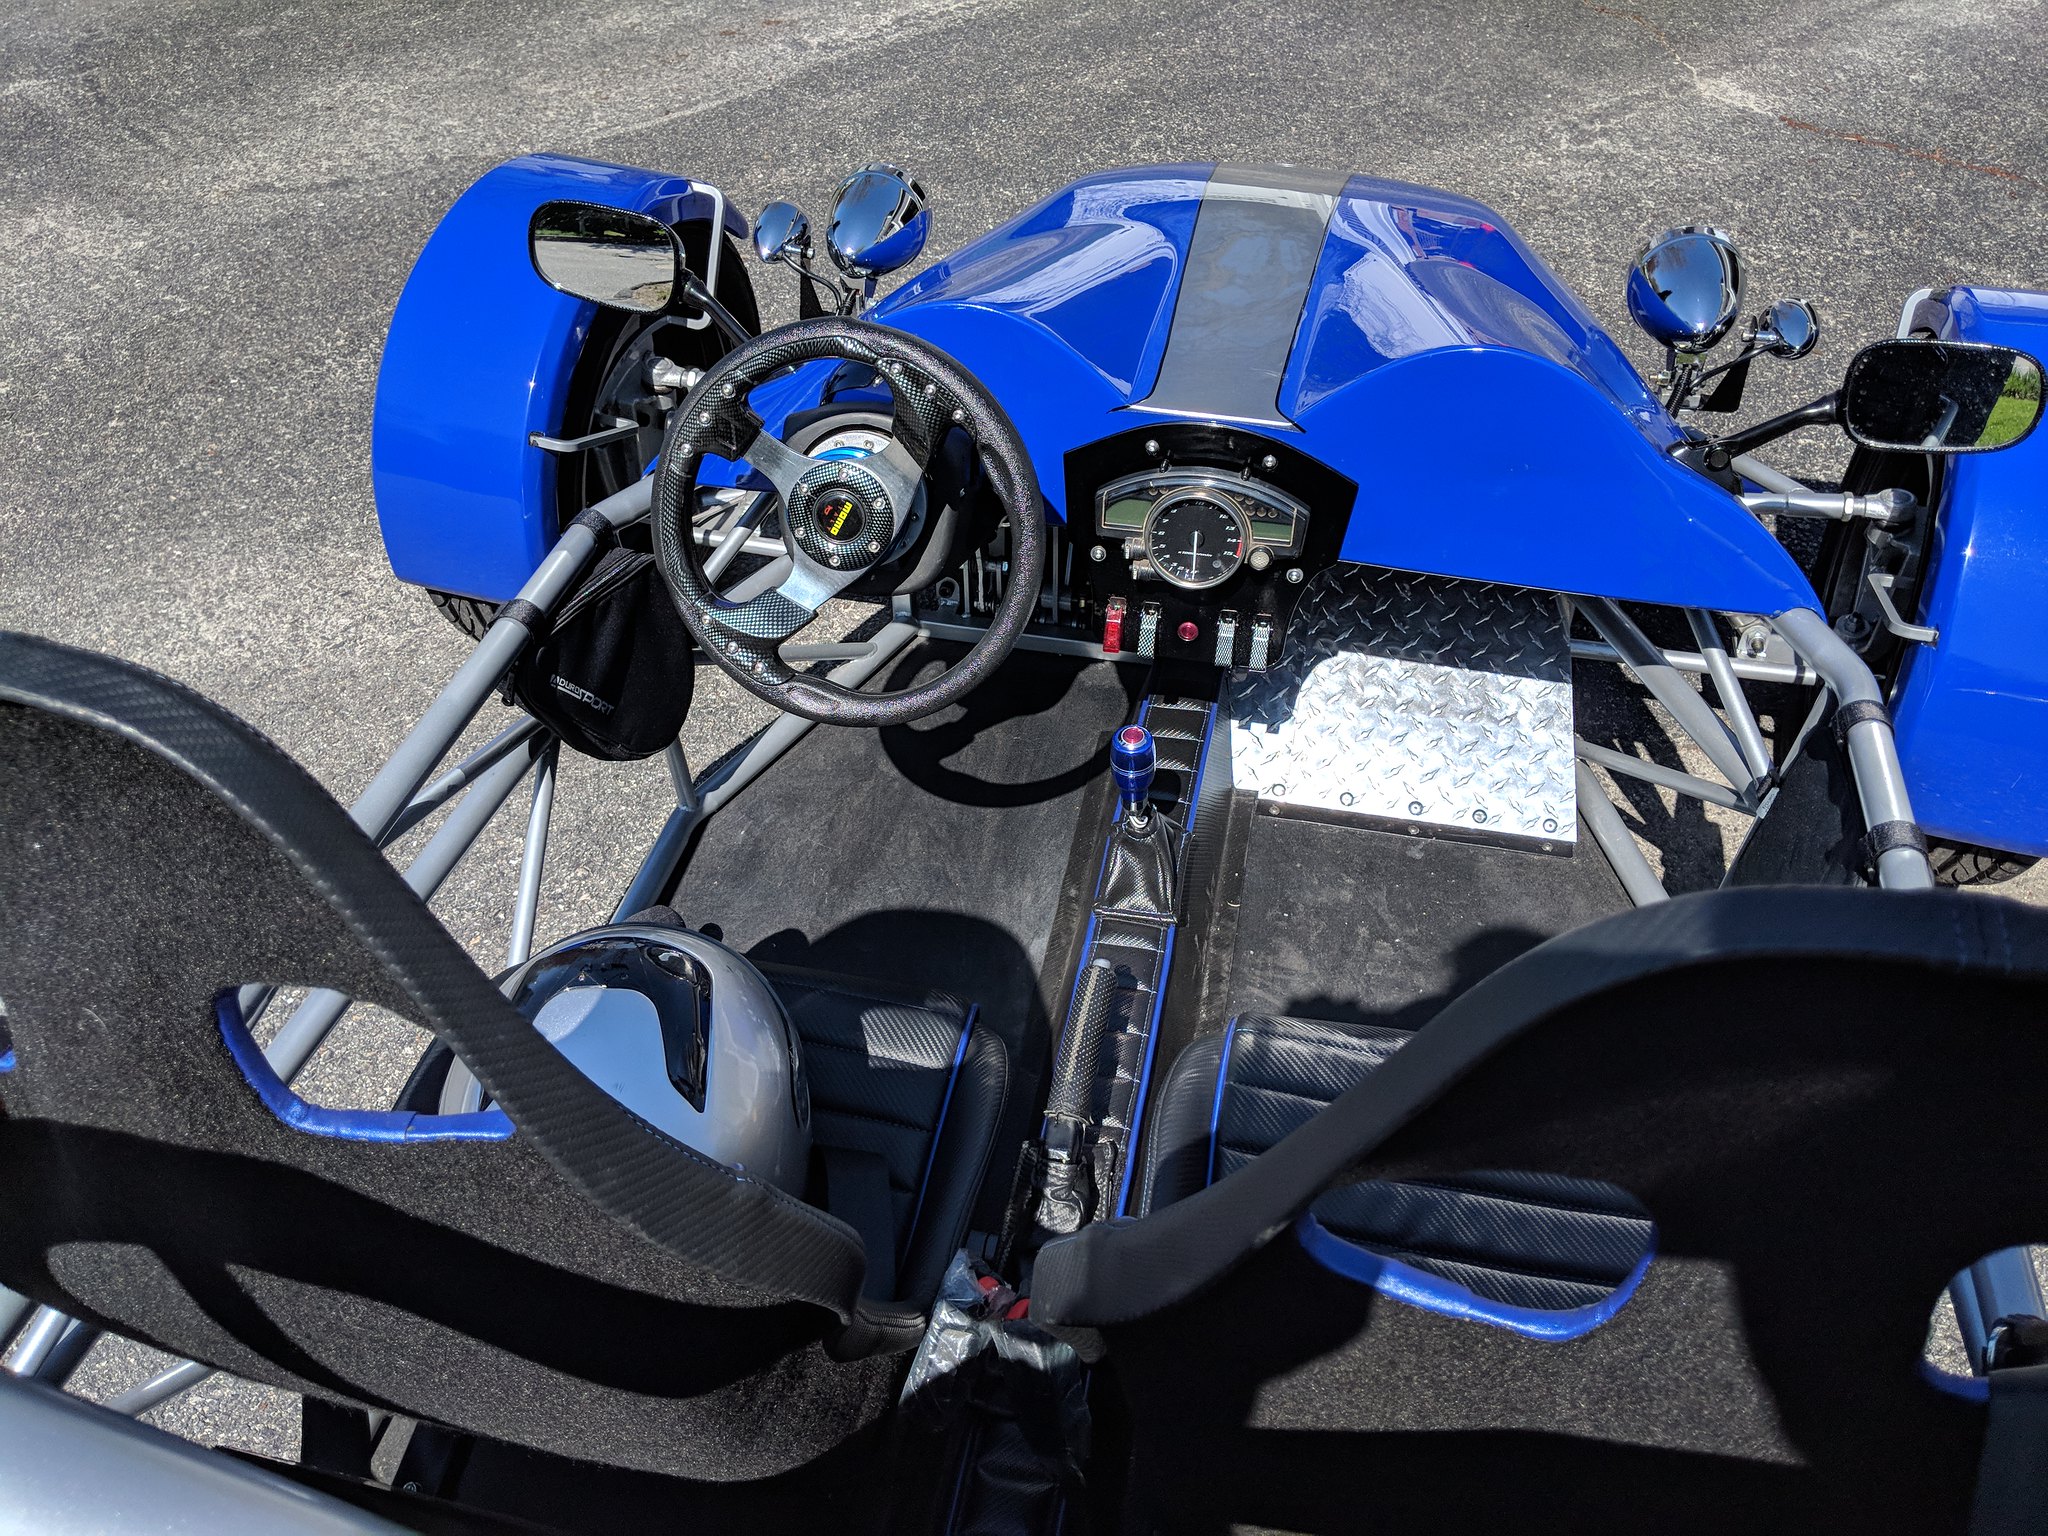
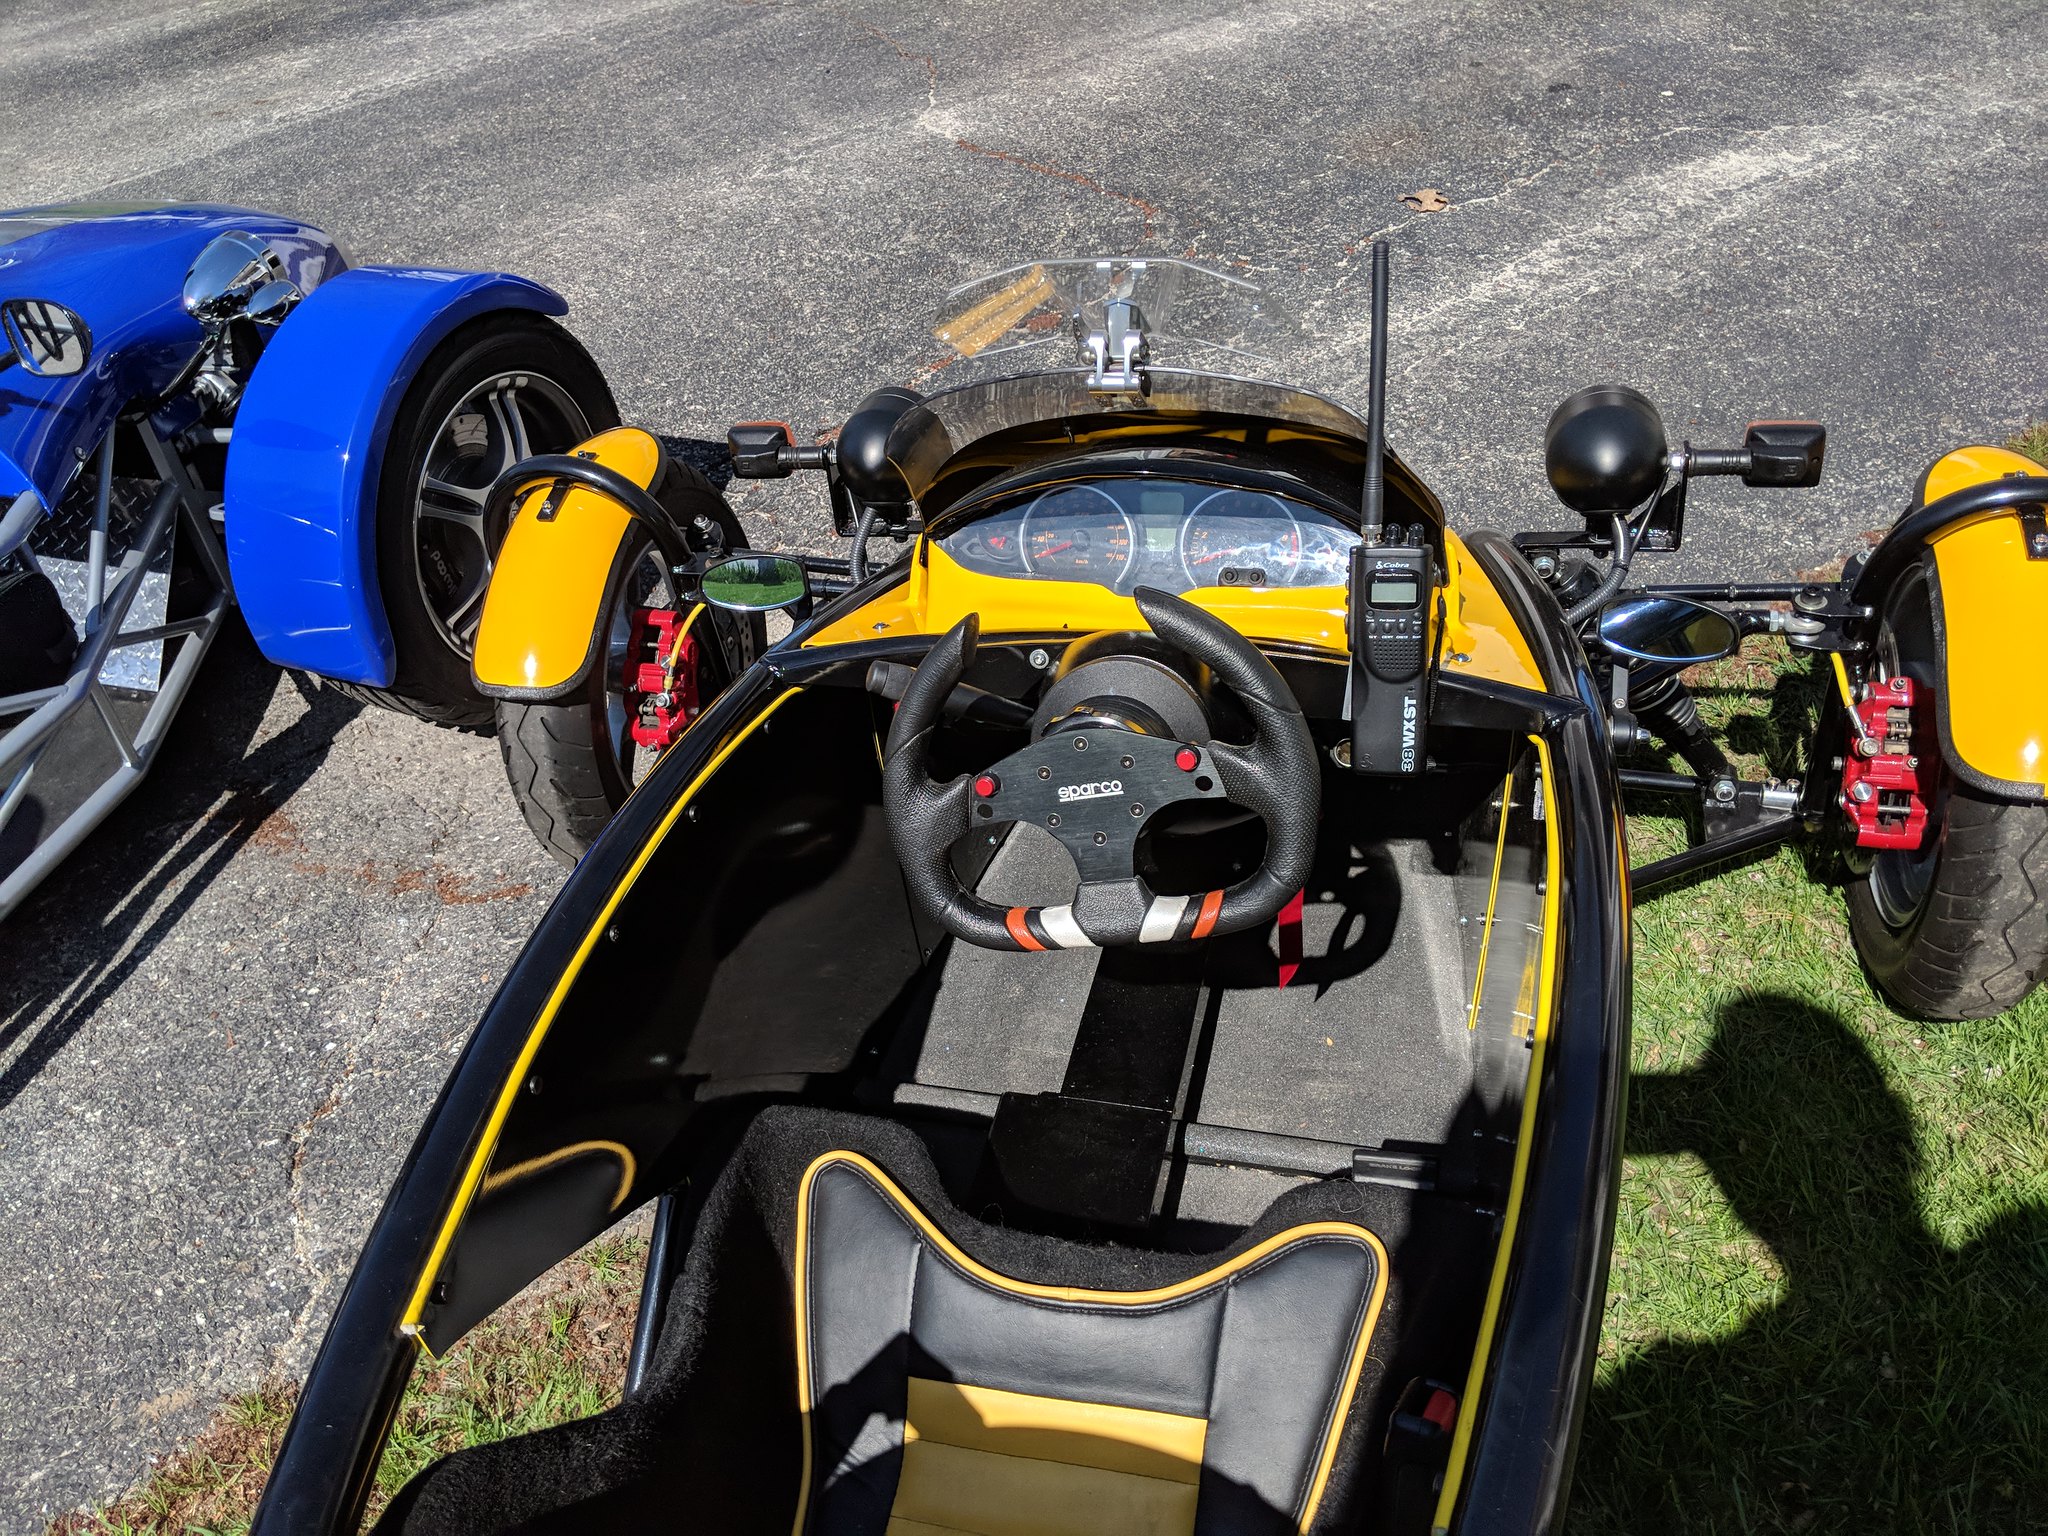
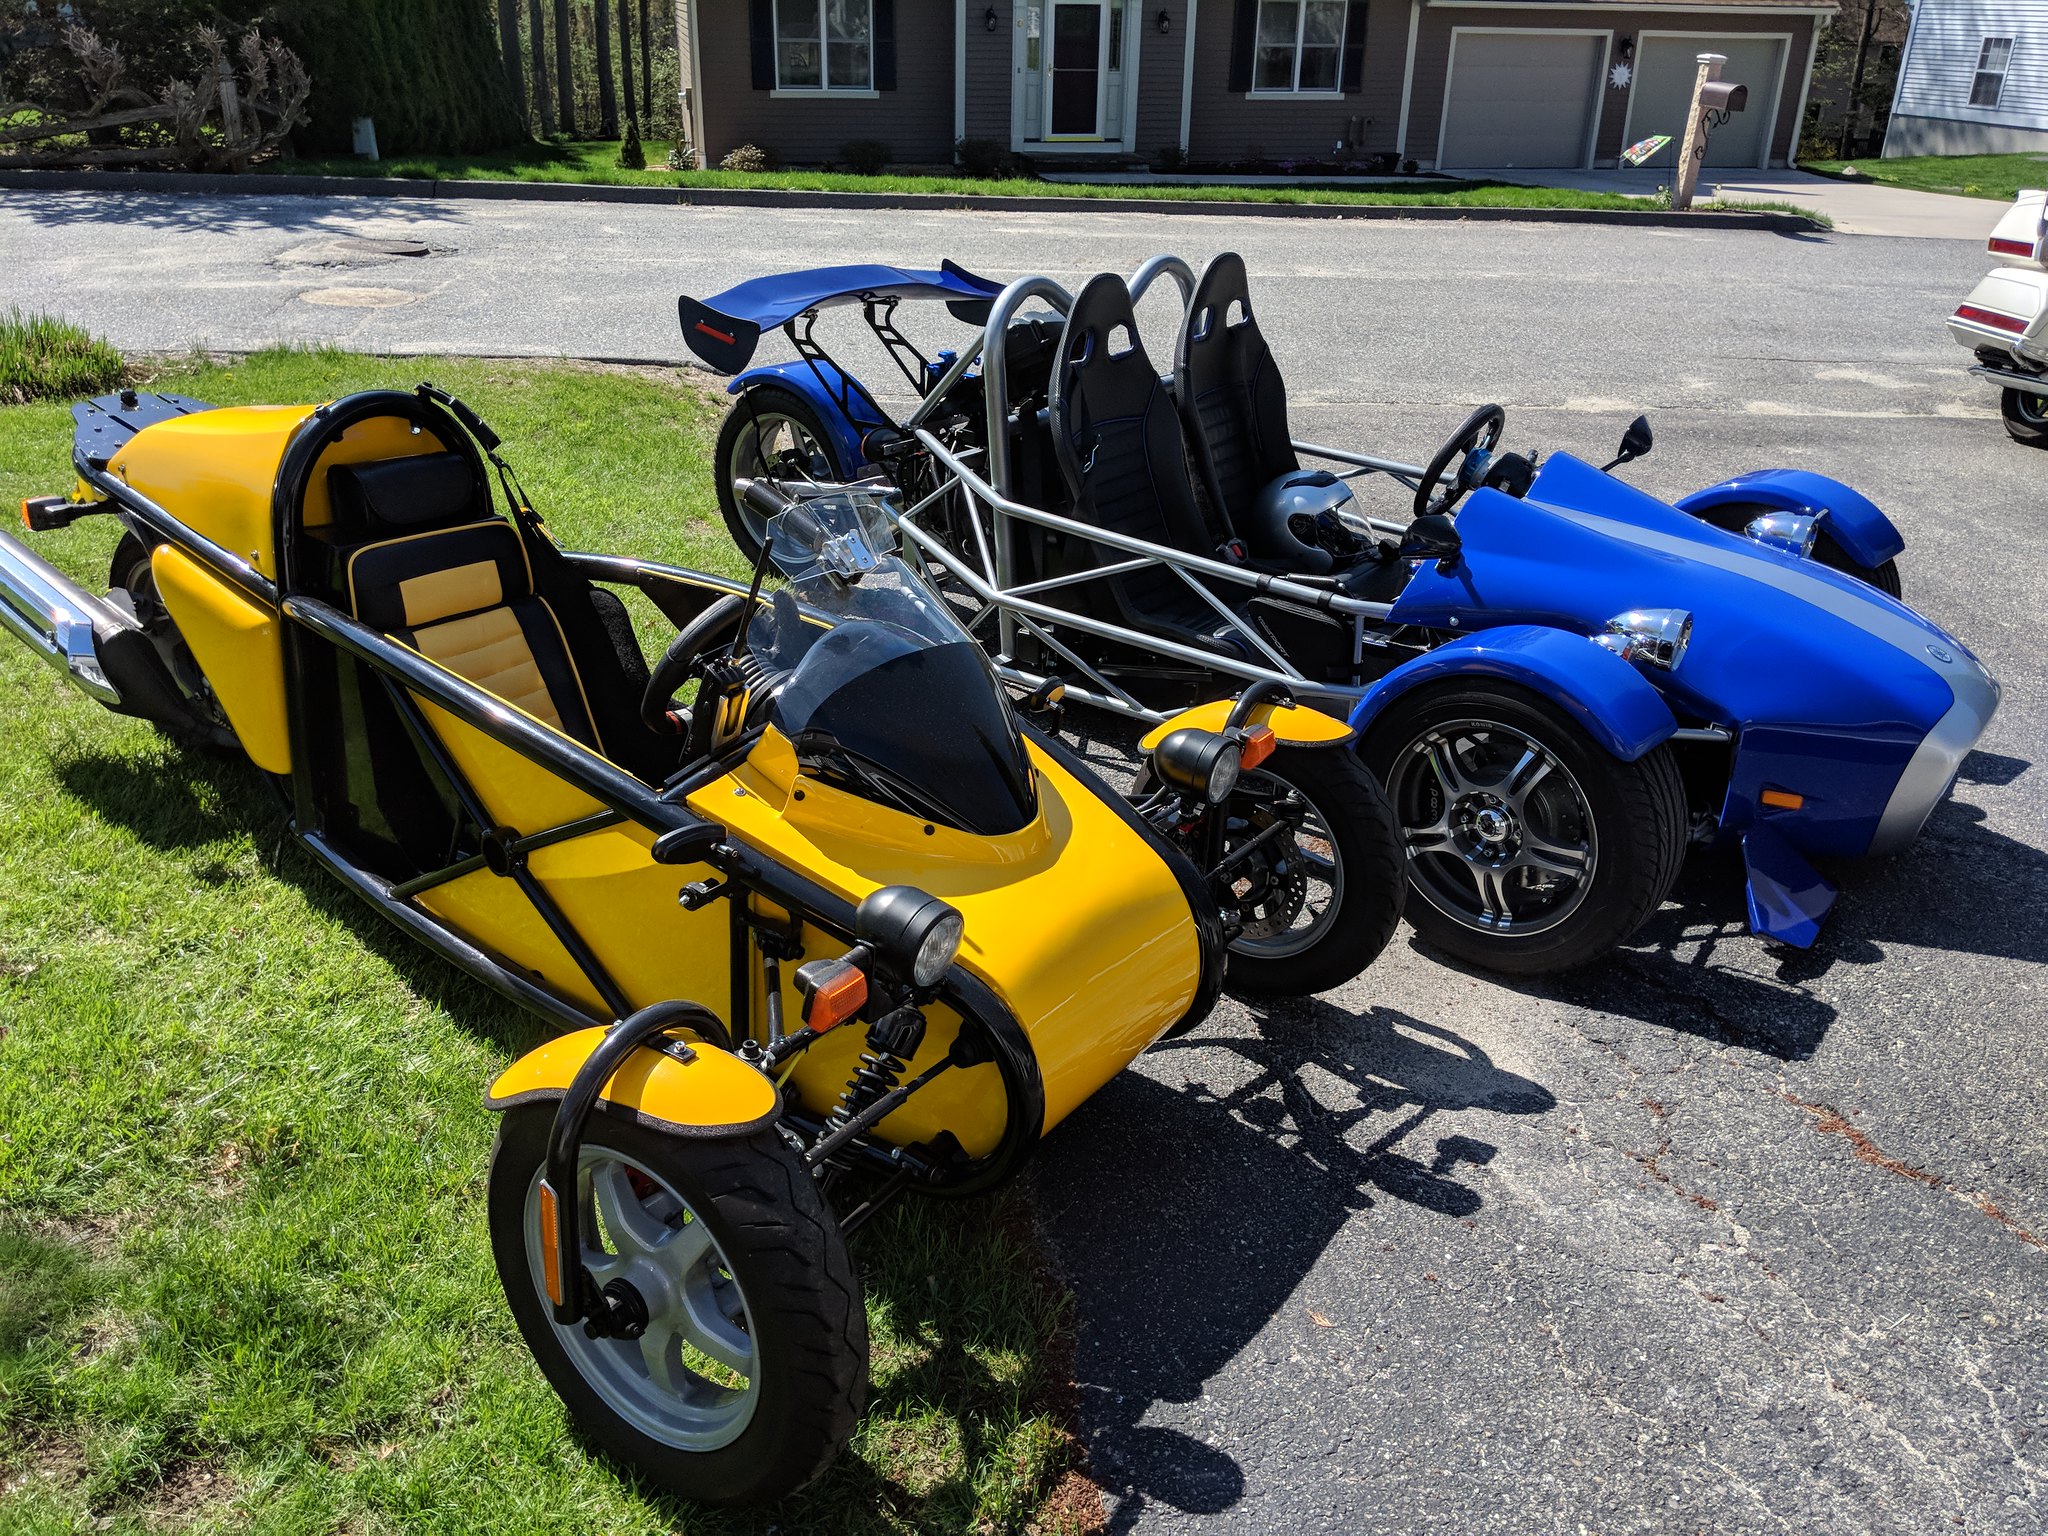
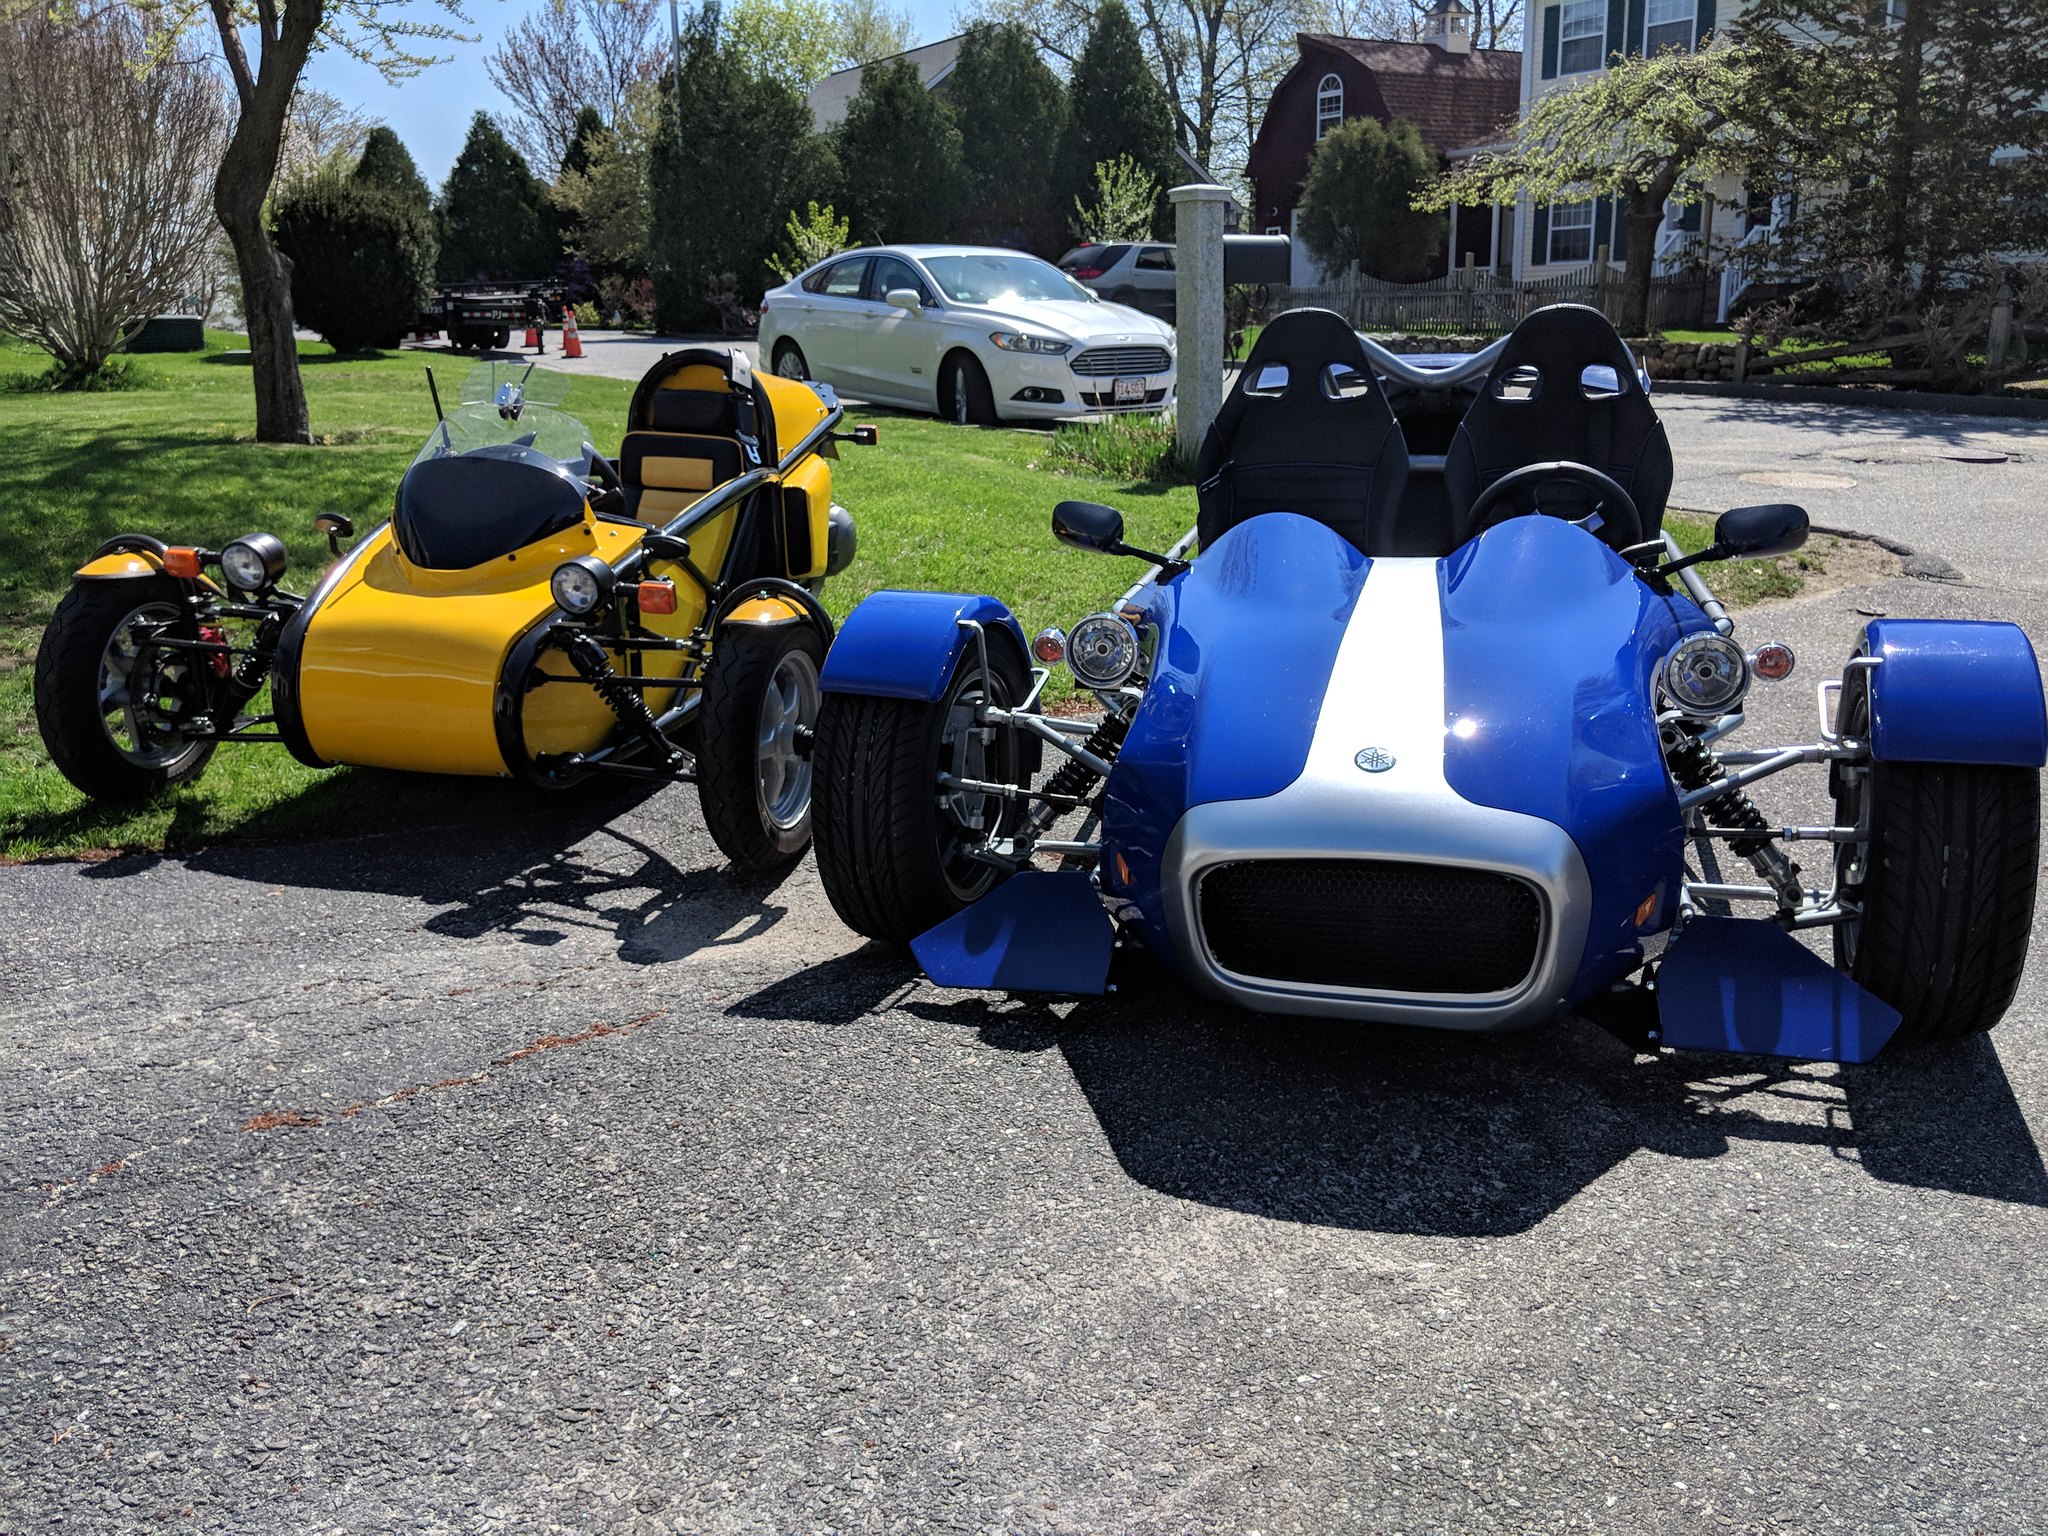


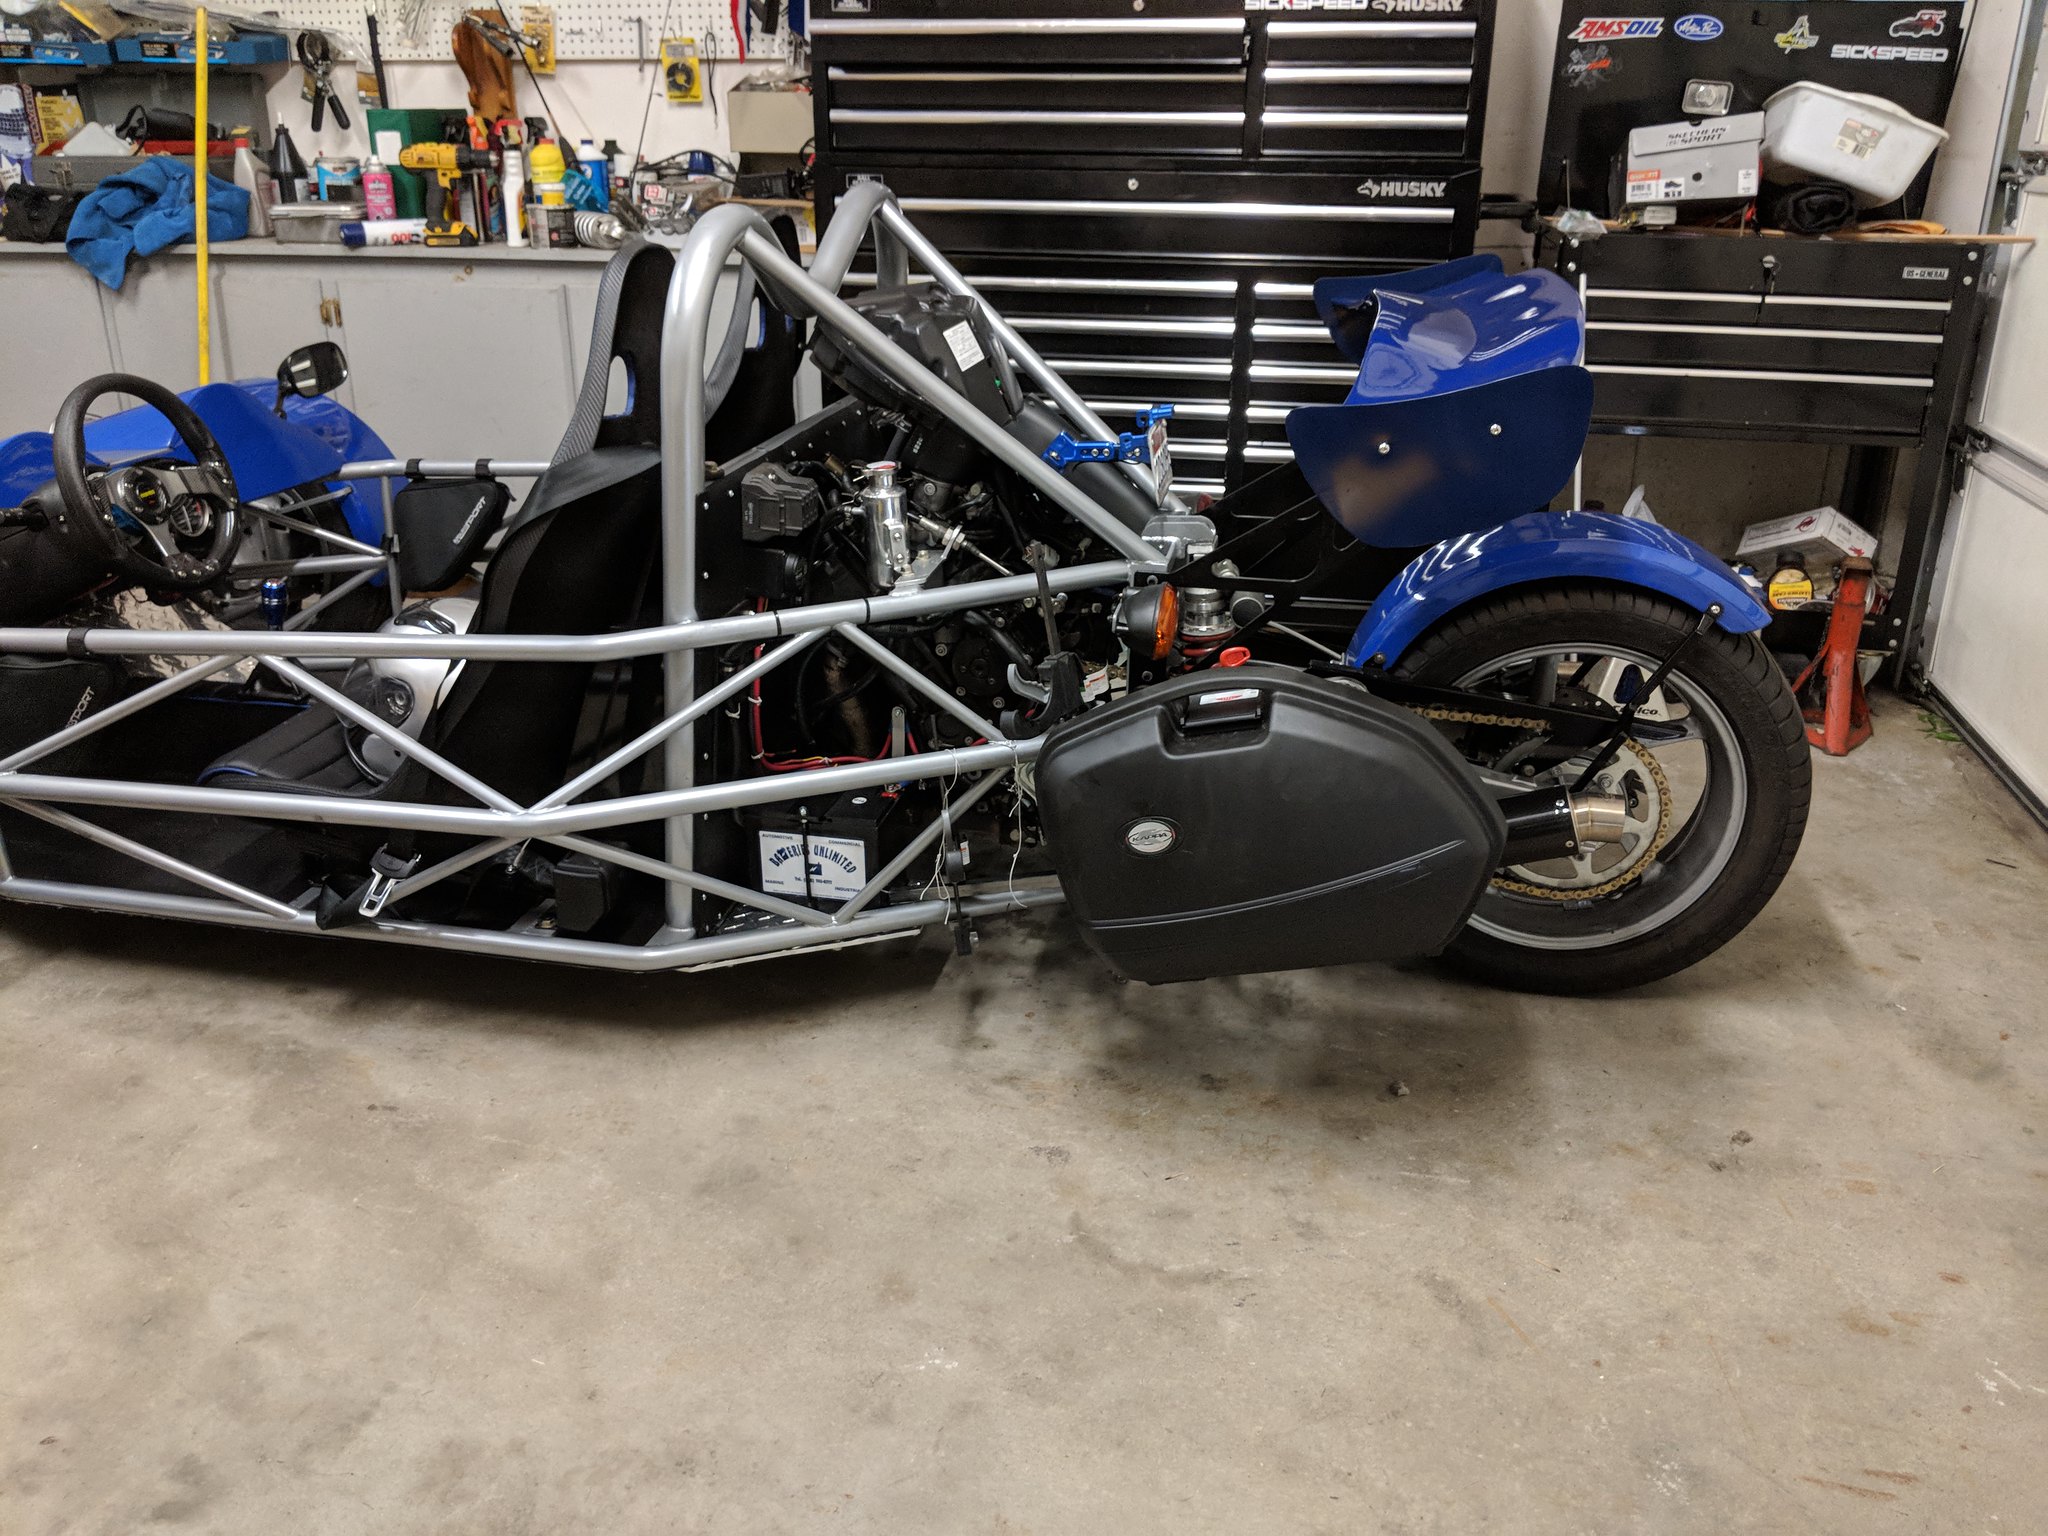
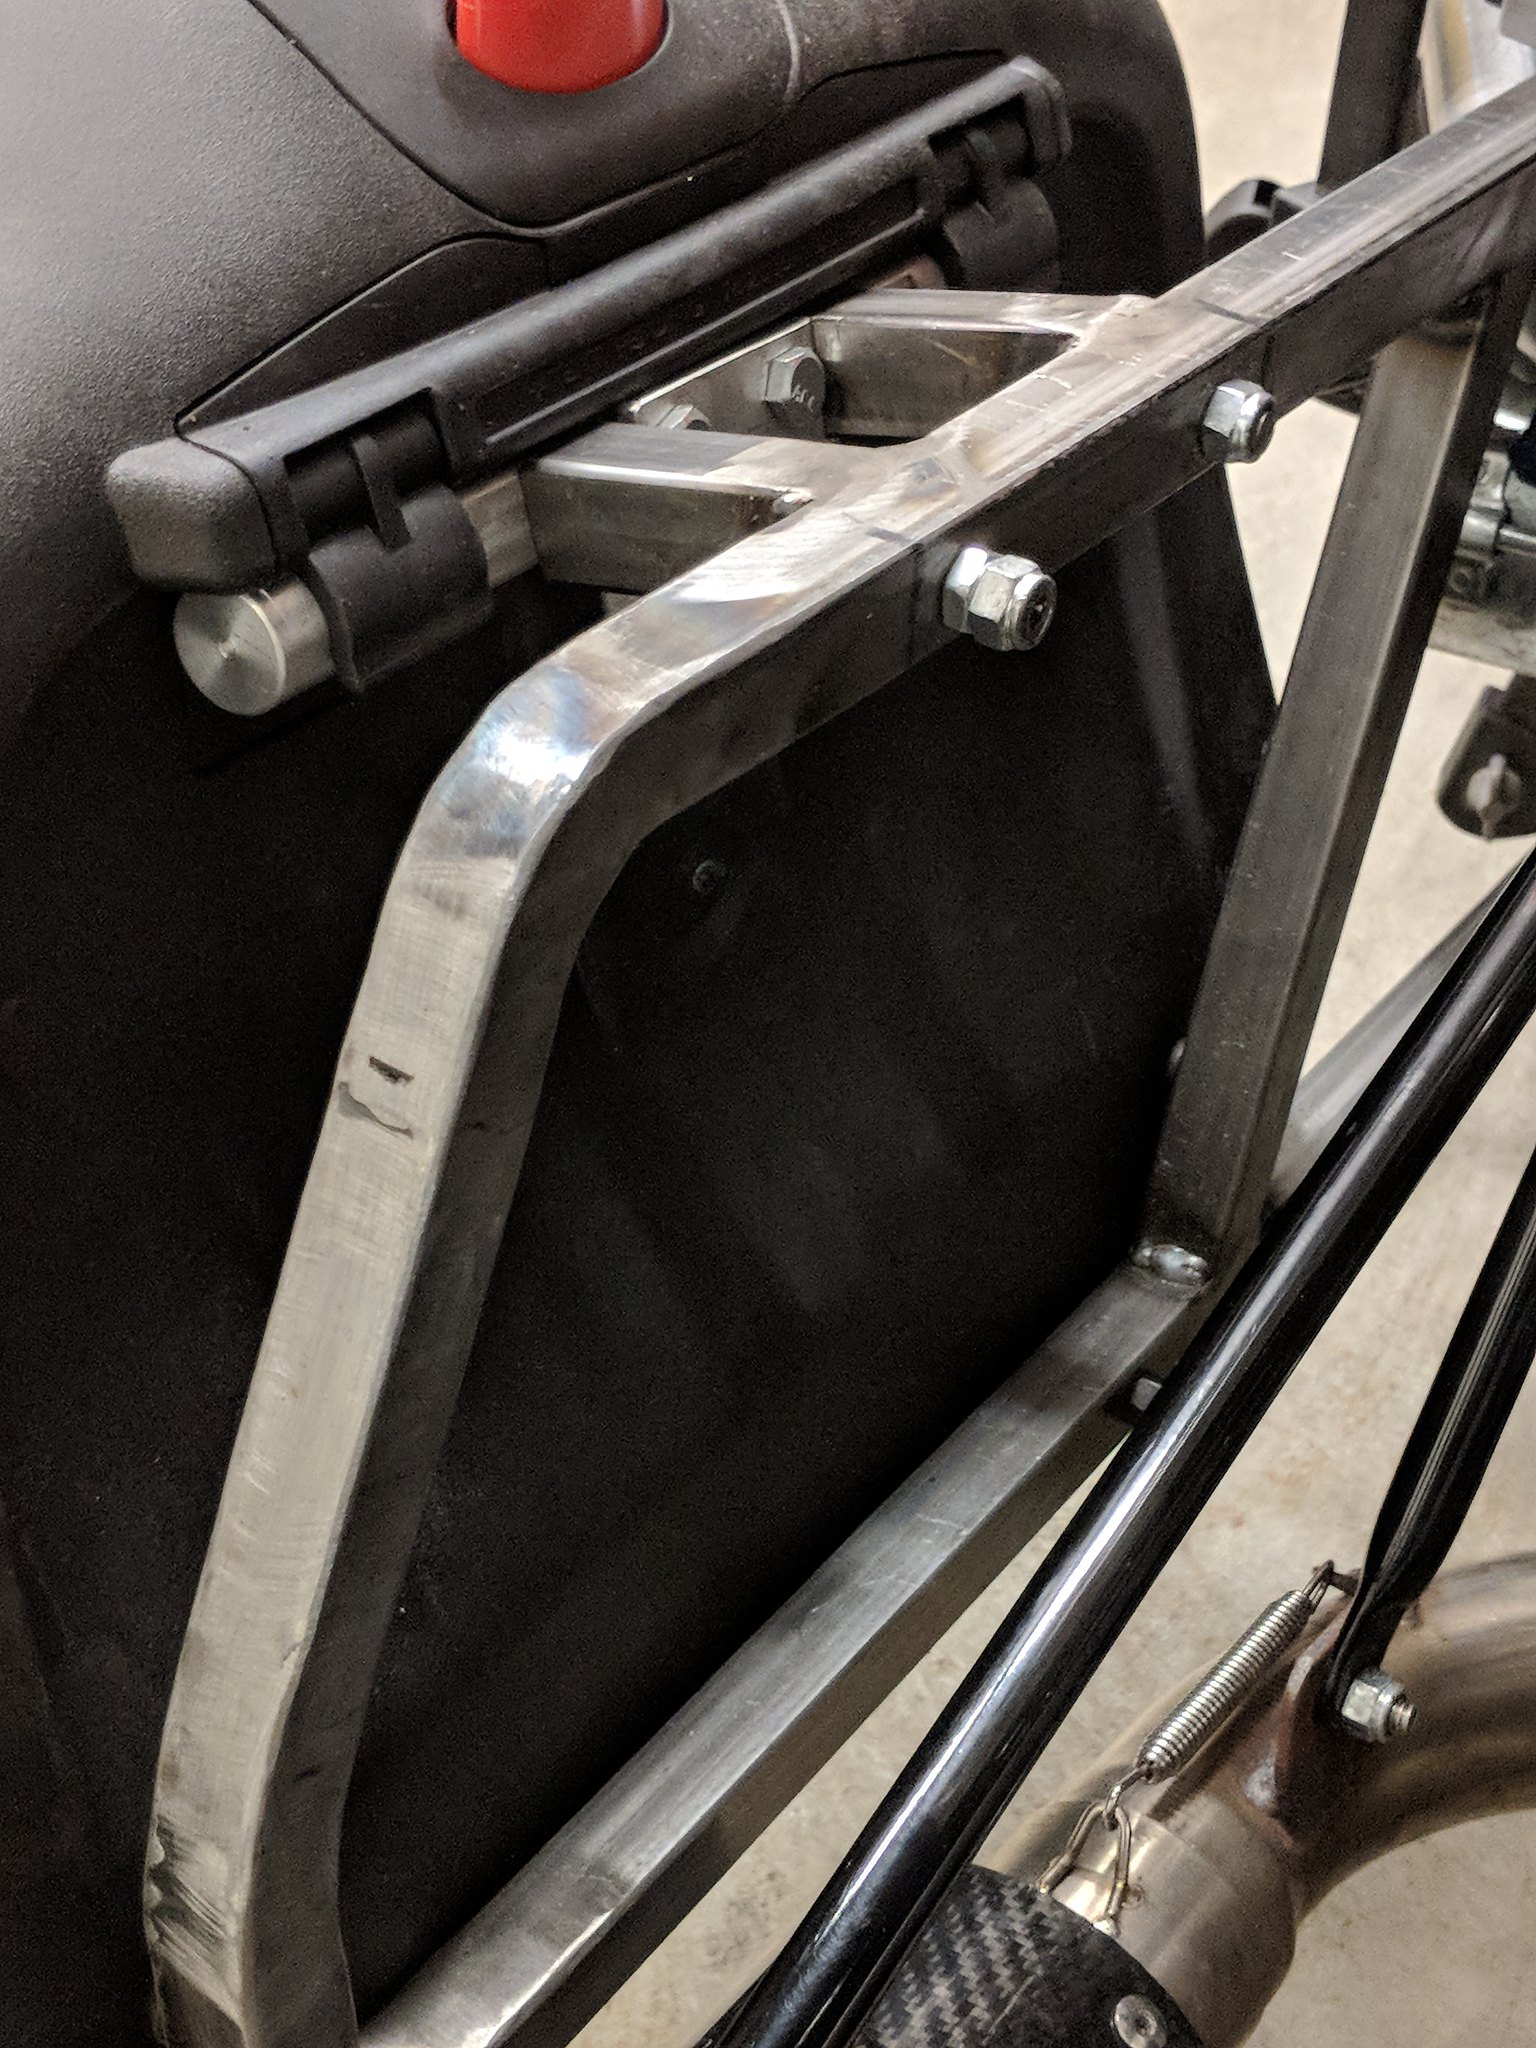
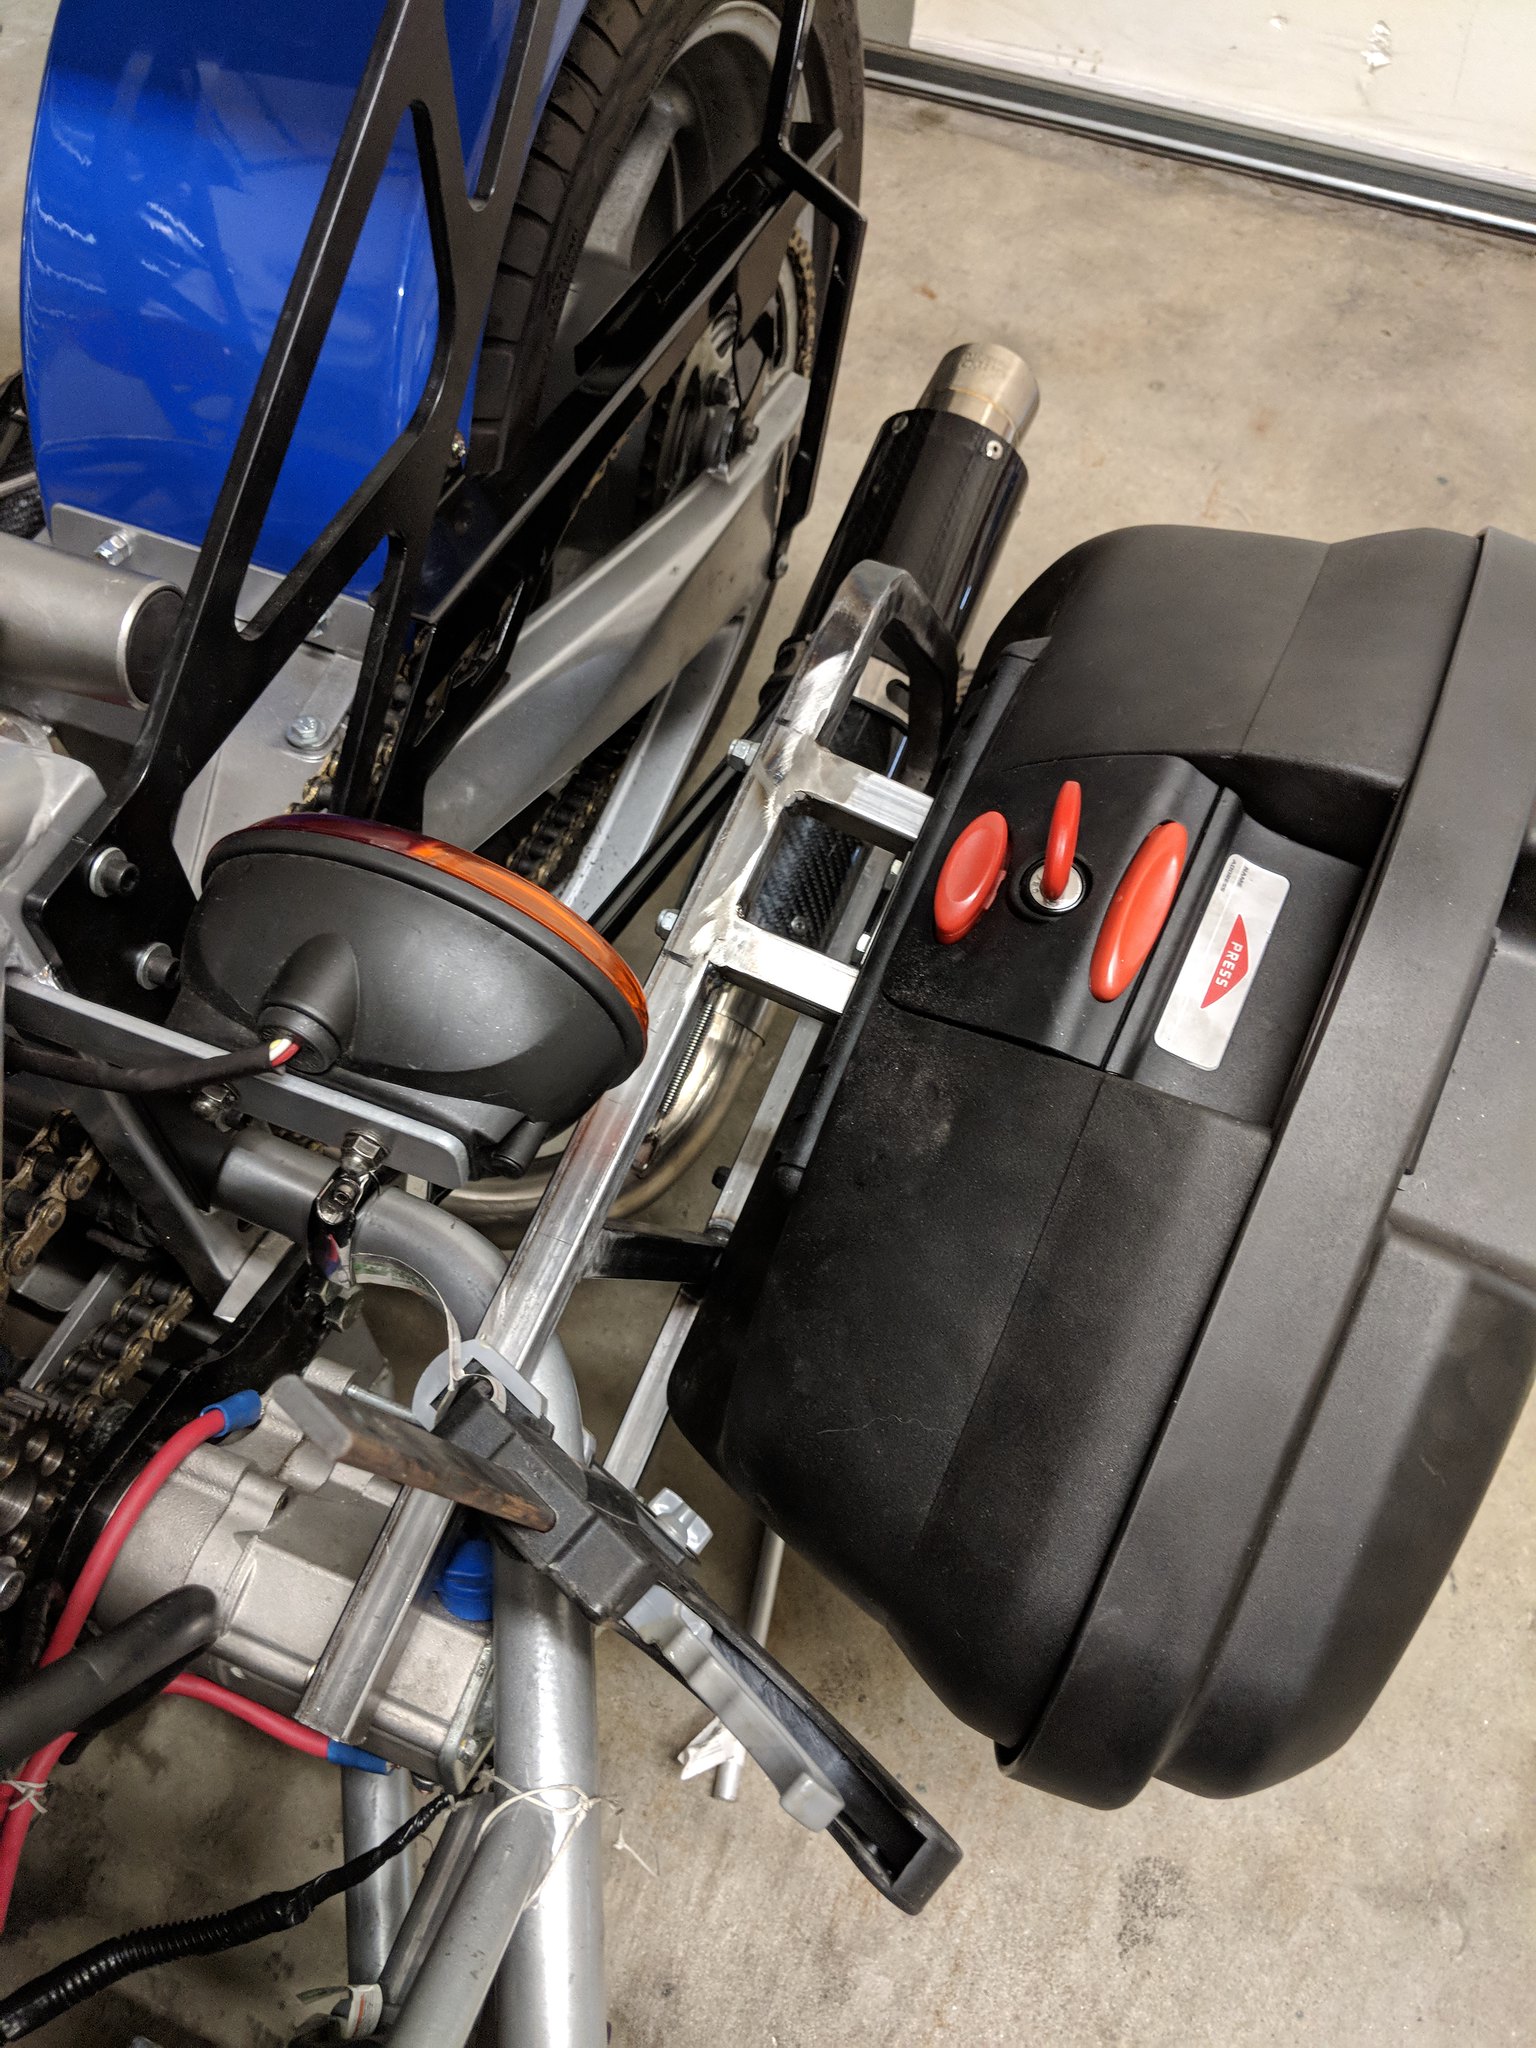
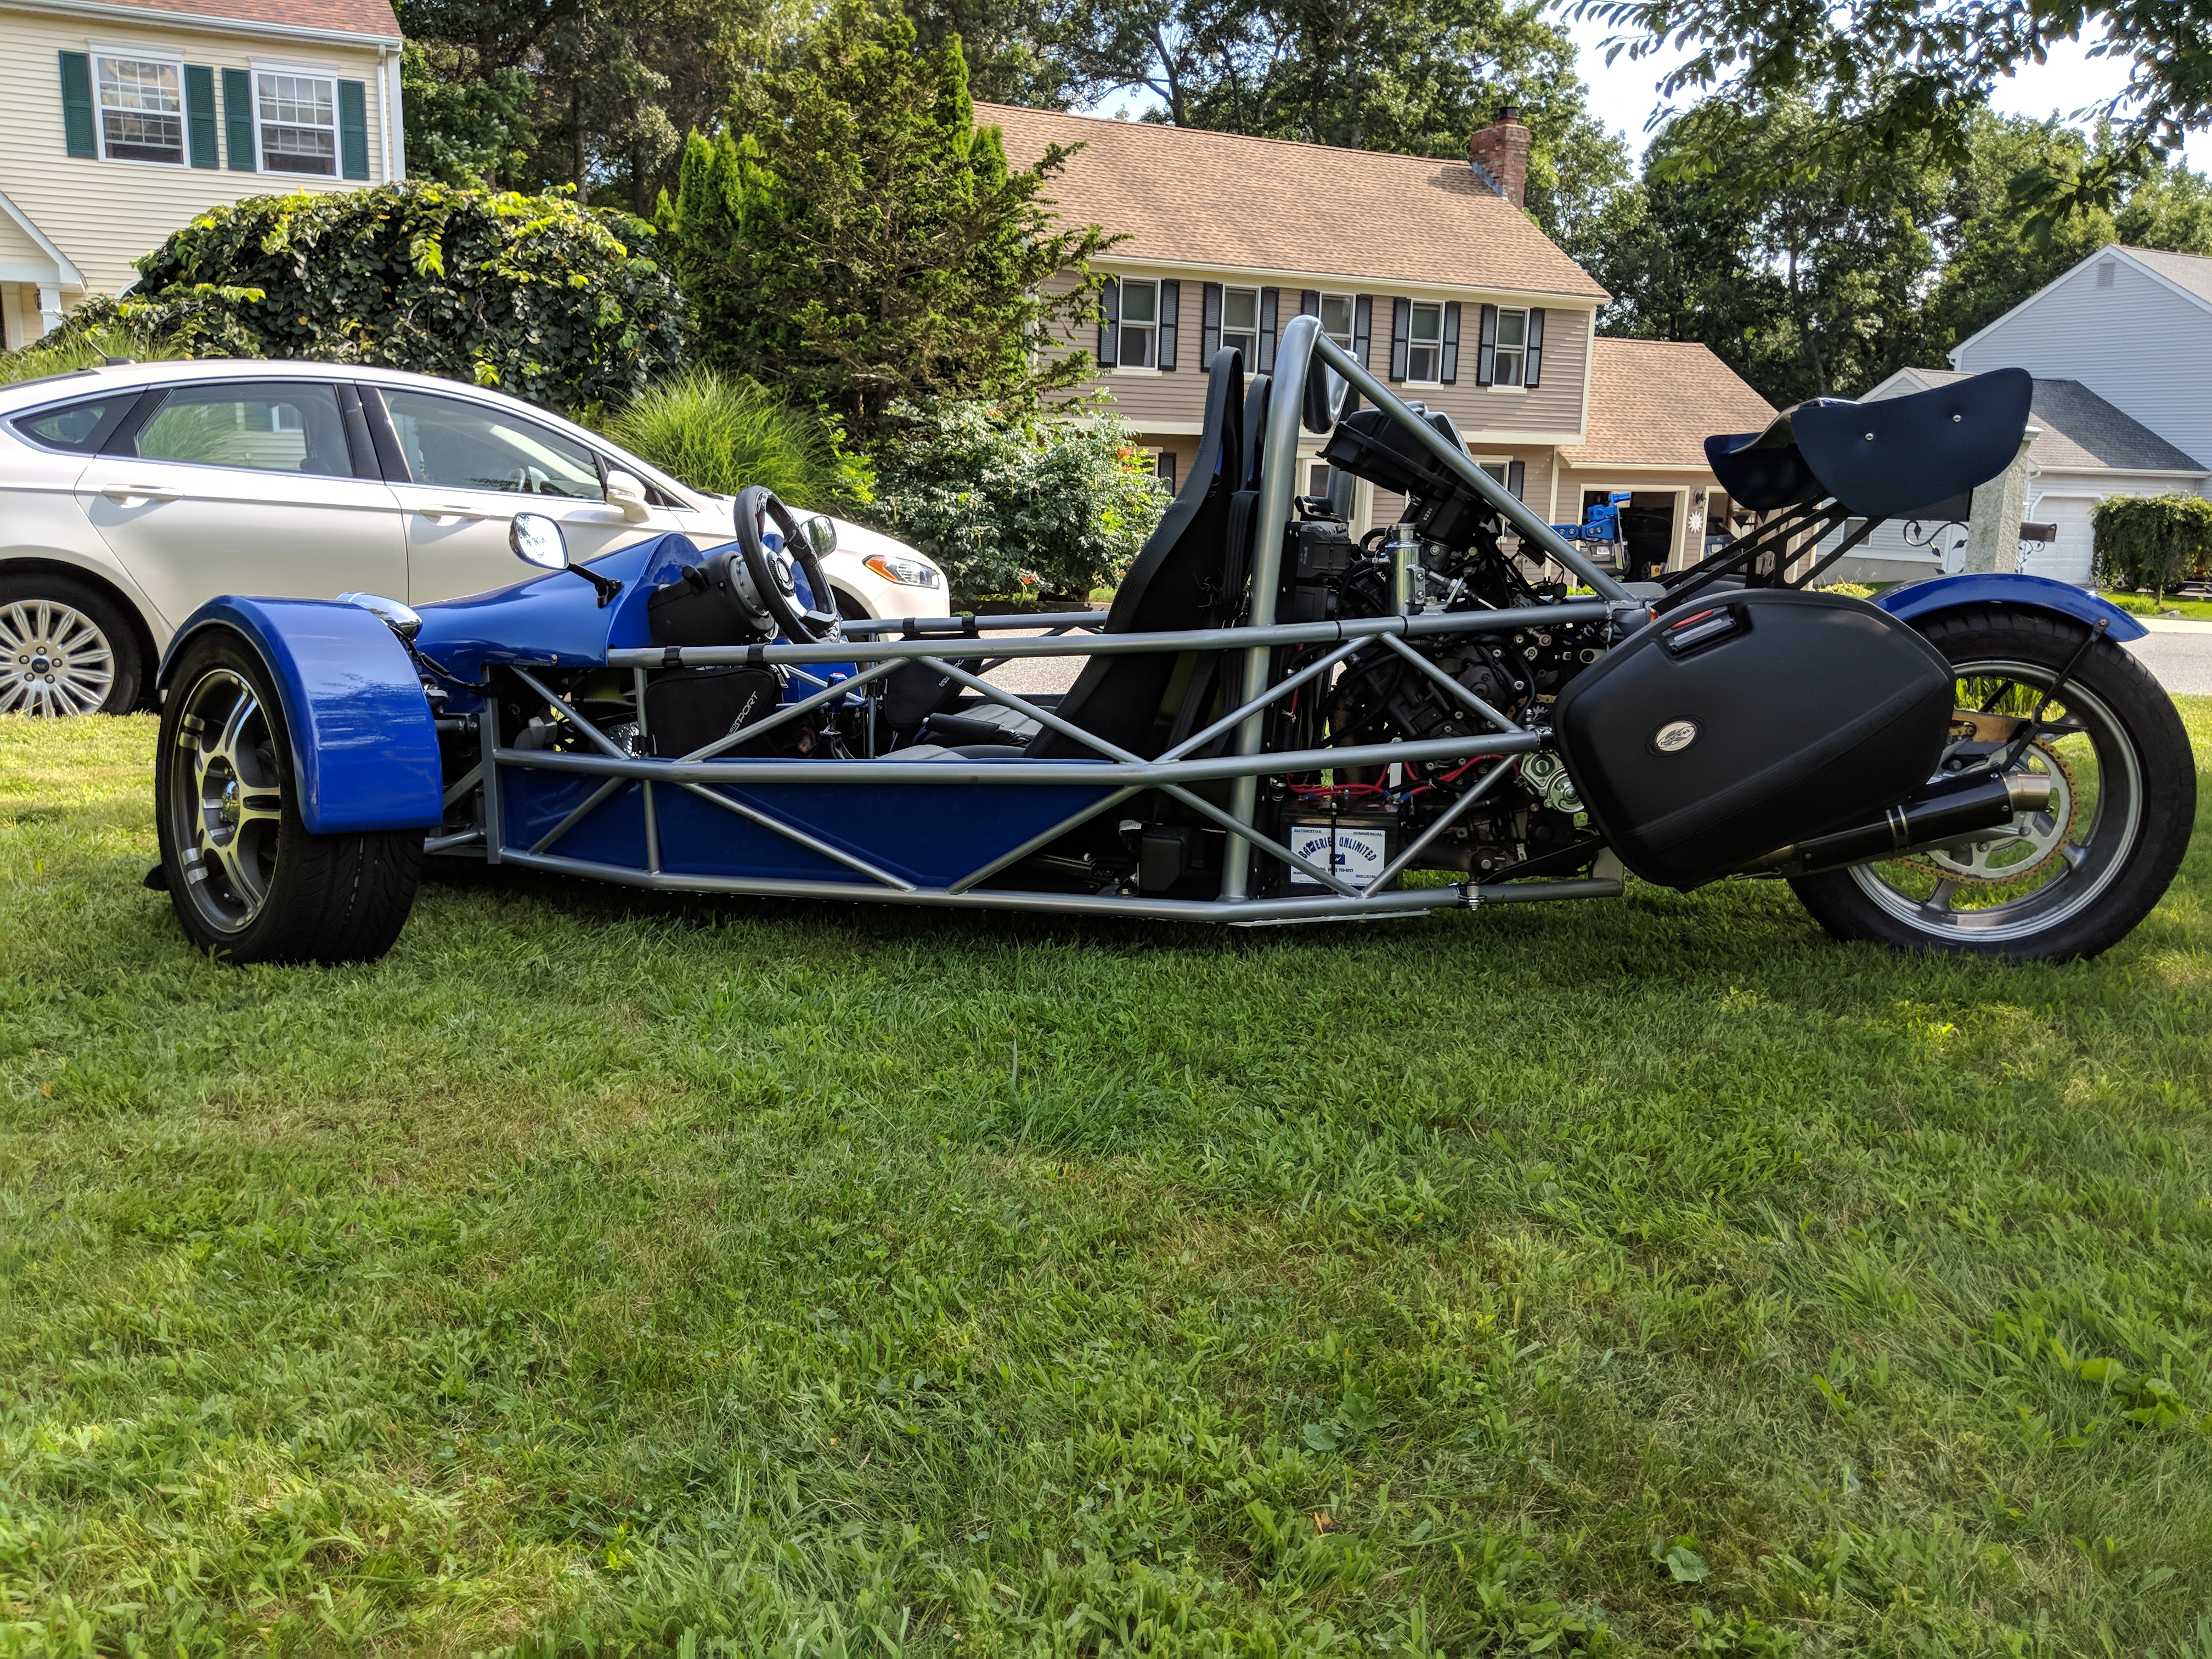
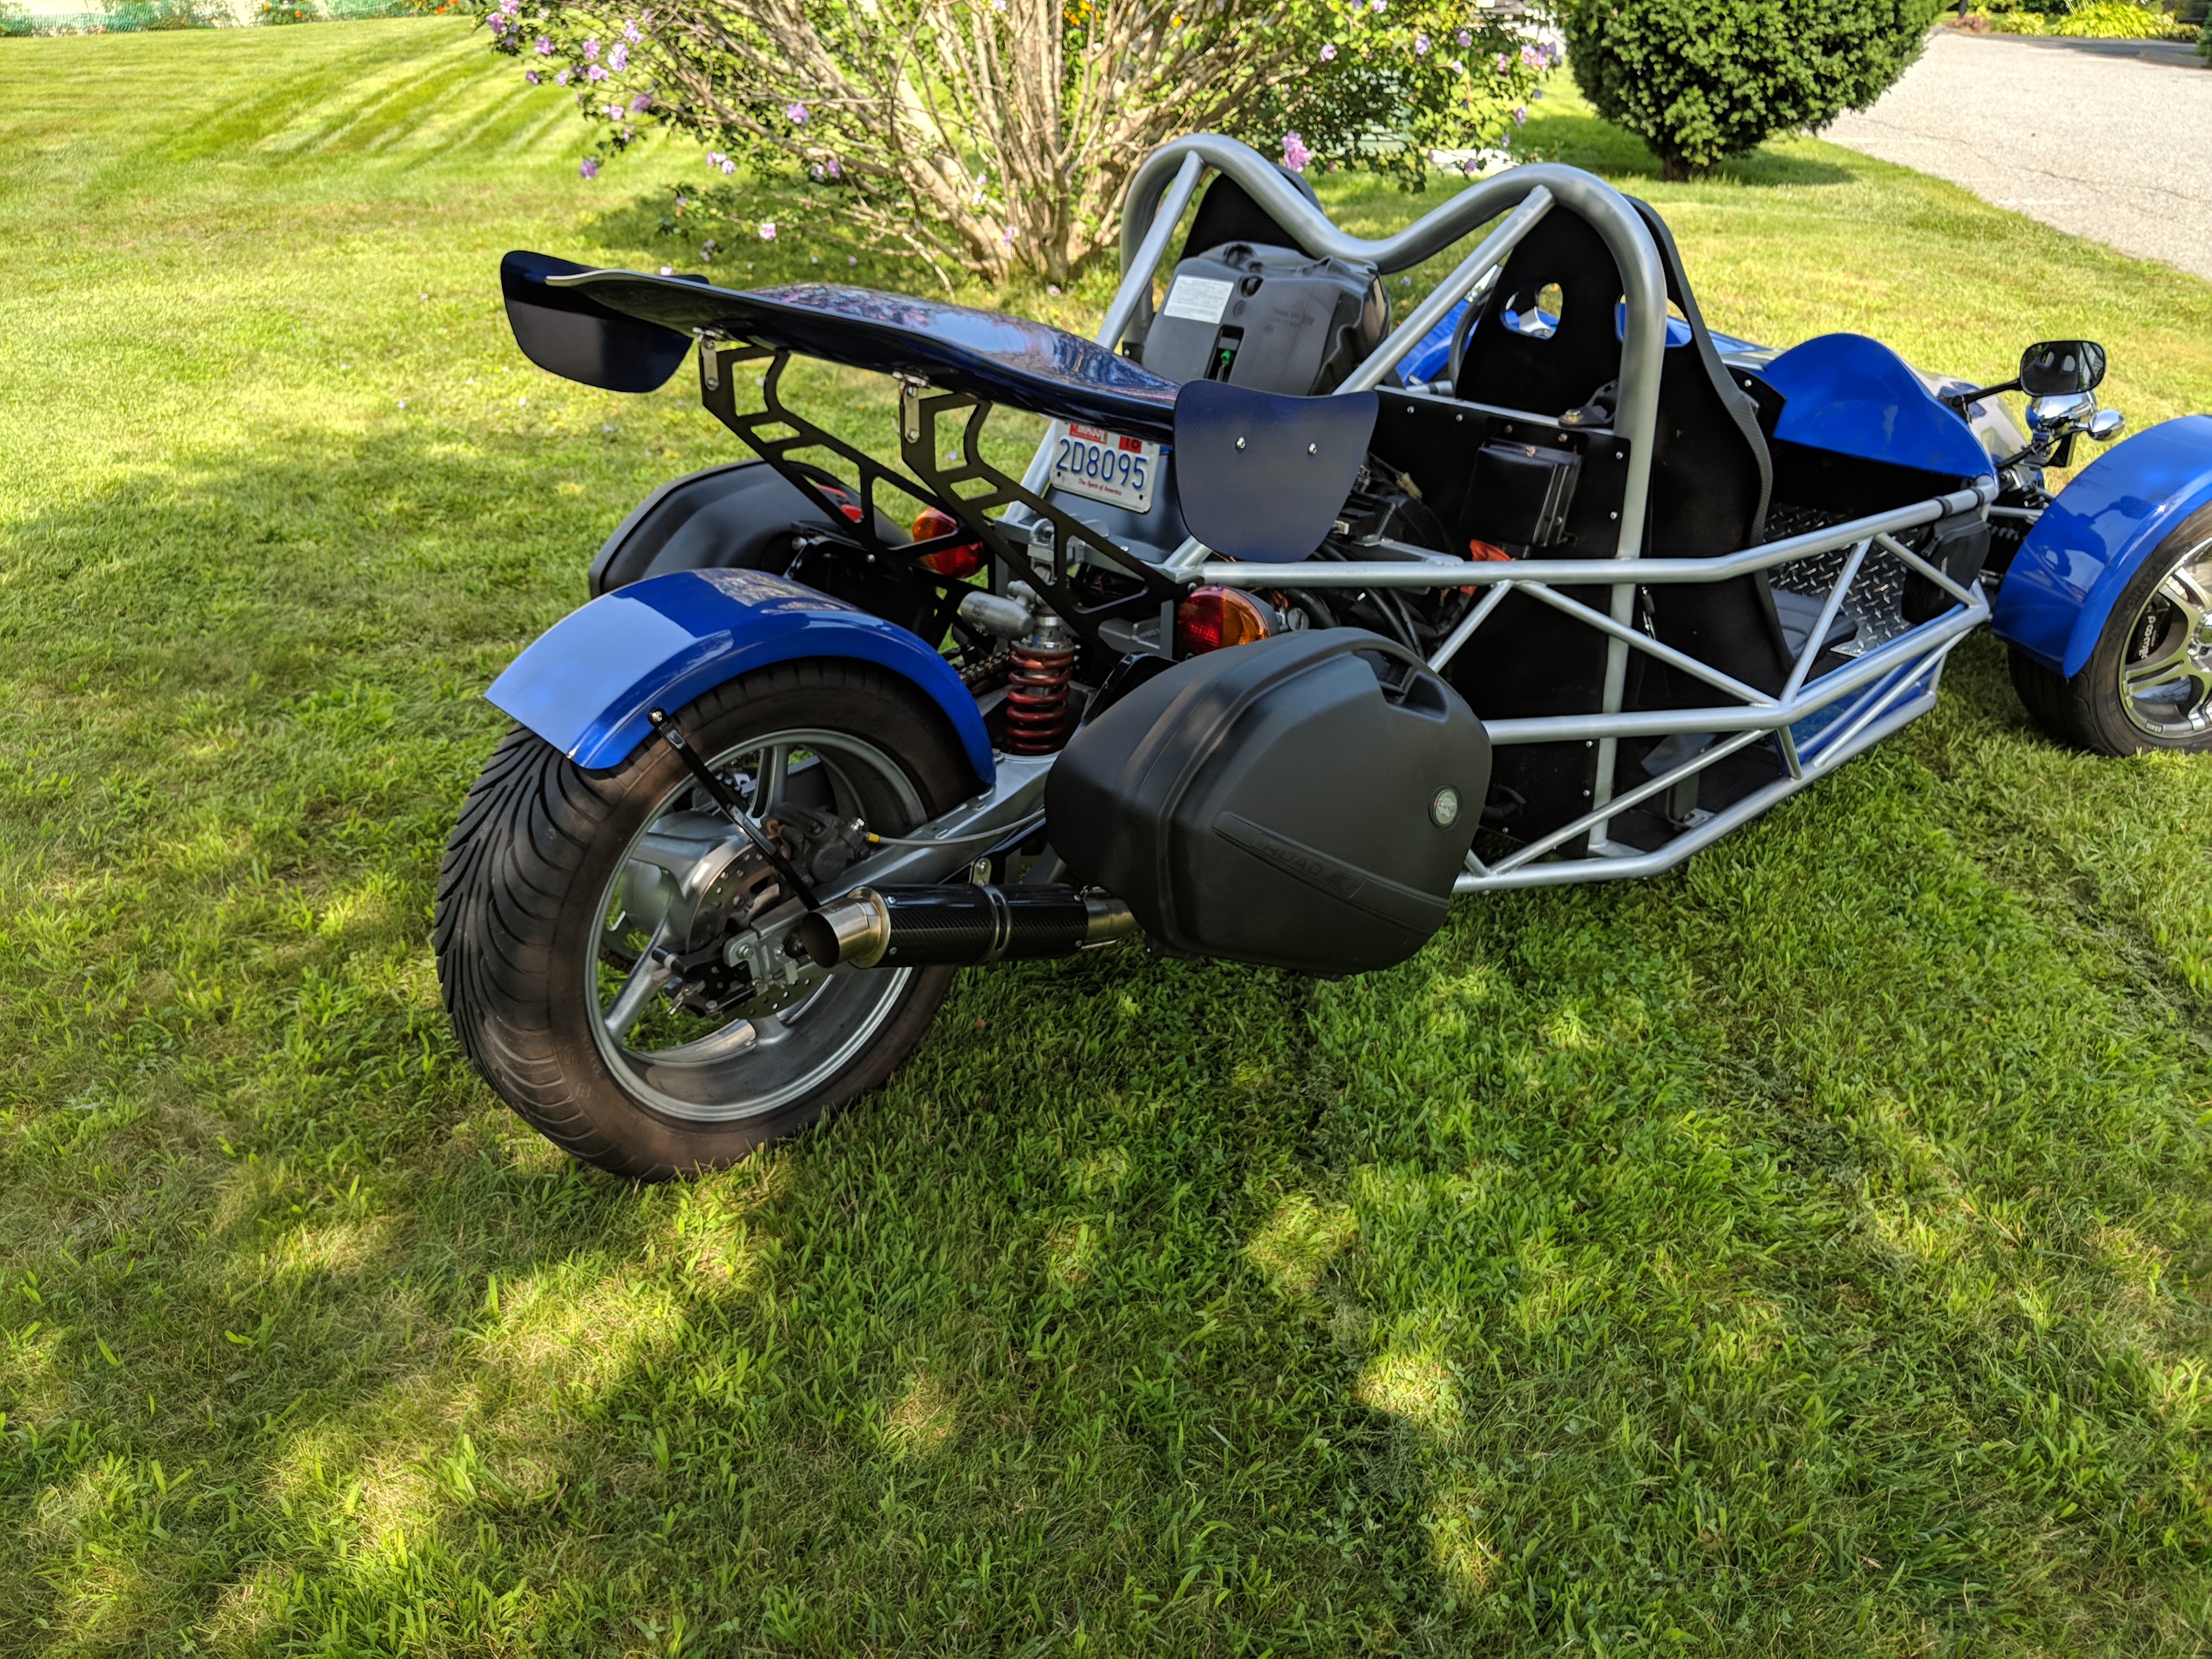

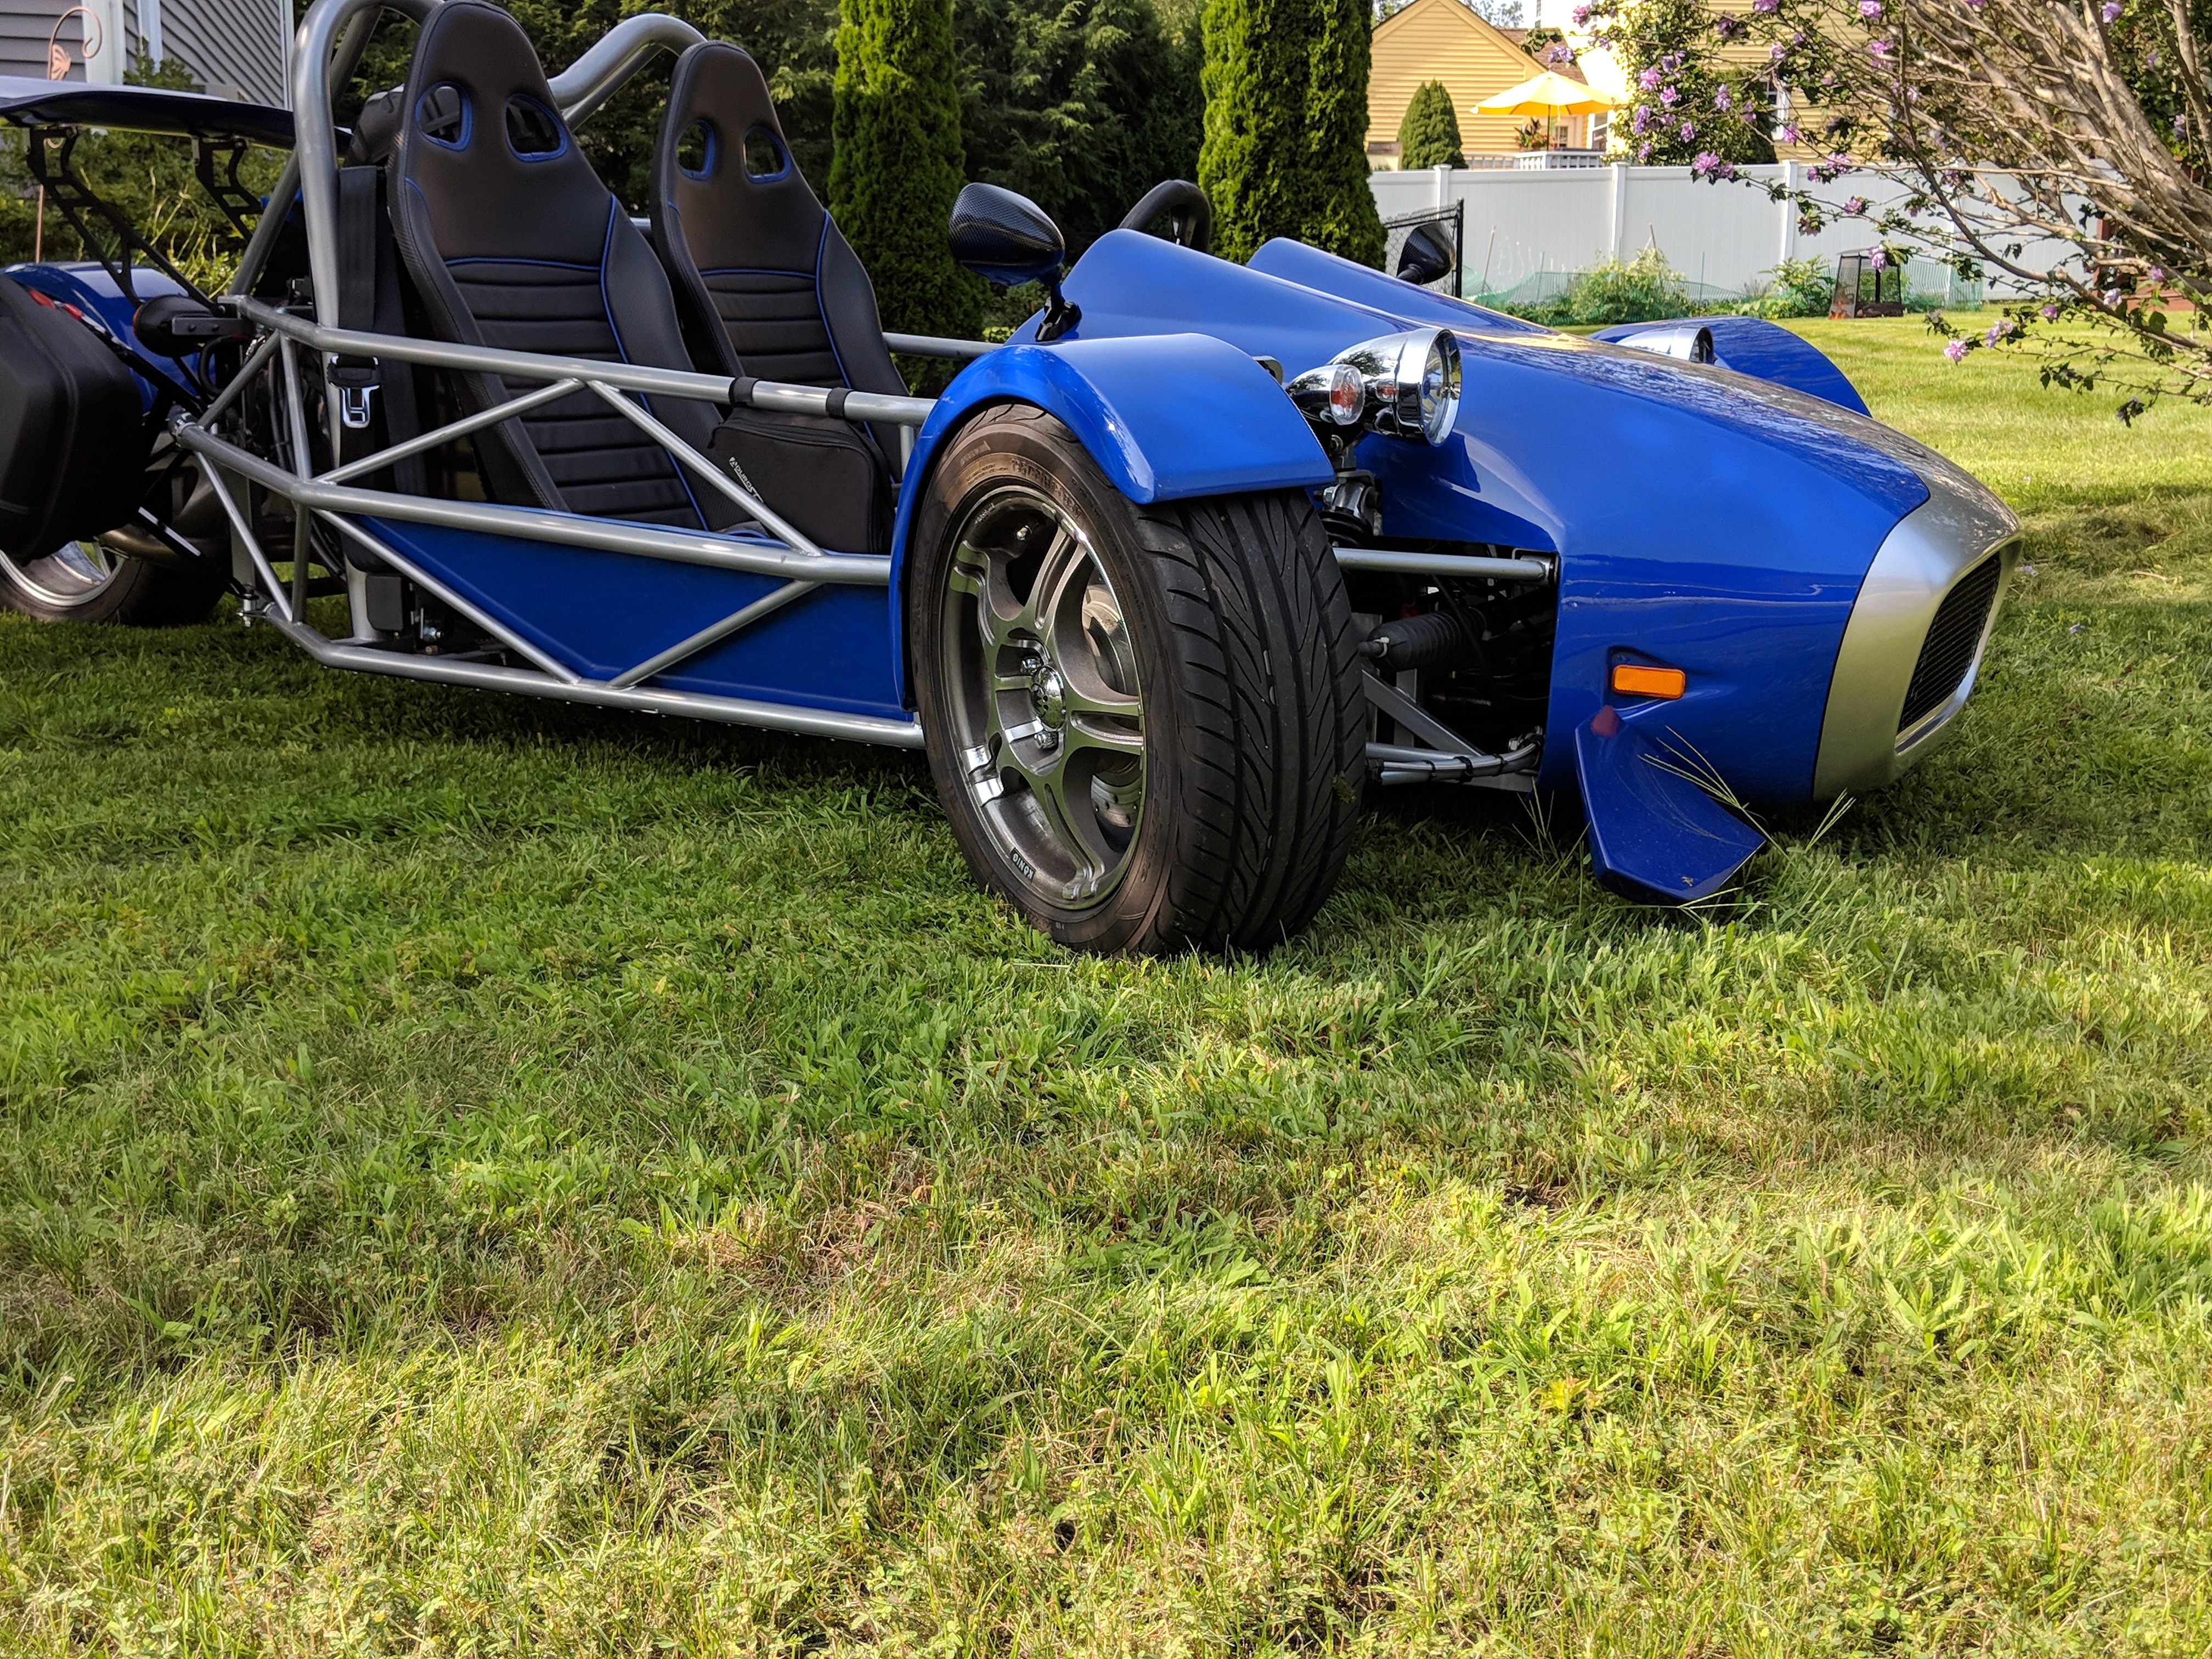
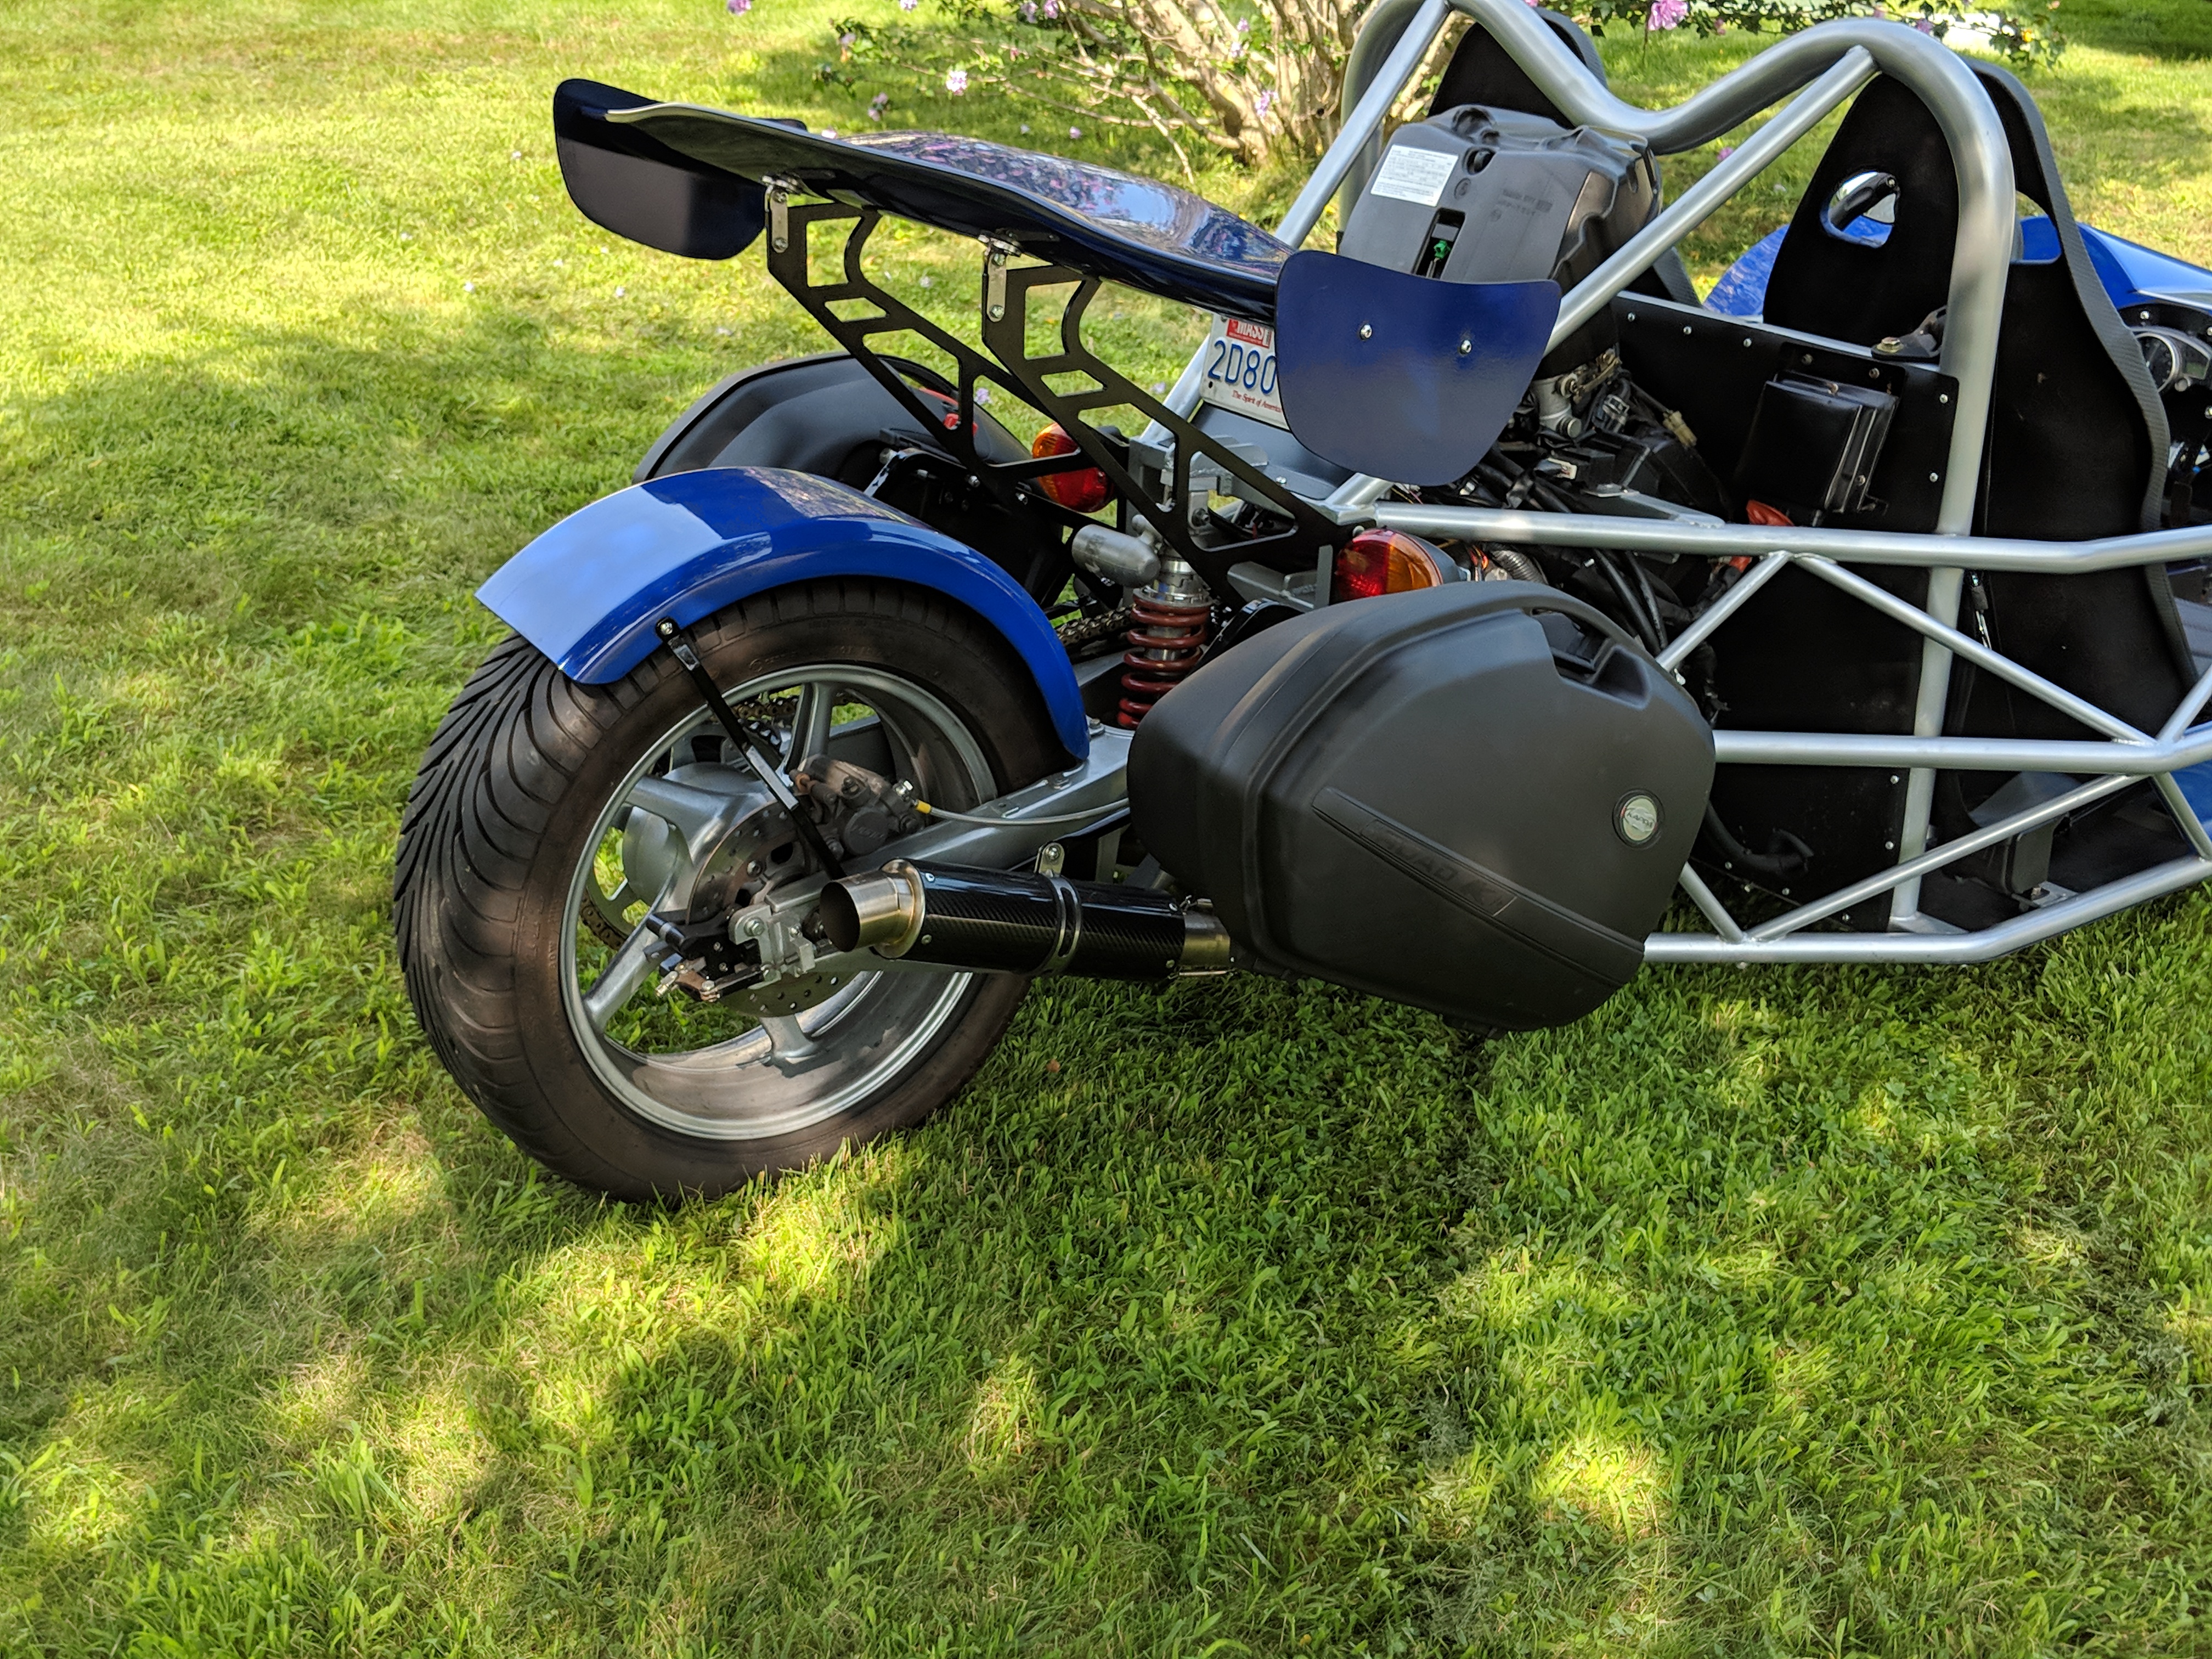

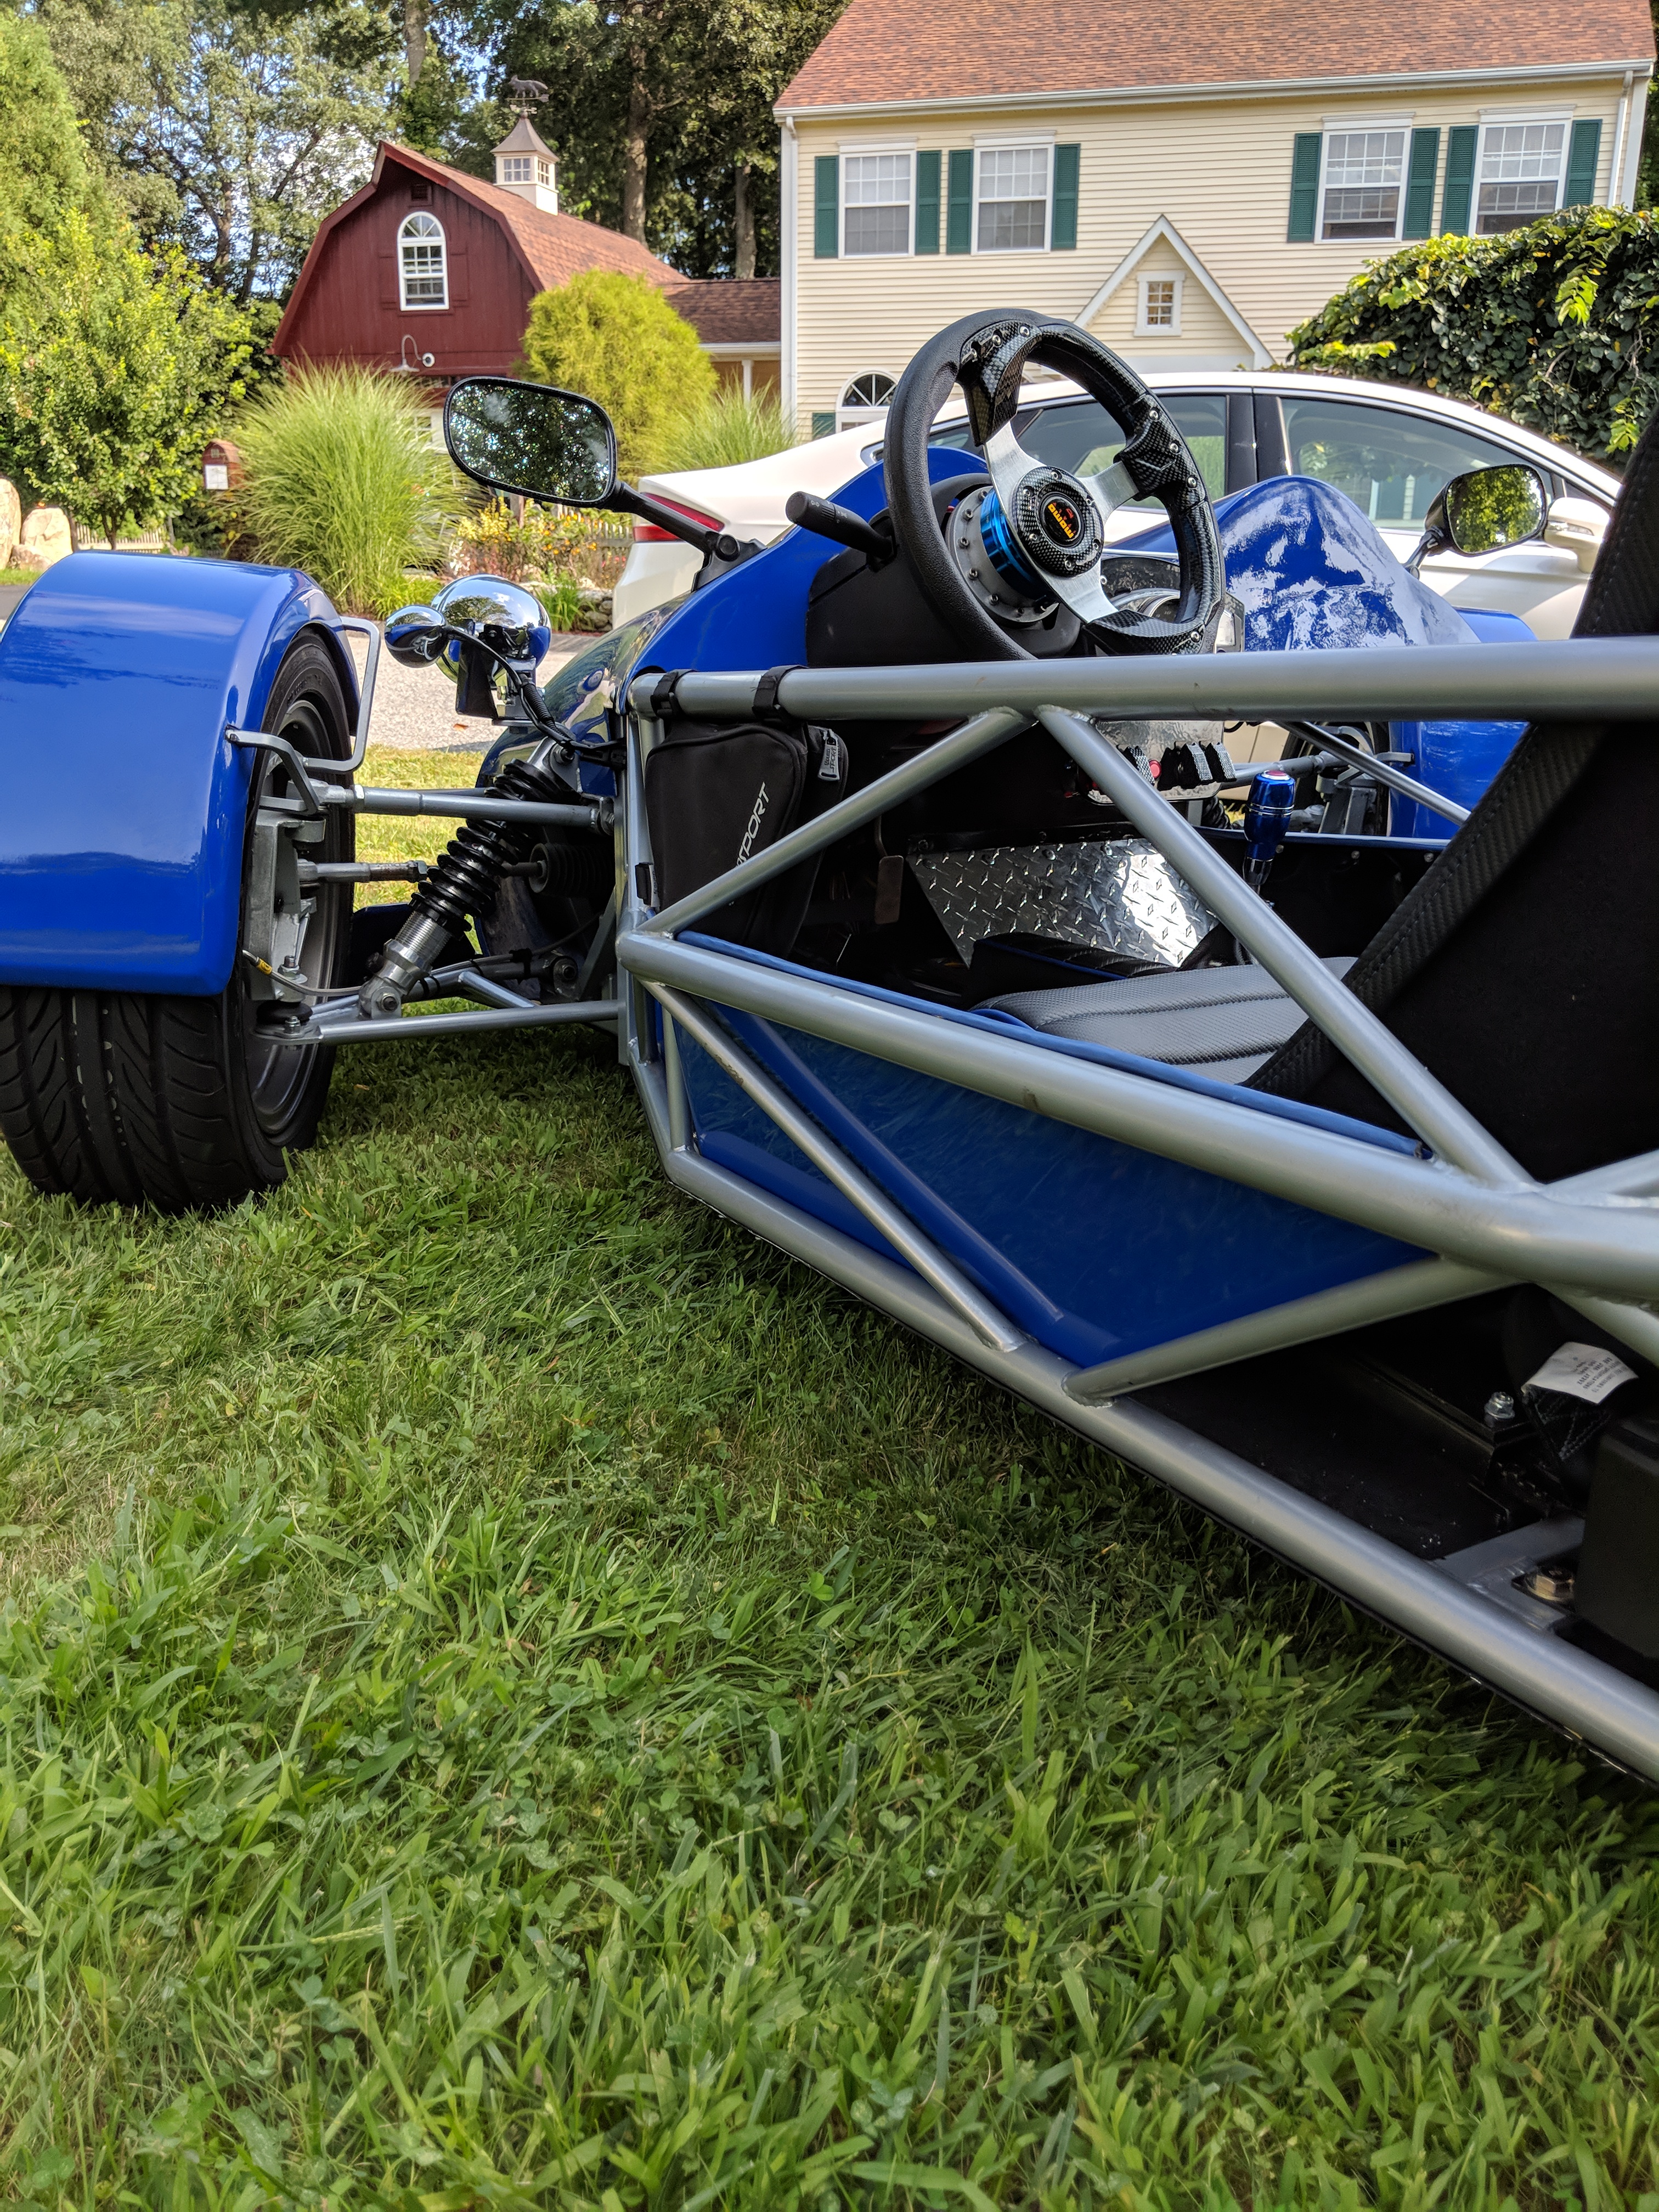

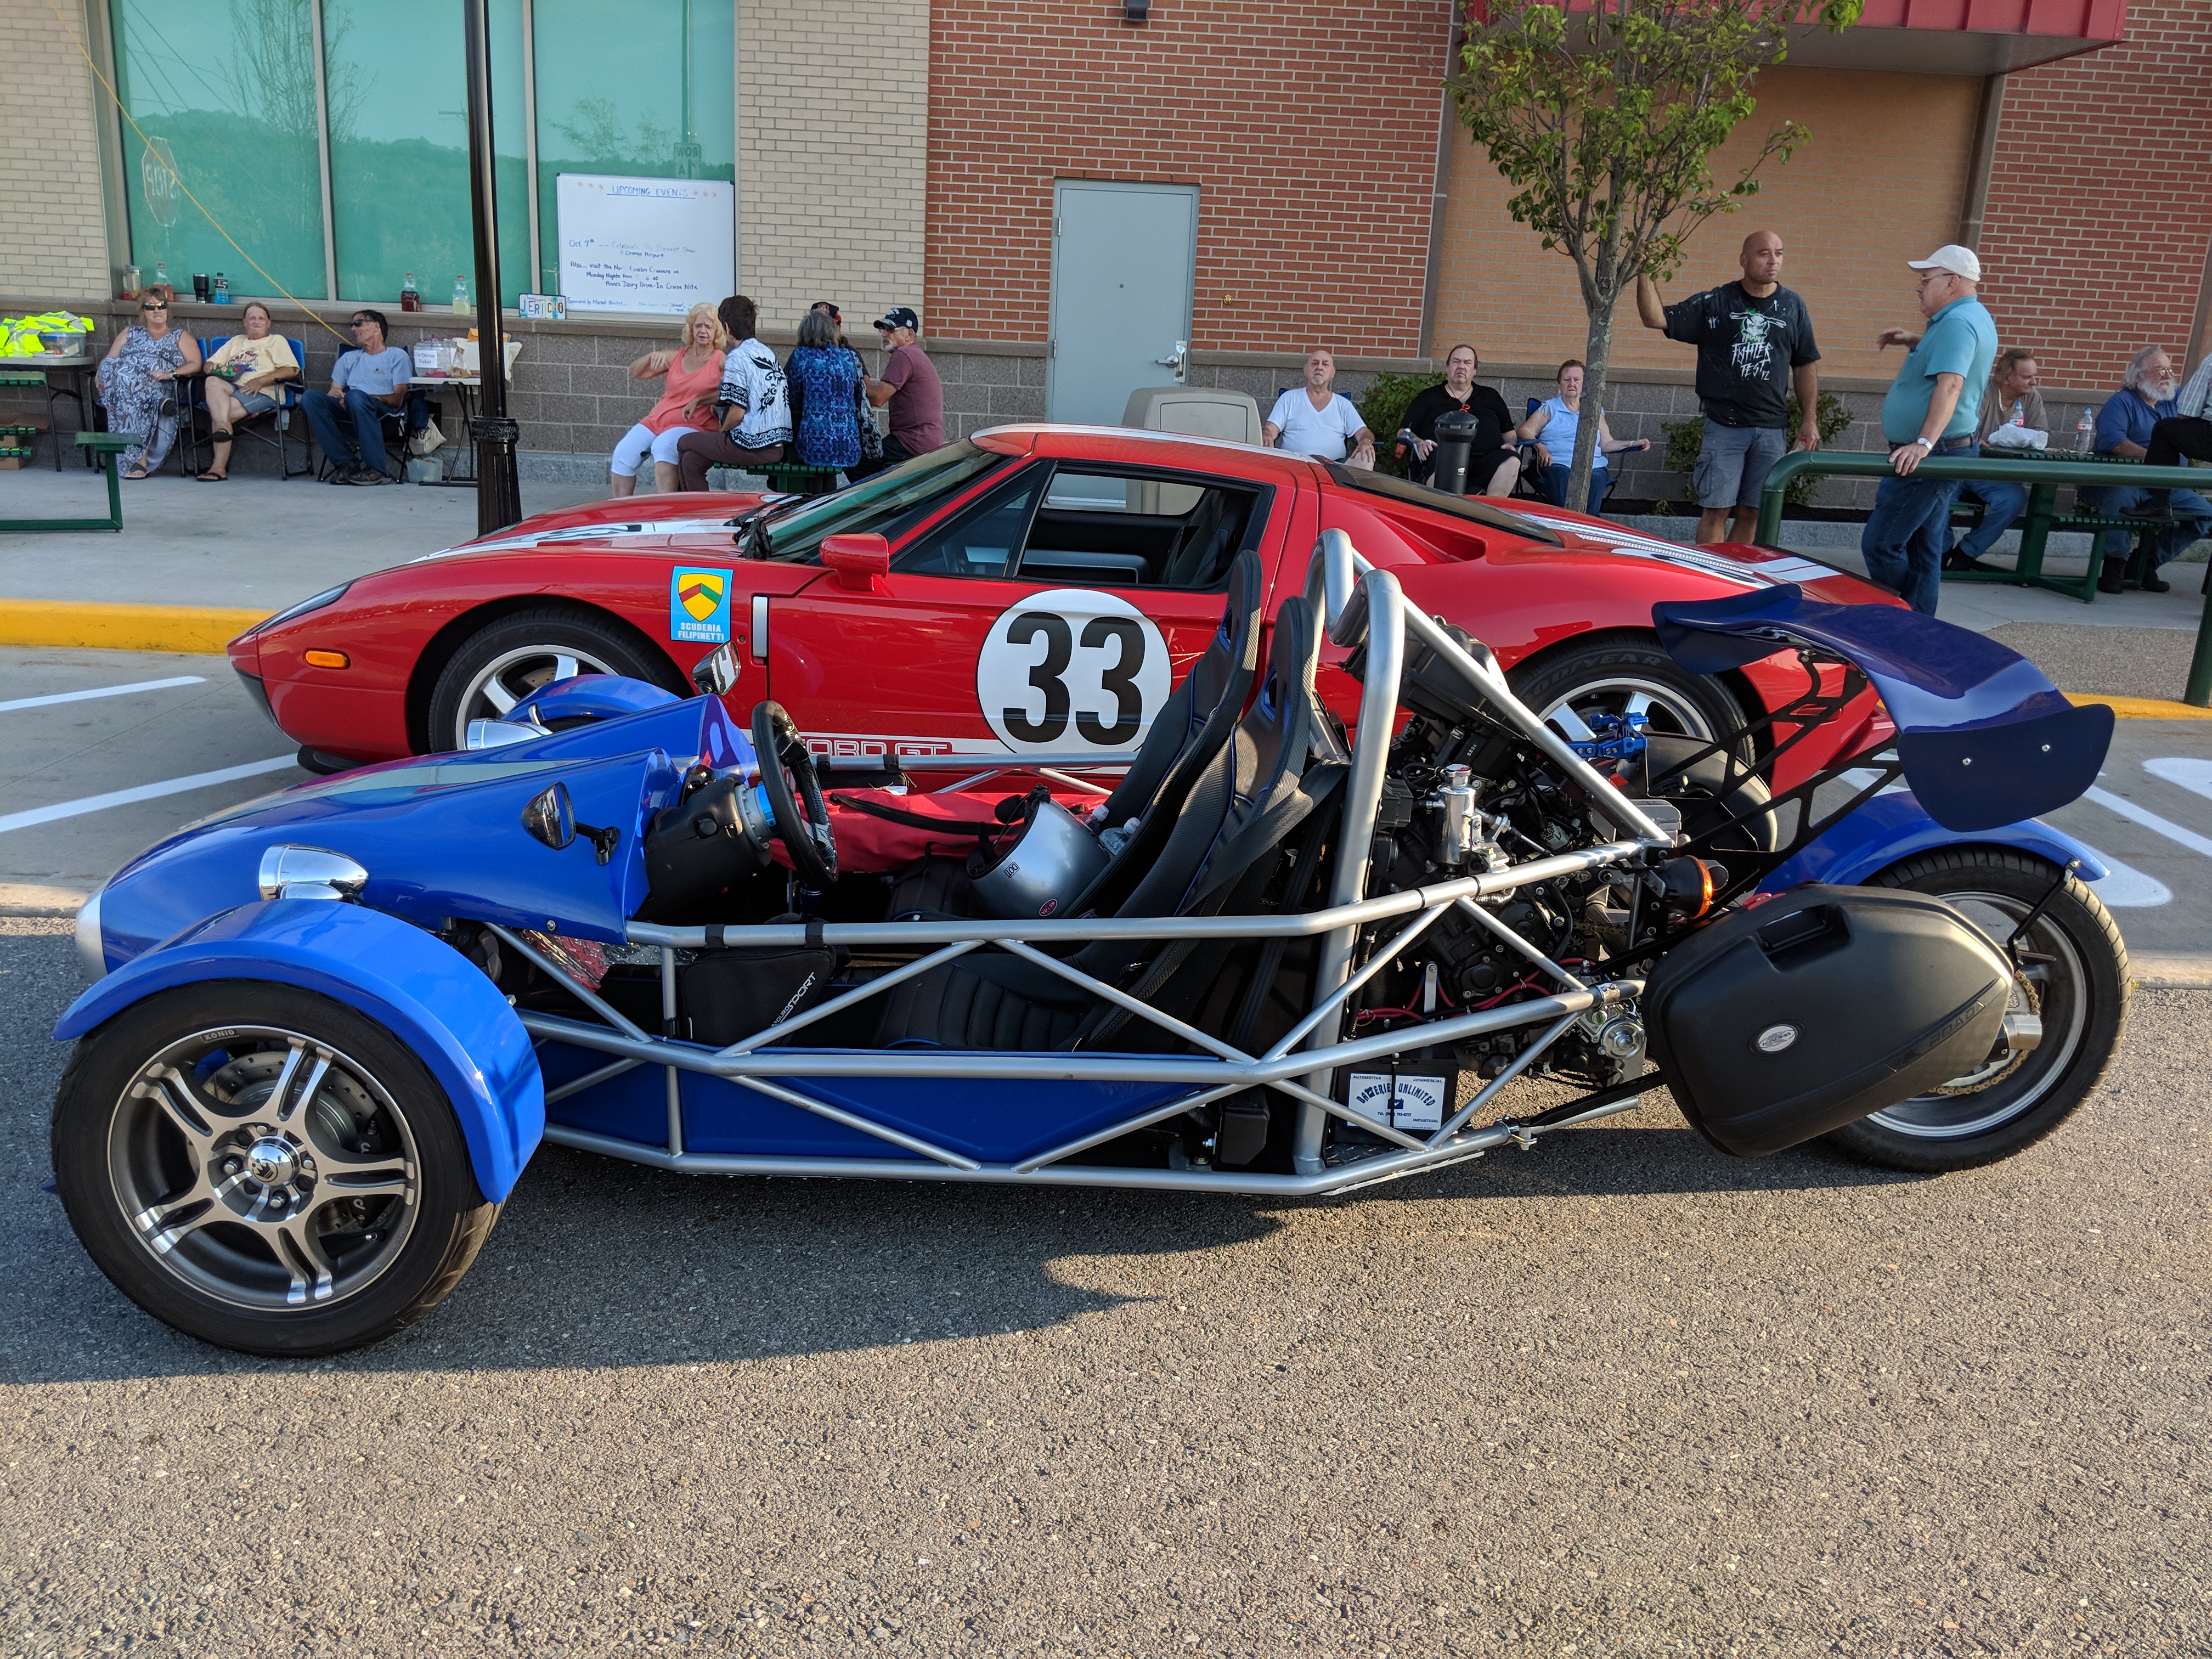
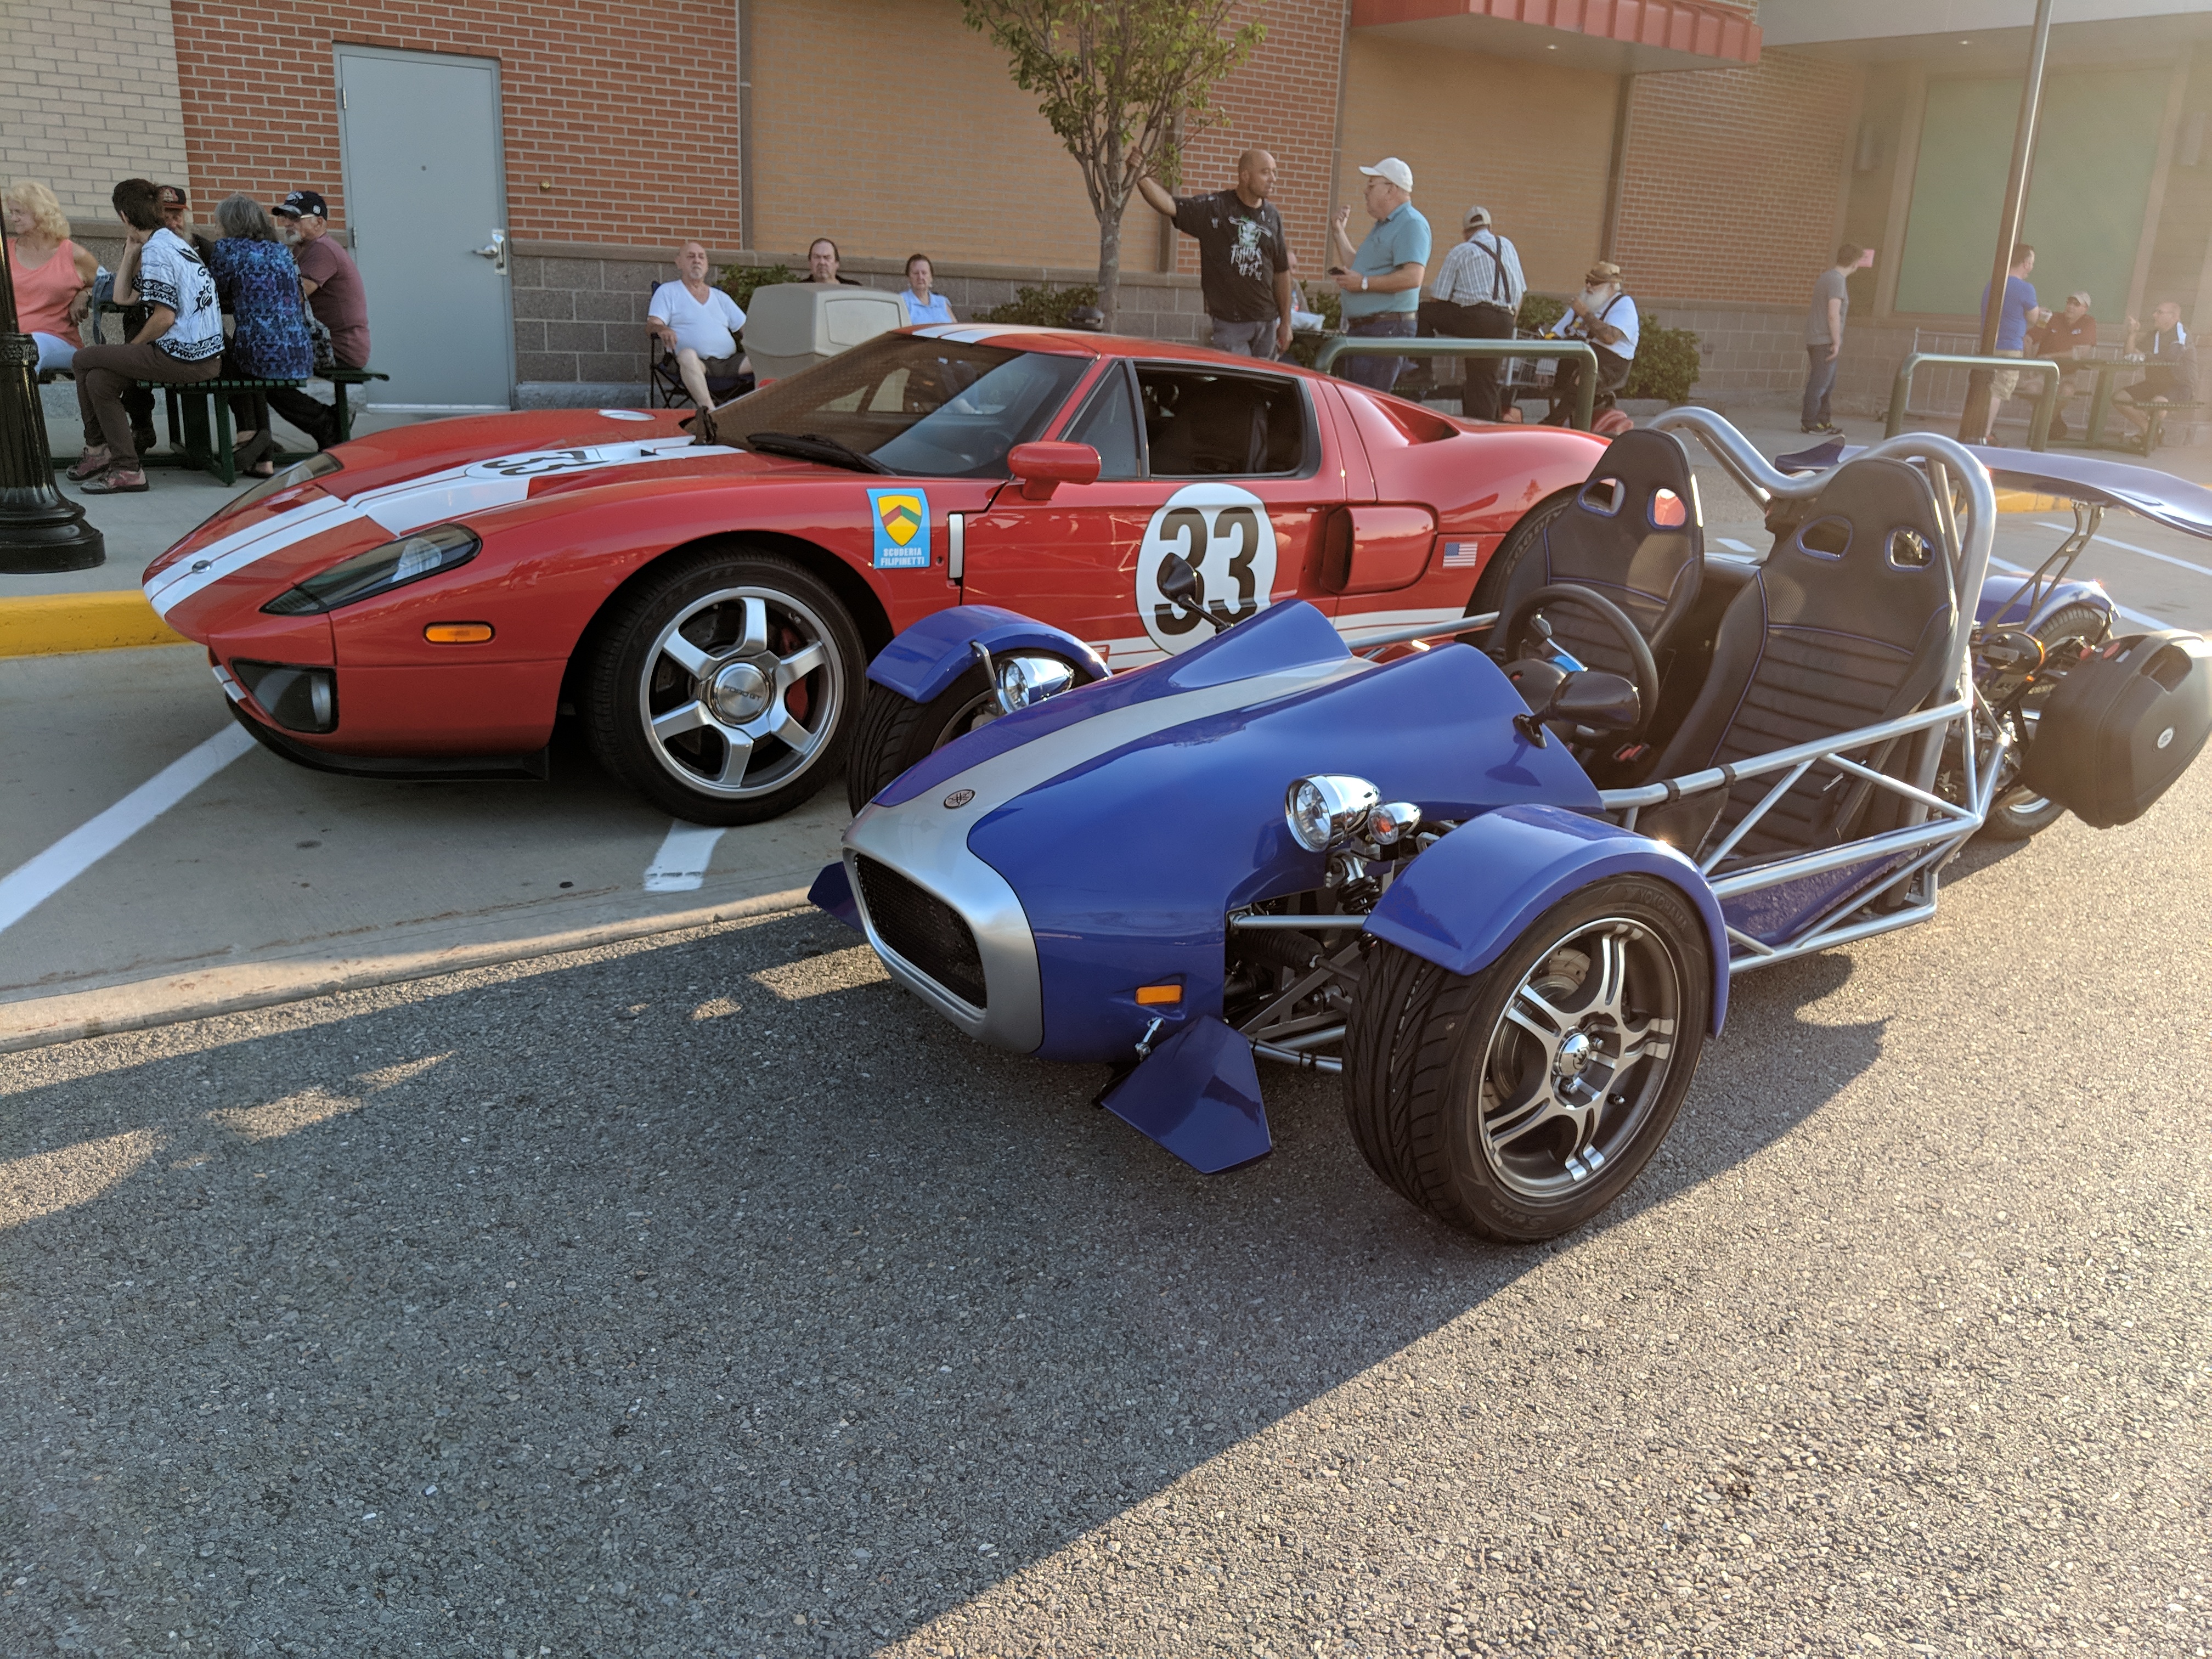
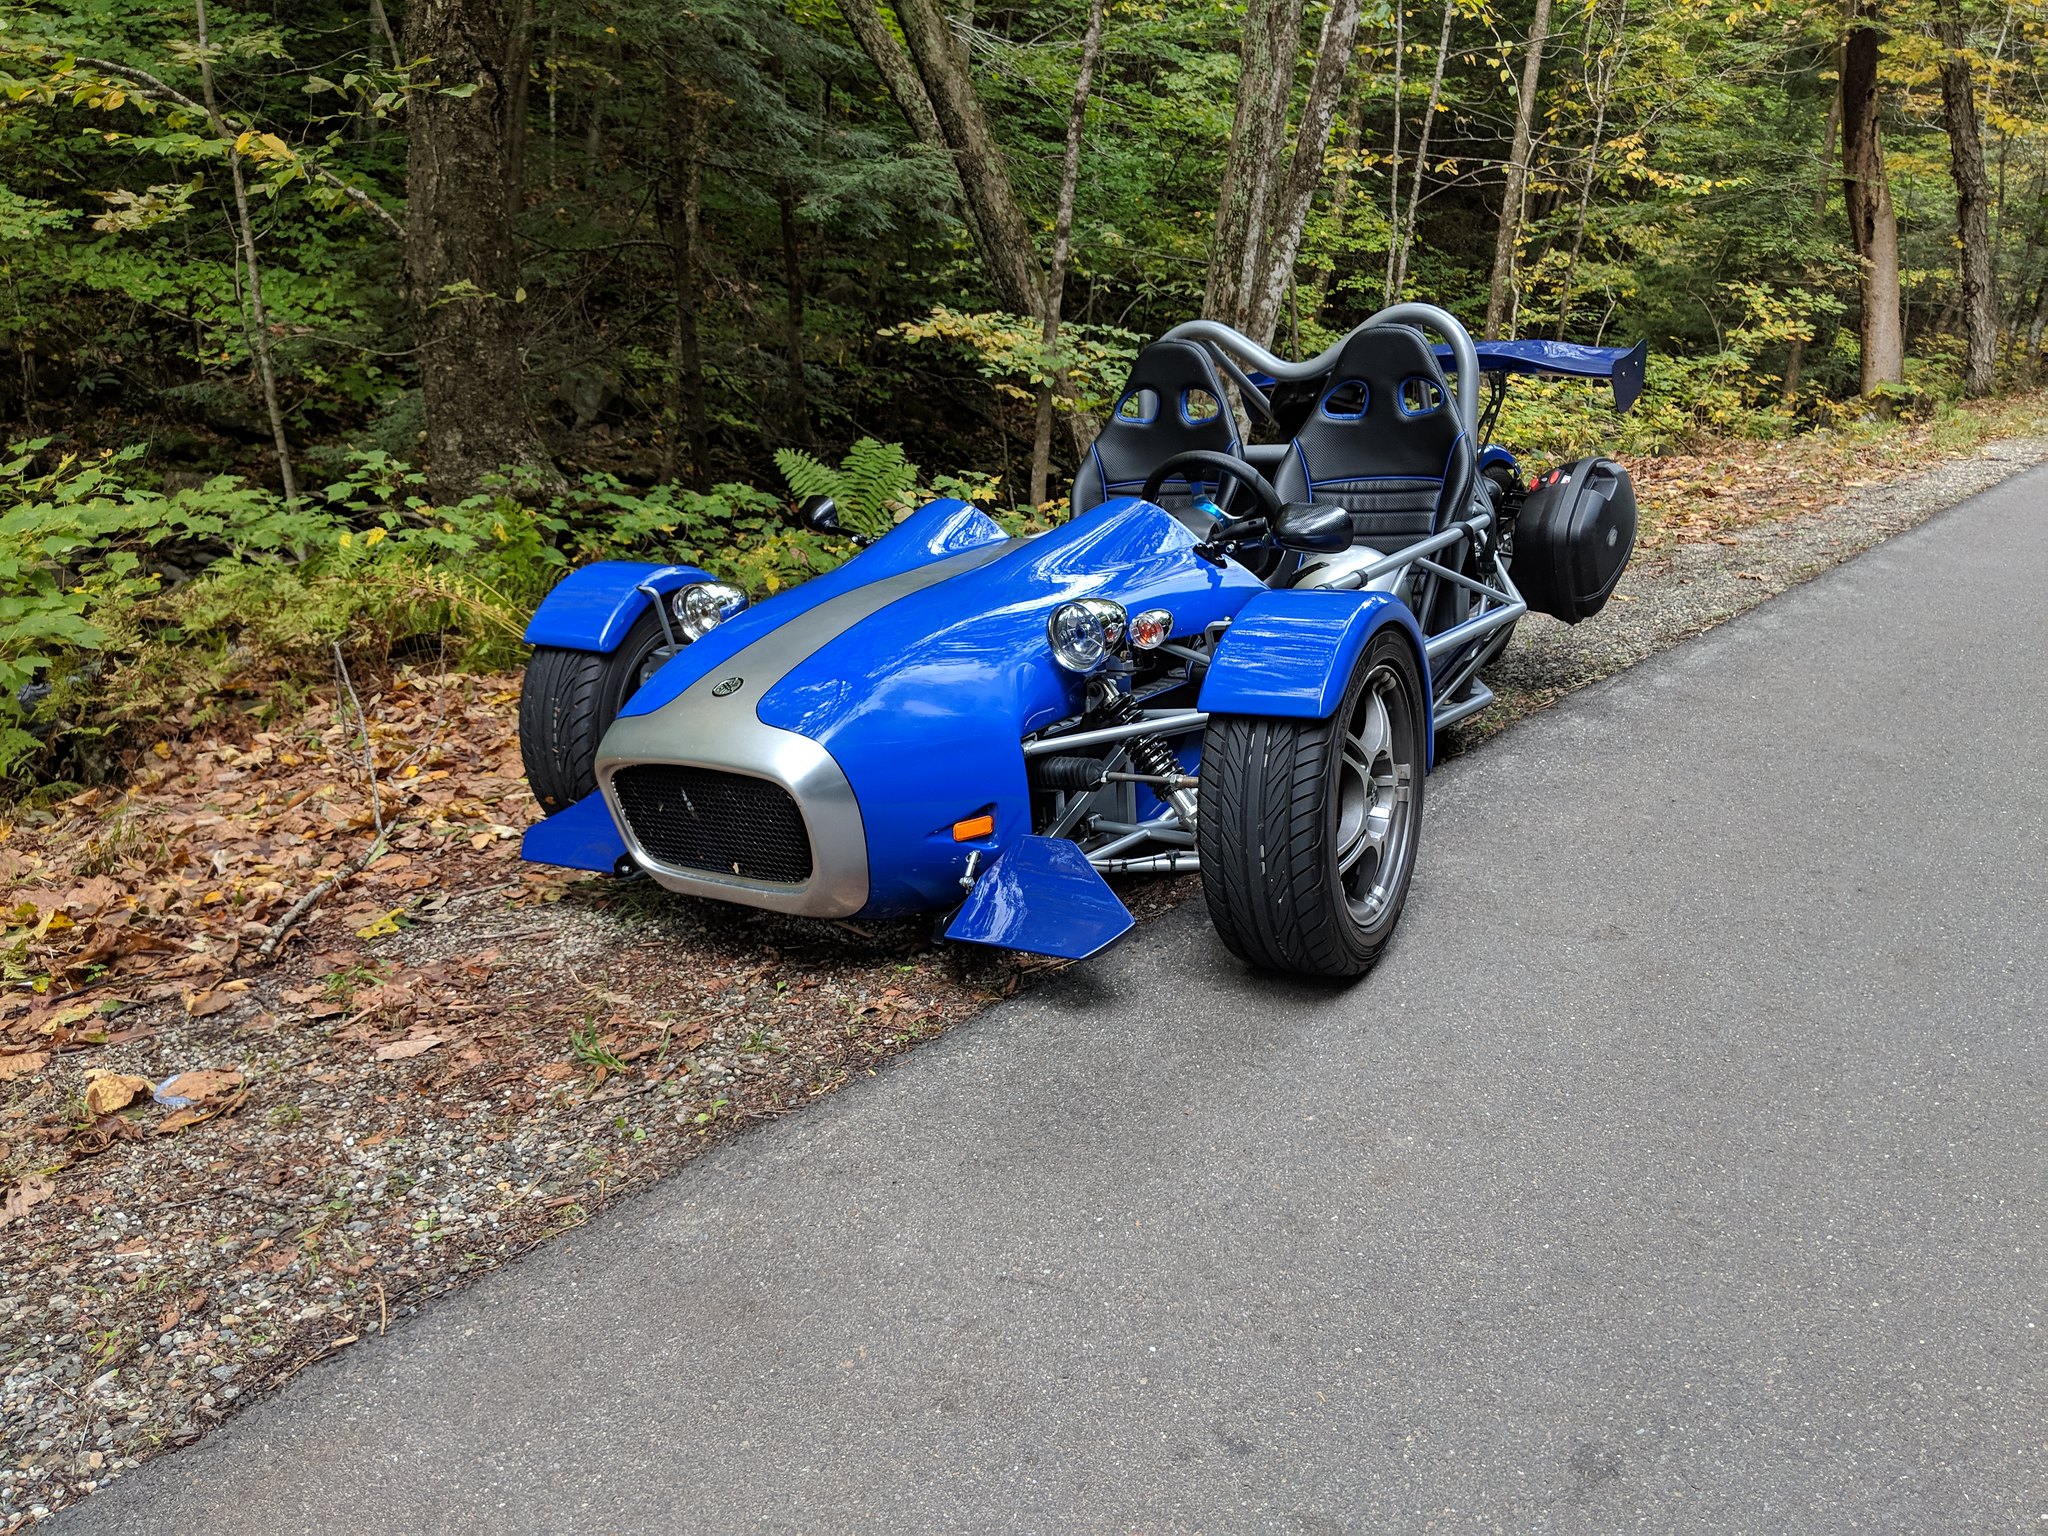

 Making all that noise disappear.